Resource icon

Hard Drive Burn-In Testing - Discussion Thread

Gilley7997

Dabbler
Joined
Feb 23, 2015
Messages
42
After running Badblocks you might want to rerun the long smart tests now that the disks have had a bit of a work-out

Absolutely, that is already in progress actually. Started it before I even took the screenshot for the last post.
 

nickt

Contributor
Joined
Feb 27, 2015
Messages
131
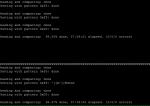
Just to make sure I understand. I had been monitoring the tests as they ran. I saw no errors reported. At the end of the test I would have expected something saying "Passed no errors reported." This is what I got though. Does it truly not give a summary of the test?

I've also just finished my first badblocks run, and was surprised by there being no "congratulations all is well" message at the end. My own conclusion was also that this was good news. A little Googling suggested that the "-v" switch could have been used, which actually provides the congratulations message (and more verbose information on errors if they occur).

Might be good to add the "-v" switch back in the OP.

On another note, I also found that speeds decreased linearly in progression from start to finish on each read / write pass. My (unqualified) conclusion is that spinning disks must use a constant linear distance per bit, and - of course - spin at a constant rotational speed (unlike CDs that spin at a constant velocity past the head, which means the rotational speed changes as required). So thinking through the geometry of this, as the head moves closer to the centre of the disk, it takes longer for each bit to pass by the head, and so the throughput decreases linearly.

The other thing I noticed is that it took more or less time for each of my 6 disks to complete badblocks, which I assume is because the rotational speed of each disk is slightly different. The ones that finished sooner also happened to achieve a higher max speed.

All very interesting - I didn't realise that the rotational speed of spinning disks is not precisely controlled.
 

Bidule0hm

Server Electronics Sorcerer
Joined
Aug 5, 2013
Messages
3,710
Yep, HDDs use the CAV method: http://en.wikipedia.org/wiki/File:Comparison_disk_storage.svg so the throughput decreases when you approach the center of the platters ;)

In fact the WD greens and reds use the IntelliPower thing which sightly changes the RPM of the drive to avoid resonances with other similar drives in the same chassis, so they are precisely controlled but they are just a bit offseted from the nominal value ;)
 

nickt

Contributor
Joined
Feb 27, 2015
Messages
131
Oh - that's cool!
 

The Gecko

Dabbler
Joined
Sep 16, 2013
Messages
18
I've been working on a script to automate this burn-in process. The file is attached. Feedback is welcome. I don't recommend you run this on a production machine.


Built-in Safety Features:
  • The drive must exist
  • The drive must not be in use (according to gpart)
  • Will not start a second, simultaneous scan on the same drive
Logging Features:
  • All log files begin with the string "<DRIVE_MODEL>_<SERIAL_NUMBER>_<DATE>"
  • SMART details are saved to disk before and after the testing process
  • Log files generated to "at a glance" let you know which disks are in progress and which are completed.
Convenience Features:
  • Extensive automatic use of tmux results in "Fire and Forget" usability
  • Enables and disables RAW Disk I/O as needed, being aware of other concurrent tests (works, kind-of, still in beta)
  • tmux sessions named after drive name (da1, ada14, etc) so you know which drives are being tested
  • Running the script against a new drive will list all active tmux sessions (equivalent of running 'tmux ls')
Steps:
  1. Switch to bash
  2. Set save path
  3. Verify disk exists
  4. Get drive model number & serial number
  5. Verify disk not already in use (gpart)
  6. Verify disk not already under test
  7. Spawn tmux session. Name tmux session after disk device designation (ie. "da0")
  8. Create"In-Progress" status file
  9. Forcibly cancel previous SMART test
  10. Save SMART details to disk
  11. Start SMART short test. Write time stamp of completion to log file. Sleep until complete.
  12. Start SMART conveyance test. Write time stamp of completion to log file. Sleep until complete.
  13. Start SMART long test. Write time stamp of completion to log file. Sleep until complete.
  14. Enable RAW Disk I/O using sysctl
  15. Run destructive badblocks test (default settings)
  16. Start SMART long test. Write time stamp of completion to log file. Sleep until complete.
  17. Save SMART details to disk
  18. Remove "In-Progress" Status File
  19. Create "Completed" Status File
  20. If no other "In-Progress" files exist, then reset the RAW Disk IO flag to zero and remove the RAW Disk IO Flag file
  21. Done
How to run it:
  1. Give the server a drive to hold files. I mounted a USB drive and set it up as a standard volume with this path: /mnt/SystemDataset
  2. Put the script in /mnt/SystemDataset
  3. Open the script and edit the variable 'Save_Path' to fit your environment
  4. Set the script to be executable
  5. Run it like this:
    1. ./drive_burn_in.sh <drive_name>
    2. ./drive_burn_in.sh da1
During the writing of this post, I have 12 drives simultaneously running this very script on a non-production server.
 

Attachments

  • drive_burn_in.txt
    6.4 KB · Views: 650

radian23

Dabbler
Joined
Jan 29, 2015
Messages
34
Sorry for being a noob but do I run these command in SSH or in the webgui shell? If in SSH I can't seem to login as root and if I login as another user I get could not chdir to home directory /nonexistent: no such file or directory. Do I need to create a volume before running these tests?
 

The Gecko

Dabbler
Joined
Sep 16, 2013
Messages
18
I always run it as root via SSH. Yes, you need to create a volume, but not on the drives you intend to test.
 

radian23

Dabbler
Joined
Jan 29, 2015
Messages
34
Somethings I learned. To login to SSH by root you must enable this in freenas. Enable it in Services->SSH Settings

Because my drive is over 4Gb I had to use the following command:
badblocks -b 4096 -ws /dev/adaX

The -b flag changes the block size.

This process for my 5TB Red Drives took an average of 82 hours. Glad I was able to run these drives through the test simultaneously.
 
Last edited:

FreeJNAS

Cadet
Joined
Feb 21, 2015
Messages
3
I've been running badblocks on a pair of identical new drives, started within seconds of each other. Somehow, the one fell out of sync with the other between the second and fourth passes and now I have drive A virtually done after around 60 hours of testing (0 errors) while the other is still only at around 70%. Should I be worried?
 

Attachments

  • Untitled.png
    Untitled.png
    13 KB · Views: 486

Ericloewe

Server Wrangler
Moderator
Joined
Feb 15, 2014
Messages
20,194
Not really. That's fairly typical. The long test time tends to highlight performance differences.
 

andrewjs18

Contributor
Joined
Oct 19, 2014
Messages
141
when I run the conveyance test, I get the following error..not sure if this is an issue or not:

Code:
sudo smartctl -t conveyance /dev/ada0
smartctl 6.3 2014-07-26 r3976 [FreeBSD 9.3-RELEASE-p8 amd64] (local build)
Copyright (C) 2002-14, Bruce Allen, Christian Franke, www.smartmontools.org

=== START OF OFFLINE IMMEDIATE AND SELF-TEST SECTION ===
Conveyance Self-test functions not supported

Sending command: "Execute SMART Conveyance self-test routine immediately in off-line mode".
Command "Execute SMART Conveyance self-test routine immediately in off-line mode" failed: Input/output error
 

qwertymodo

Contributor
Joined
Apr 7, 2014
Messages
144
Some drives don't support conveyance tests. Run the long test and check the results when it finishes. If the long test comes back good then you're fine.
 

andrewjs18

Contributor
Joined
Oct 19, 2014
Messages
141
Some drives don't support conveyance tests. Run the long test and check the results when it finishes. If the long test comes back good then you're fine.

thanks. running the long test now...looks like about 9 hours for each disk.
 

andrewjs18

Contributor
Joined
Oct 19, 2014
Messages
141
Yeah, it'll be awhile. badblocks, even longer.

correct me if I'm wrong, but users should run the long smartctl tests using tmux, yes? AFAIK, as soon as you close the ssh session, it'll kill the smartctl tests. for me, having 4TB HDDs, it's going to take over 9 hours to complete. to run tmux is simple:

tmux new -s sessionname

to attach to it, you'd run:

tmux attach -t sessionname
 

qwertymodo

Contributor
Joined
Apr 7, 2014
Messages
144
No, smartctl is asynchronous, so you can just run one after another in a single shell, then you have to come back and run smartctl -a after the tests finish.
 

andrewjs18

Contributor
Joined
Oct 19, 2014
Messages
141
No, smartctl is asynchronous, so you can just run one after another in a single shell, then you have to come back and run smartctl -a after the tests finish.

right, but what happens if you close the ssh session before smartctl -t long finishes?
 
Top