Got it figured
Ok i finally found this in the documentation and it worked perfect for me. My freeNAS is no longer degraded and the drive is back in the array like it should be!
I followed this.... for any others that may need it
I have a bad drive, how do I check the serial number so I can make sure I remove the correct disk?
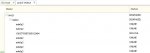
A. You can do this in Storage -> View All Volumes. For the volume with the bad drive, click the View Disks icon with the little magnifying glass, as seen in Figure 10.8c. The serial number is listed next to the device name of each disk. You may need to expand the column by dragging your mouse to see the entire serial number.
Figure 10.8c: Finding a Disk's Serial Number
SerialNumbers.jpg
How do I replace a bad drive?
IS THIS FAQ STILL VALID OR IS IT SUPERCEDED BY Volumes#Replacing_a_Failed_Drive?
A. It is recommended that you first upgrade to either the latest version of 8.0.2 to make sure that your system is not affected by previously known bugs. You will also need access to the FreeNAS™ system to replace the hard drive and to run some commands from the FreeNAS™ console.
If you are replacing a disk that is a member of a RAIDZ1 or RAIDZ2:
1. Determine the device name and serial number of the disk that needs to be replaced as described in FAQ 8.
2. Shut down the system, pull out the failed drive, and replace it with a new disk of the same size or larger into the same port.
3. Power-on the system. At this point the RAIDZ will be in a DEGRADED state and the disk will be listed as Unavailable.
4. From the command line type zpool replace tank ada7 where tank represents the pool name and ada7 represents the device name.
5. The pool will begin re-silvering. This can take a long time (many hours); be patient and let it finish. You can check the status of the resilvering with zpool status -v. Once the resilvering finishes, zpool status -v will still say DEGRADED.
6. Type the command zpool detach tank /dev/ada7/old, replacing tank and ada7 with your pool name and device name. Check the status again and the DEGRADED and /dev/ada7/old should be gone and the pool state should be ONLINE.
7. Type the command zpool export tank. This will prepare the specified pool for an auto-import of the disk.
8. From the GUI go to: Storage -> Volumes -> Auto Import. Your disk should now show in the drop-down menu.
9. Should the disk not appear in the drop-down menu, make sure that you are running the latest version of FreeNAS™ and upgrade if you are not. If you are running the latest FreeNAS™, try backing up your configuration from System -> Settings -> Config -> Save Config. Then, reset the configuration to the factory defaults using the Factory Restore button, and try the auto-import again. Once your disk is imported, you can return to your saved configuration using the Upload Config button.