12. Plugins
FreeNAS® 8.2.0 introduced the ability to extend the built-in NAS services by providing a mechanism for installing additional software. This mechanism was known as the Plugins architecture and is based on FreeBSD jails and PC-BSD 9.x PBIs. This allowed users to install and configure additional applications once they had created and configured a plugins jail.
FreeNAS® 9.x simplifies this procedure by providing two methods for software installation. The Plugins method, described in this section, is meant for users who prefer to browse for, install, and configure available software using the GUI. This method is very easy to use, but is limited in the amount of software that is available. Each application will automatically be installed into its own jail, meaning that this method may not be suitable for users who wish to run multiple applications within the same jail.
The Jails method provides much more control over software installation but assumes that the user is comfortable working from the command line can and has a good understanding of networking basics and software installation on FreeBSD-based systems.
It is recommended that users skim through both the Plugins and Jails sections in order to become familiar with the features and limitations of each and to choose the method that best meets their software needs.
Note
Due to ABI (application binary interface) changes, FreeNAS® 8.x Plugins cannot be installed on a 9.x system.
12.1. Installing Plugins
A plugin is a self-contained application installer which has been designed to integrate into the FreeNAS® GUI. A plugin offers several advantages:
- the FreeNAS® GUI provides a browser for viewing the list of available plugins
- the FreeNAS® GUI provides buttons for installing, starting, managing, and deleting plugins
- if the plugin has configuration options, a screen will be added to the FreeNAS® GUI so that these options can be configured from the GUI
To install a plugin, click Plugins. As seen in Figure 12.1.1, the list of available plugins will be displayed.
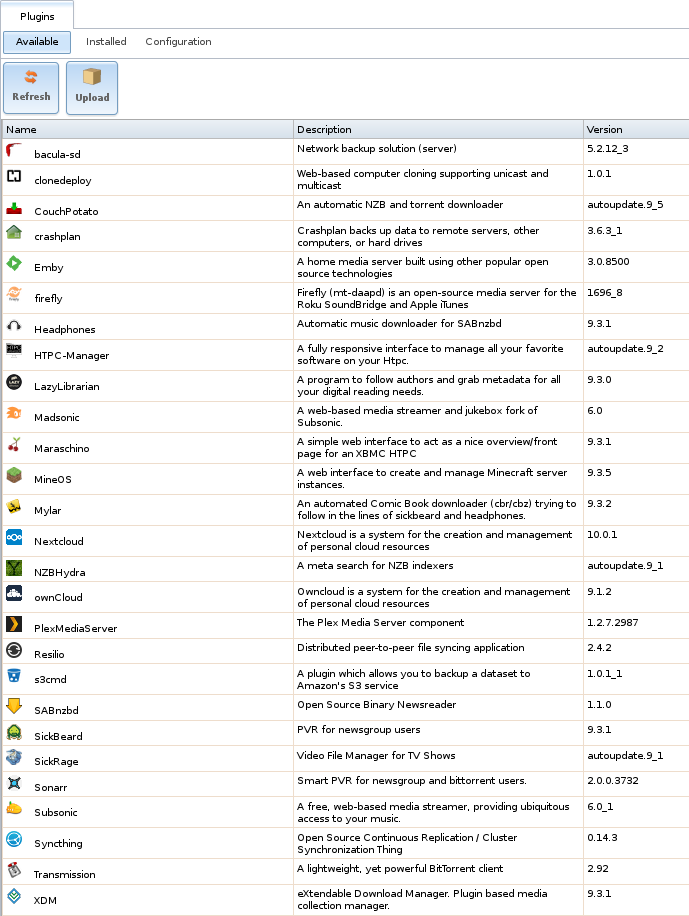
Fig. 12.1.1 Viewing the List of Available Plugins
Note
if the list of available plugins is not displayed, open
Shell and verify that the FreeNAS® system can ping
an address on the Internet. If it cannot, you may have to add a
default gateway address and/or DNS server address in
Network → Global Configuration.
Highlight the plugin you would like to install, click its Install button, then click OK. In the example shown in Figure 12.1.2, SABnzbd is selected for installation.
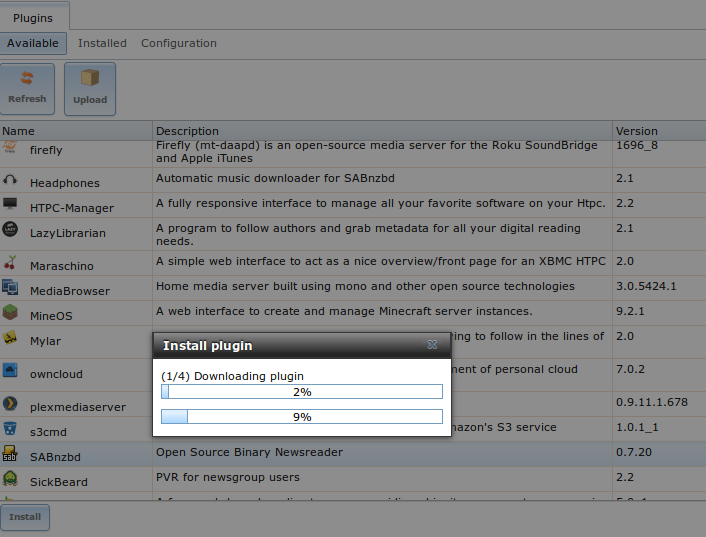
Fig. 12.1.2 Installing a Plugin
The installation will take a few minutes as the system will first download and configure a jail to contain the installed software. It will then install the plugin and add it to the Installed tab as shown in Figure 12.1.3.
Warning
Be patient and wait for the installation to finish. Navigating away from the installation before it is finished will cause problems with the installation.
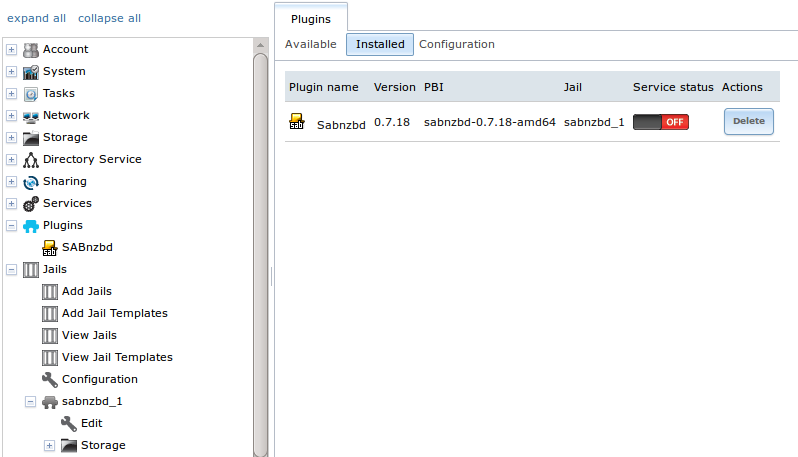
Fig. 12.1.3 Viewing Installed PBIs
As seen in the example shown in Figure 12.1.3, entries for the installed PBI will appear in the following locations:
- the Installed tab of Plugins
- the Plugins section of the tree
- the Jails section of the tree
The entry in the Installed tab of Plugins will display the plugin name and version, the name of the PBI that was installed, the name of the jail that was created, whether the application status is ON or OFF, and a button to delete the application and its associated jail. If a newer version of the application is available as a plugin, a button to update the application will also appear.
Note
The Service status of a plugin must be turned to ON before the installed application is available. Before starting the service, check to see if it has a configuration menu by clicking its entry in the Plugins section of the tree. If the application is configurable, this will open a screen that contains the available configuration options. Plugins which are not configurable will instead display a message with a hyperlink for accessing the software. However, that hyperlink does not work until the plugin is started.
Always review a plugin’s configuration options before attempting to start it. some plugins have options that need to be set before their service will successfully start. If you have never configured that application before, check the application’s website to see what documentation is available. A link to the website for each available plugin can be found in Available Plugins.
If the application requires access to the data stored on the FreeNAS® system, click the entry for the associated jail in the Jails section of the tree and add a storage as described in Add Storage.
If you need to access the shell of the jail containing the application to complete or test your configuration, click the entry for the associated jail in the Jails section of the tree. You can then click its “shell” icon as described in Managing Jails.
Once the configuration is complete, click the red OFF button for the entry for the plugin. If the service starts successfully, it will change to a blue ON. If it fails to start, click the jail’s Shell icon and type tail /var/log/messages to see if any errors were logged.
12.2. Updating Plugins
When a newer version of a plugin becomes available in the official repository, an Update button is added to the entry for the plugin in the Installed tab. In the example shown in Figure 12.2.1, a newer version of Transmission is available.
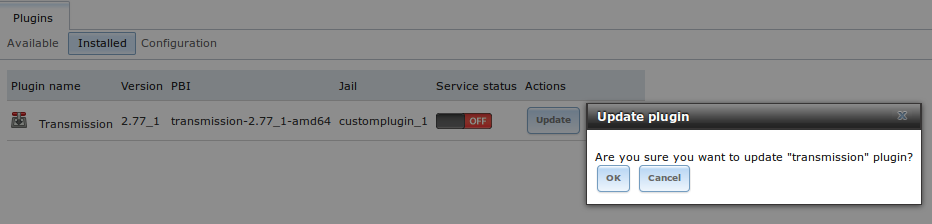
Fig. 12.2.1 Updating an Installed Plugin
Click the OK button to start the download and installation of the latest version of the plugin. Once the update is complete, the entry for the plugin will be refreshed to show the new version number and the Update button will disappear.
12.3. Uploading Plugins
The Available tab of Plugins contains an
Upload button. This button allows installation of plugins
that are not yet available in the official repository or which are
still being tested. These plugins must be manually downloaded and
should end in a .pbi extension. When downloading a plugin,
make sure that it is 64-bit and that it was developed for 9.x. as 8.x
and 10.x applications will not work on a 9.x FreeNAS® system.
Upload the new plugin with the Upload button. As seen in the example in Figure 12.3.1, this prompts you to browse to the location of the plugin file. Select the file and click Upload to begin the installation.
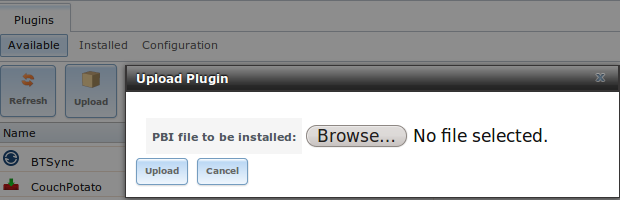
Fig. 12.3.1 Installing a Previously Downloaded .pbi File
When the installation is complete, an entry for the plugin will be added to the Installed tab and its associated jail is listed under Jails. However, if it is not a FreeNAS® plugin, it will not be added to Plugins in the tree. In this case, any required jail configuration must be done from the command line of the jail’s shell instead of from the GUI.
12.4. Deleting Plugins
When you install a plugin, an associated jail is created. If you decide to delete a plugin, the associated jail is also deleted as it is no longer required. Before deleting a plugin, make sure that you do not have any data or configuration in the jail that you need to save. If you do, back up that data first, before deleting the plugin.
In the example shown in Figure 12.4.1, Sabnzbd has been installed and the user has clicked its Delete button. A pop-up message asks the user if they are sure that they want to delete. This is the one and only warning. If the user clicks Yes, the plugin and the associated jail are permanently deleted.
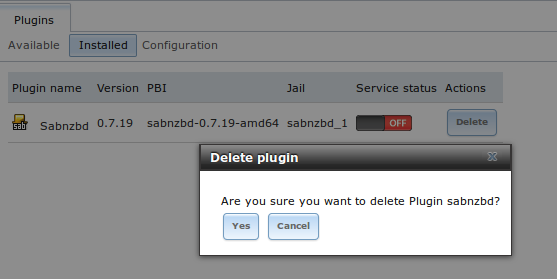
Fig. 12.4.1 Deleting an Installed Plugin
12.5. Available Plugins
These plugins are available for FreeNAS® 9.10.2:
- bacula-sd (storage daemon)
- CloneDeploy
- CouchPotato
- crashplan
- Emby
- firefly
- Headphones
- HTPC-Manager
- LazyLibrarian
- Madsonic
- Maraschino
- MineOS
- Mylar
- Nextcloud
- NZBHydra
- owncloud
- PlexMediaServer
- Resilio
- s3cmd
- SABnzbd
- SickBeard
- SickRage
- Sonarr
- Subsonic
- Syncthing
- Transmission
- XDM
While the FreeNAS® Plugins system makes it easy to install software, it is still up to you to know how to configure and use the installed application. When in doubt, refer to the documentation for that application.