NorCalTechSupport
Explorer
- Joined
- Aug 25, 2014
- Messages
- 89
Hi group, I have been gone working on other projects and I still love my SuperMicro FreeNAS SAN.
I purchased a pair of FreeNAS mini SANs with 32GB RAM and the optional Read & Write eMLC 128GB SSDs.
It took me 2 or 3 months and a storage emergency for me to start building the first one. First thing to know is the two SSDs are identical so don't worry about which SSD data cable you plug them into. RAM is RAM so I added one new 8GB EEC stick of RAM in each of the two open slots. The instructions that came in the box were bogus as the webpages did not come up and I tried 2 Windows computer an my Mac laptop. After opening the 3rd box with new upgrades I found a 2 page sheet on installing the SSDs and the only thing missing were the power cables for SSDs and a power splitter. Of course I had a Y power splitter and a power to 2 SSDs cable in my server build drawer so the build was easy. The power splitter worked well by pulling the power from the HDD backplane and inserting the splitter. And of course having a power to dual SSD power connectors was a big help.
The four 6TB HDDs have a RAID box attachment on their front and there is a little black button on the right side of each HDD. They are slide to the right buttons not push in hard buttons. Each of the four drives had a number from zero to three so being an anal geek I kept them in order.
On my first boot everything looked good on the attached VGA screen but from my Windows 7 PC only part of the welcome screen came up. The solution was as simple as refreshing my screen. At this point I was jumping for joy. I configured my new storage vault with a FreeNASmini01 name as I presume I may have more than 2 of them if they work as well as my first impressions indicate they will. I setup a Windows CIFS share and mapped it to my backup server. As a good geek I made copies of the Config file and then ran updates and made a second copy of the Config File. Oh no my Alert button on the top right corner went from green to yellow and the alert said it would be a good idea to upgrade to 9.10. The upgrade was easier than falling off of a log. System->Update and select the 9.10-STABLE train from the Train selection drop-down menu. 7 minutes later my FreeNAS mini was running 9.10.1-U4. And the share was still working on my backup server. Then being the geek I am I made another copy of the Config file.
Yea iXsystems, you did good again!
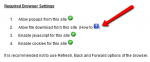
I am uploading a file and it is to illustrate the minor website flaw and the components I used.
I purchased a pair of FreeNAS mini SANs with 32GB RAM and the optional Read & Write eMLC 128GB SSDs.
It took me 2 or 3 months and a storage emergency for me to start building the first one. First thing to know is the two SSDs are identical so don't worry about which SSD data cable you plug them into. RAM is RAM so I added one new 8GB EEC stick of RAM in each of the two open slots. The instructions that came in the box were bogus as the webpages did not come up and I tried 2 Windows computer an my Mac laptop. After opening the 3rd box with new upgrades I found a 2 page sheet on installing the SSDs and the only thing missing were the power cables for SSDs and a power splitter. Of course I had a Y power splitter and a power to 2 SSDs cable in my server build drawer so the build was easy. The power splitter worked well by pulling the power from the HDD backplane and inserting the splitter. And of course having a power to dual SSD power connectors was a big help.
The four 6TB HDDs have a RAID box attachment on their front and there is a little black button on the right side of each HDD. They are slide to the right buttons not push in hard buttons. Each of the four drives had a number from zero to three so being an anal geek I kept them in order.
On my first boot everything looked good on the attached VGA screen but from my Windows 7 PC only part of the welcome screen came up. The solution was as simple as refreshing my screen. At this point I was jumping for joy. I configured my new storage vault with a FreeNASmini01 name as I presume I may have more than 2 of them if they work as well as my first impressions indicate they will. I setup a Windows CIFS share and mapped it to my backup server. As a good geek I made copies of the Config file and then ran updates and made a second copy of the Config File. Oh no my Alert button on the top right corner went from green to yellow and the alert said it would be a good idea to upgrade to 9.10. The upgrade was easier than falling off of a log. System->Update and select the 9.10-STABLE train from the Train selection drop-down menu. 7 minutes later my FreeNAS mini was running 9.10.1-U4. And the share was still working on my backup server. Then being the geek I am I made another copy of the Config file.
Yea iXsystems, you did good again!
I am uploading a file and it is to illustrate the minor website flaw and the components I used.