Version 1.0-BETA
1. Introduction
Welcome to TrueCommand®!
TrueCommand® is a top-level management solution for managing multiple FreeNAS and TrueNAS systems. This is sometimes called a “single pane of glass” appliance and provides a unified administration for multiple users and multiple systems on networks.
TrueCommand® can monitor an entire network of FreeNAS® and TrueNAS® systems. This includes showing system statistics on storage usage, network activity, active services, and more. Even more, TrueCommand® has the ability to create custom reports about individual systems or a combination of many systems.
2. Installation
TrueCommand® is usually installed inside a virtual machine. It can also be installed on standalone hardware.
2.1. System Requirements
The system requirements for TrueCommand® are:
- x86 64-bit CPU
- at least 4 GiB or 4096 MiB of RAM
- at least 80 GiB of disk space
2.2. Virtualization
2.2.1. VirtualBox
VirtualBox is an open source virtualization program originally created by Sun Microsystems. VirtualBox runs on Windows, BSD, Linux, Macintosh, and OpenSolaris.
To install or run TrueCommand® in VirtualBox, start VirtualBox. Click the New button.
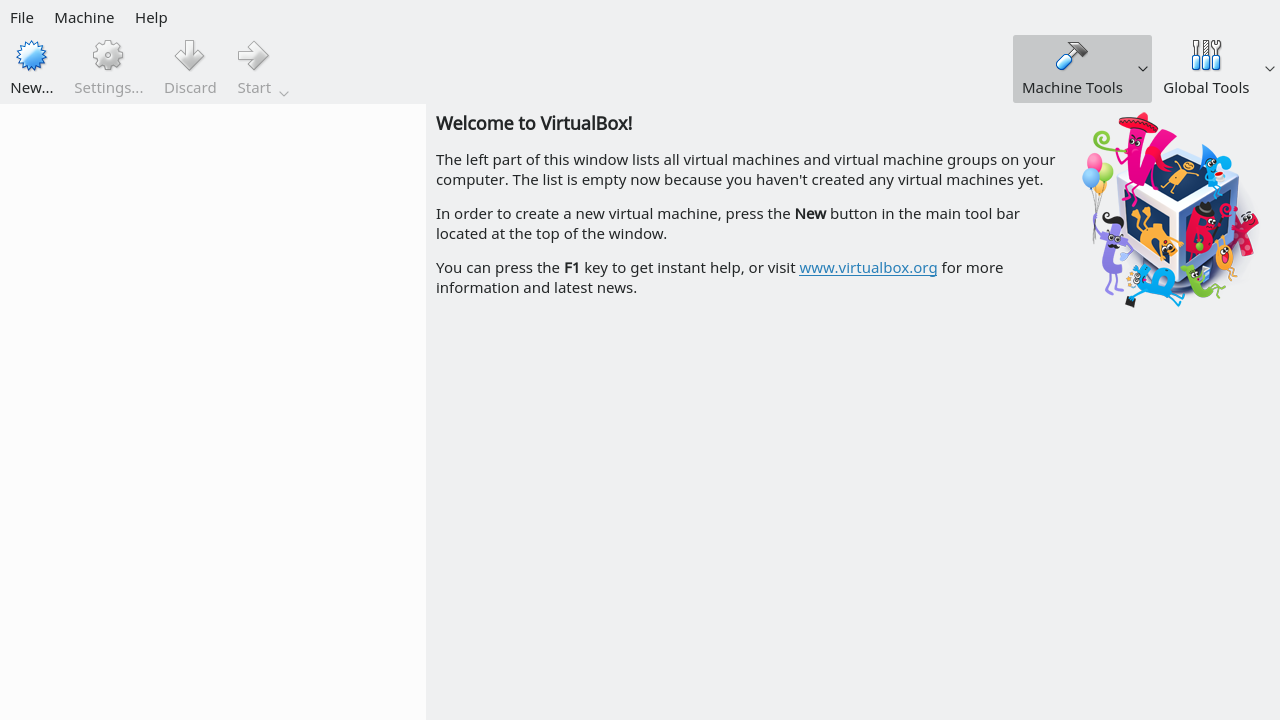
Fig. 2.2.1 VirtualBox Screen Menu
Enter a name for the virtual machine. Click the Type drop-down menu and select BSD. Select FreeBSD (64-bit) from the Version drop-down. Click Next.
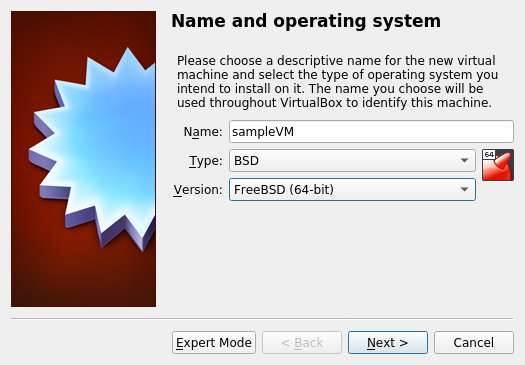
Fig. 2.2.2 New Virtual Machine Name and Operating System
Change the base memory size to at least 4 GiB or 4096 MiB (see System Requirements). Click Next.
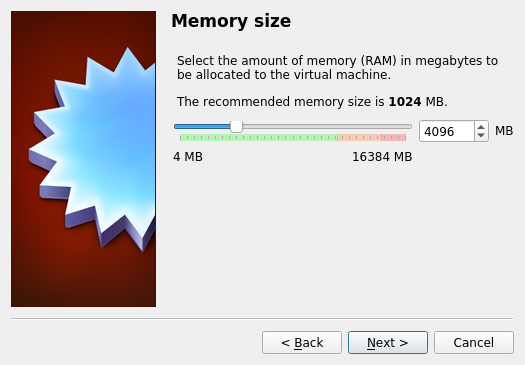
Fig. 2.2.3 Virtual Machine Reserved Memory
Click Create.
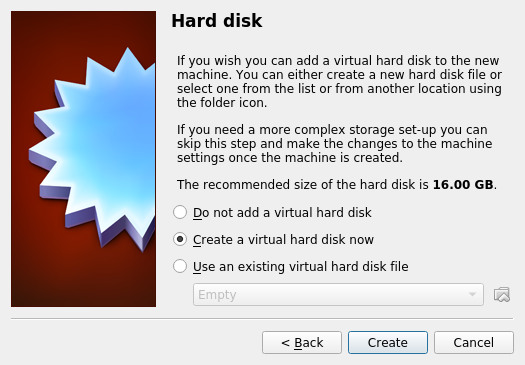
Fig. 2.2.4 Virtual Machine Hard Disk
Select VDI and click Next.
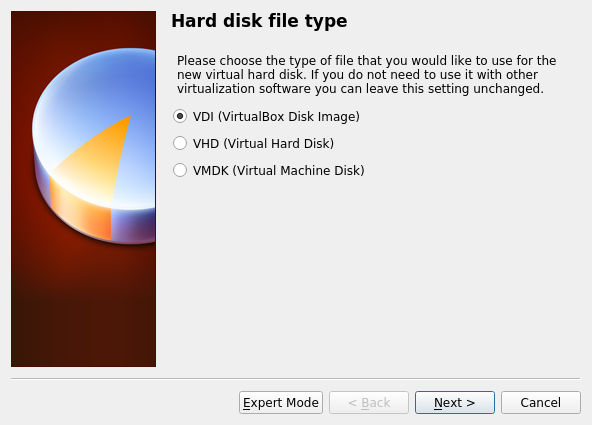
Fig. 2.2.5 New Virtual Hard Disk Type
Select Dynamically allocated. Click Next.
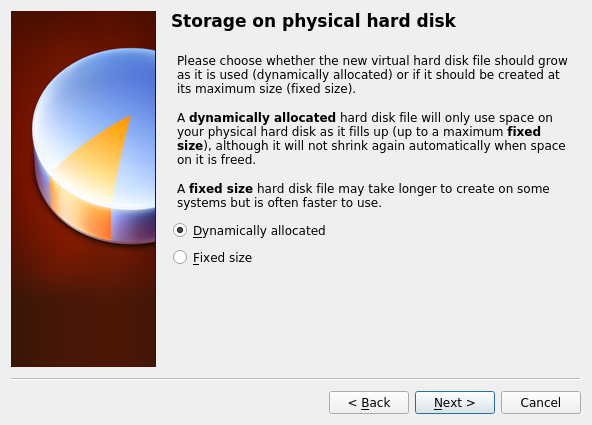
Fig. 2.2.6 Virtual Disk Storage Type
Set the size of the Virtual Disk. Set the Virtual Disk size to at least 80 GiB (see System Requirements. Click Create to create the new VM.
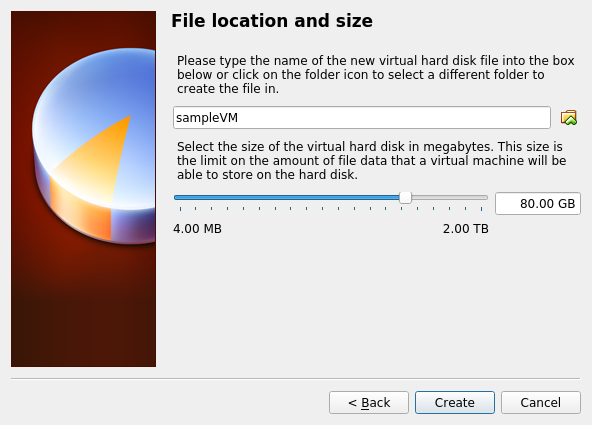
Fig. 2.2.7 Virtual Disk Location and Size
Highlight the VM and click Settings to create a device for the installation media.
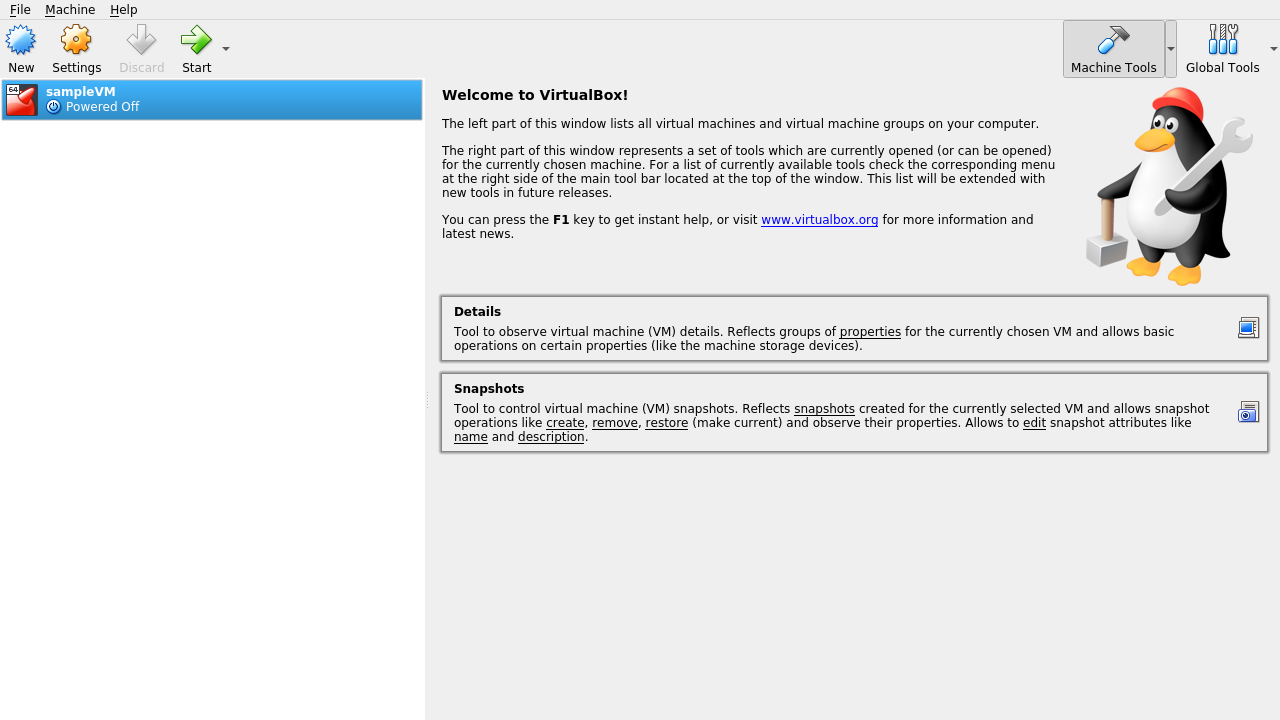
Fig. 2.2.8 New Virtual Machine
Click the Storage option in the left frame to show storage options.
Select Empty from the Storage Devices frame and click
the CD icon in the Attributes frame. Click
Choose Virtual Optical Disk File to browse to the location
of the TrueCommand® .iso file.
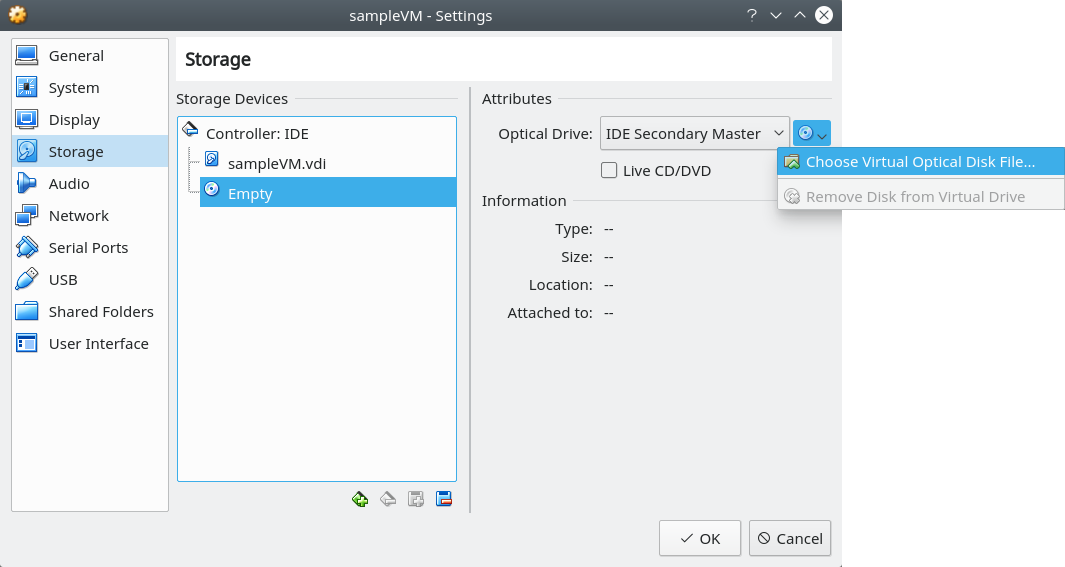
Fig. 2.2.9 Adding the ISO Installation Media
Configure the network adapter by opening the VM settings and clicking Network. Select Bridged Adapter in the Attached To drop-down menu. Choose the name of the physical interface from the Name drop-down menu. Click Ok to save the new settings.
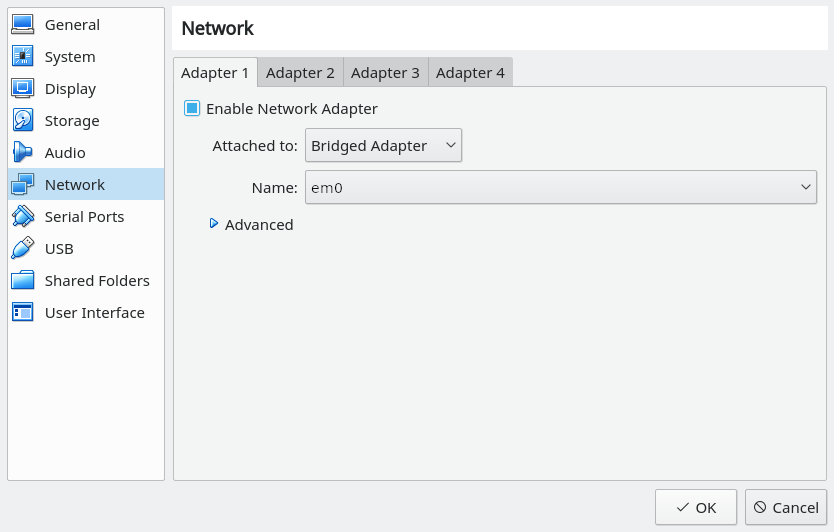
Fig. 2.2.10 Configuring a Bridged Adapter
Click Start to power on the VM and begin the TrueCommand® installation process.
After the installation is complete, shut down the VM. Remove the installation media by right-clicking the IDE icon and selecting Remove disk from virtual hard drive.
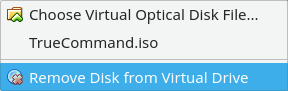
Fig. 2.2.11 Remove Installation Media
2.2.2. VMware ESXi
ESXi is a bare-metal hypervisor architecture created by VMware Inc. Commercial and free versions of the VMware vSphere Hypervisor operating system (ESXi) are available from the VMware website.
When the VMware vSphere client is installed, use it to connect to the
ESXi server. Enter the username and password created when installing
ESXi to log into the interface. After logging in, go to Storage to
upload the TrueCommand® .iso.
Click Datastore browser and select a datastore for the
TrueCommand® .iso. Click Upload. Use the
file dialog to choose the TrueCommand® .iso from the host system.
Click Create / Register VM to create a new VM. The New virtual machine wizard opens:
Select creation type: Select
Create a new virtual machineand click Next.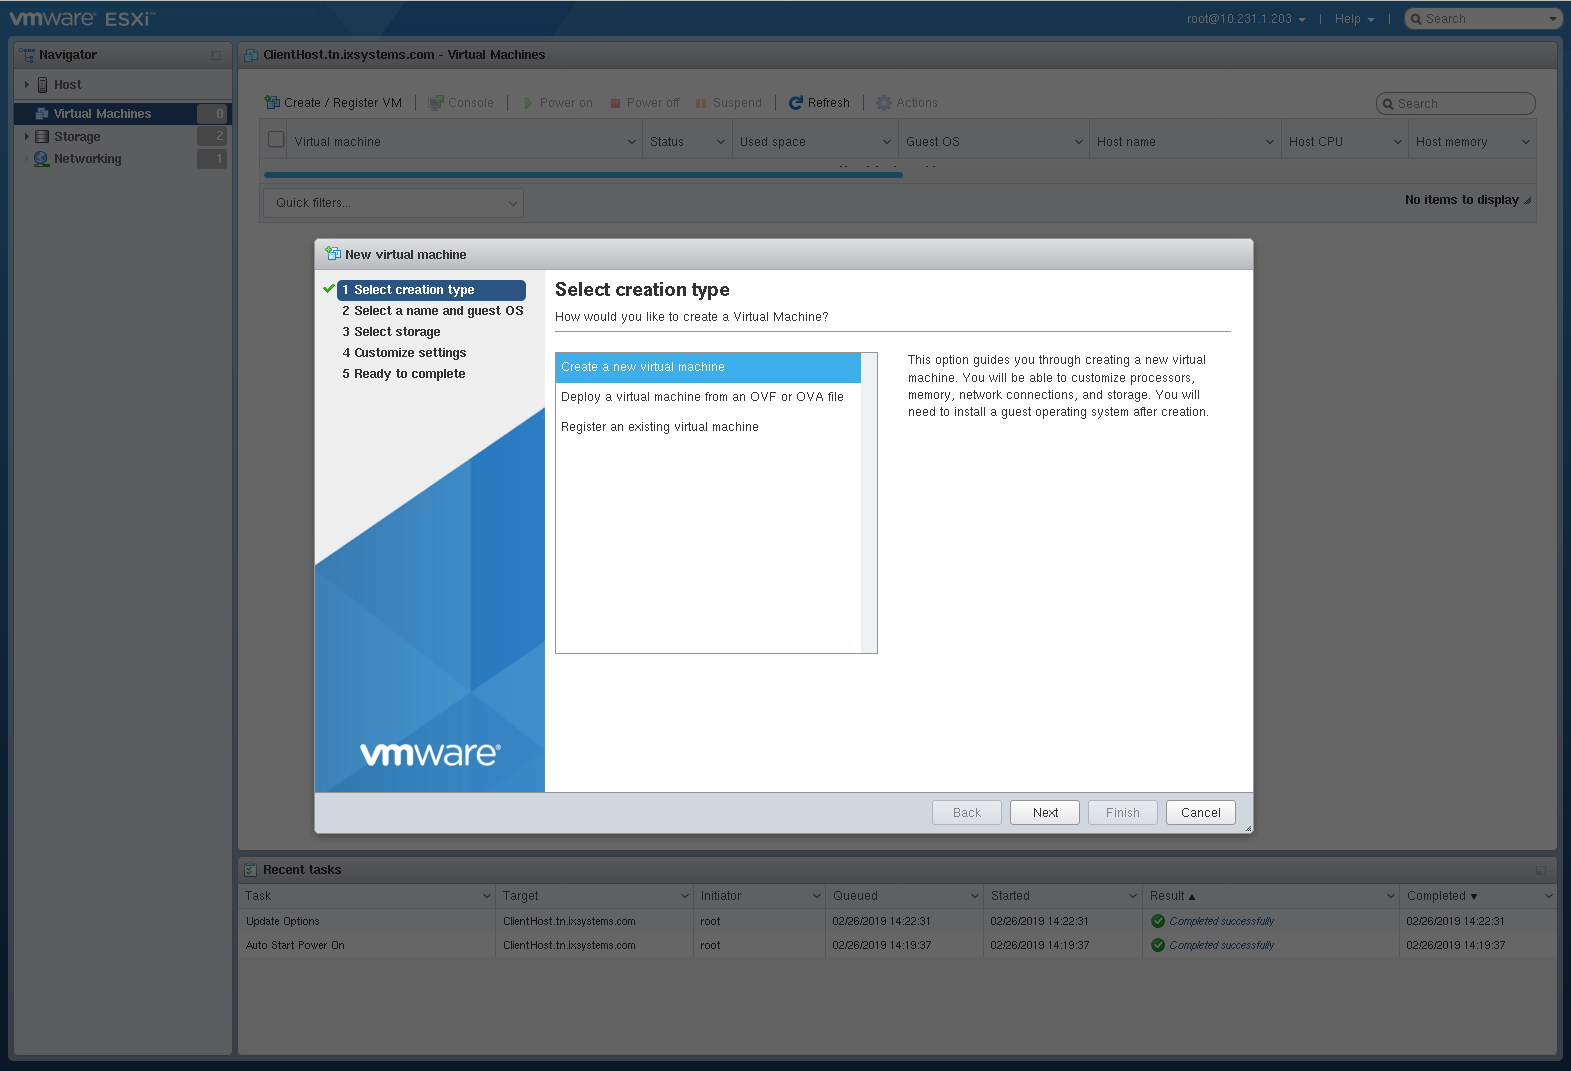
Select a name and guest OS: Enter a name for the VM. Leave ESXi compatibility version at the default. Select
Otheras the Guest OS family. SelectFreeBSD12 or later versions (64-bit)as the Guest OS version. Click Next.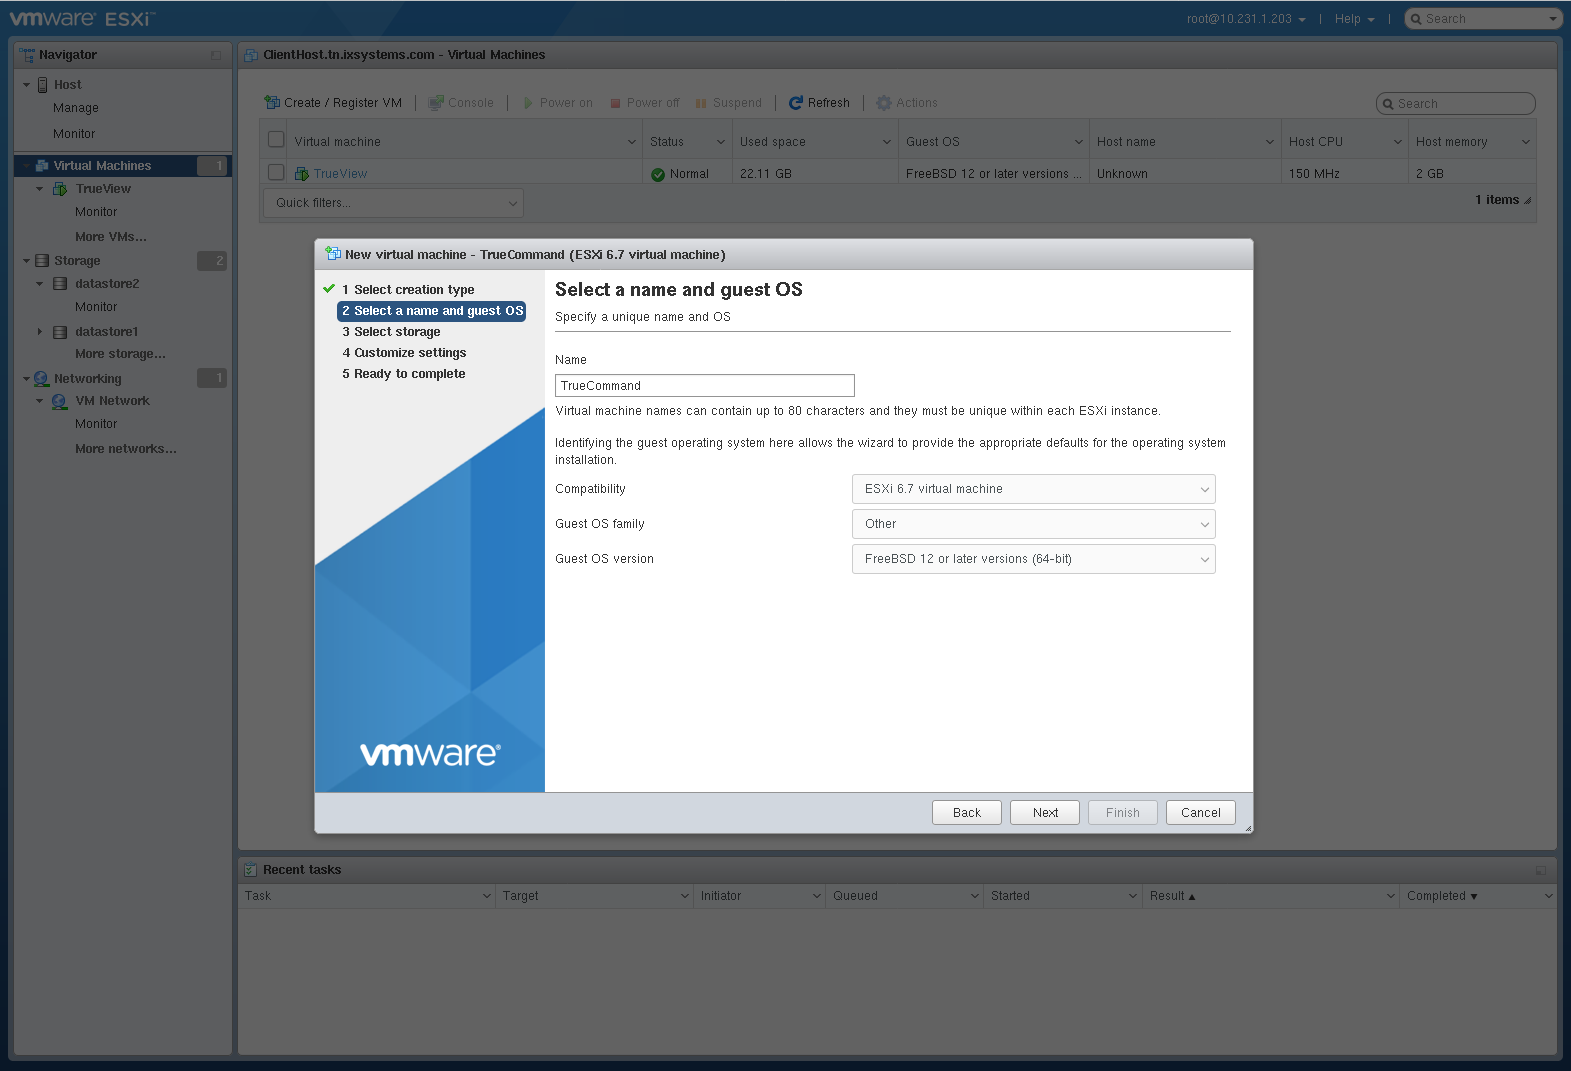
Select storage: Select a datastore for the VM. The datastore must be at least 80 GiB (see System Requirements).

Customize settings: Enter at least 4 GiB or 4096 MiB of memory and at least 80 GiB of virtual storage (see System Requirements). Select
Datastore ISO filefrom the CD/DVD Drive 1 drop-down. Use the Datastore browser to select the uploaded TrueCommand®.iso. Click Next.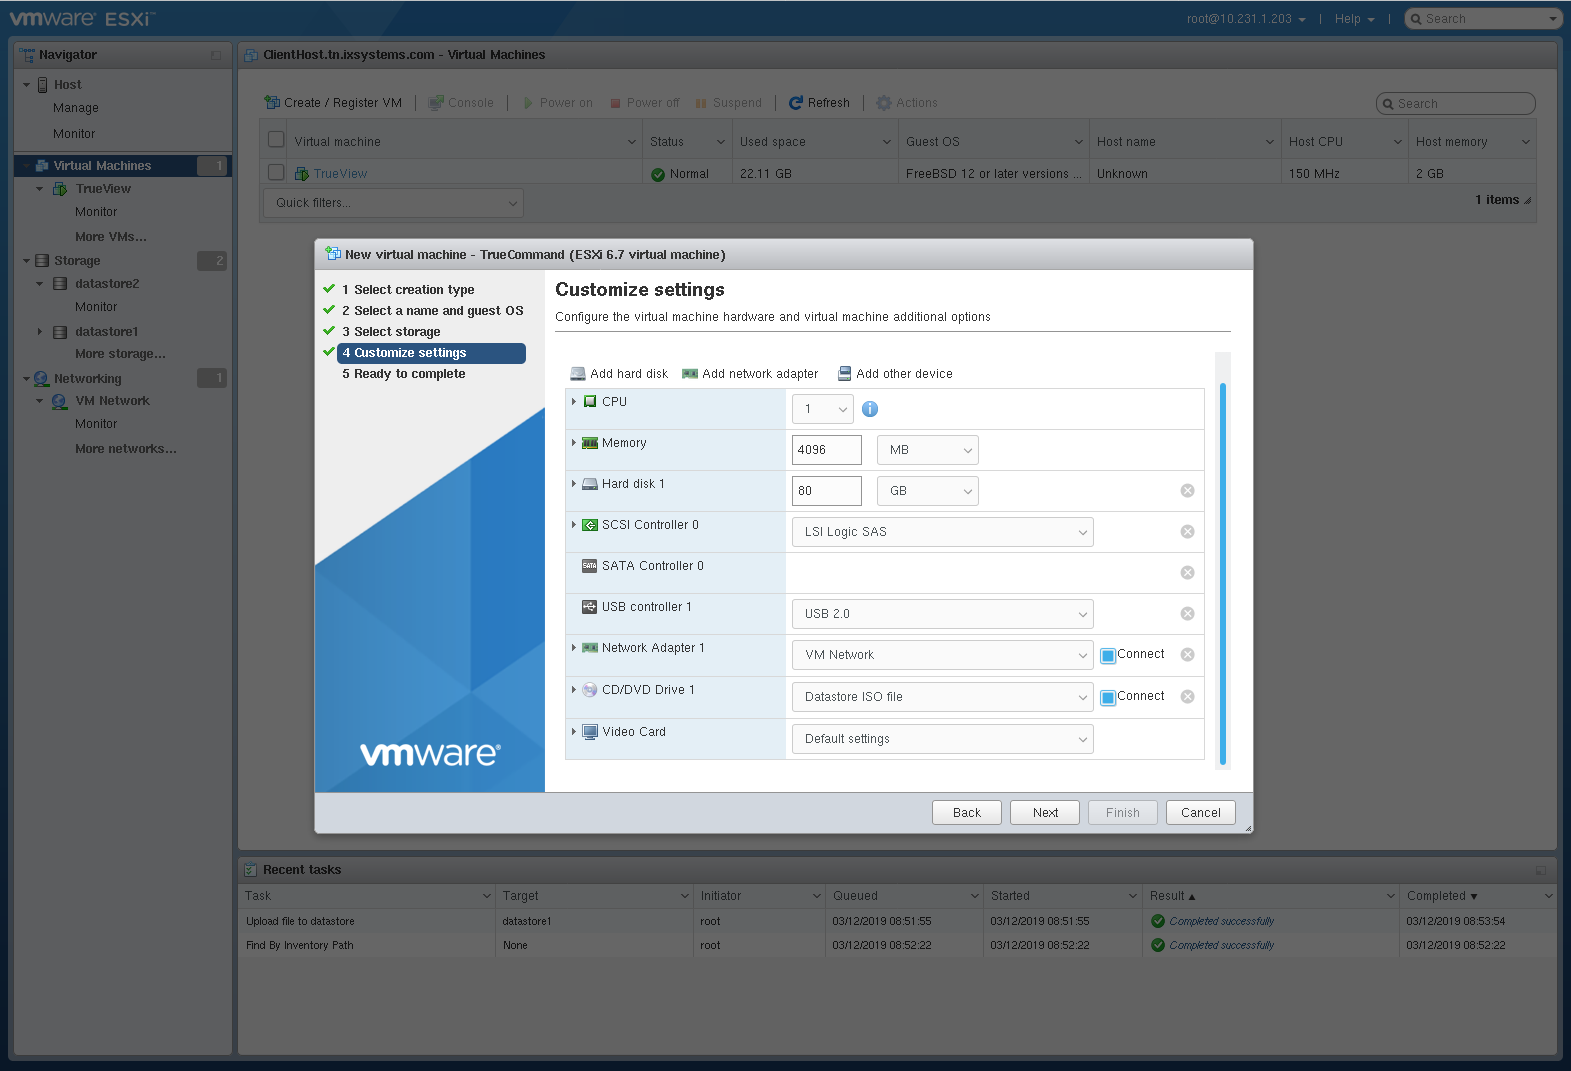
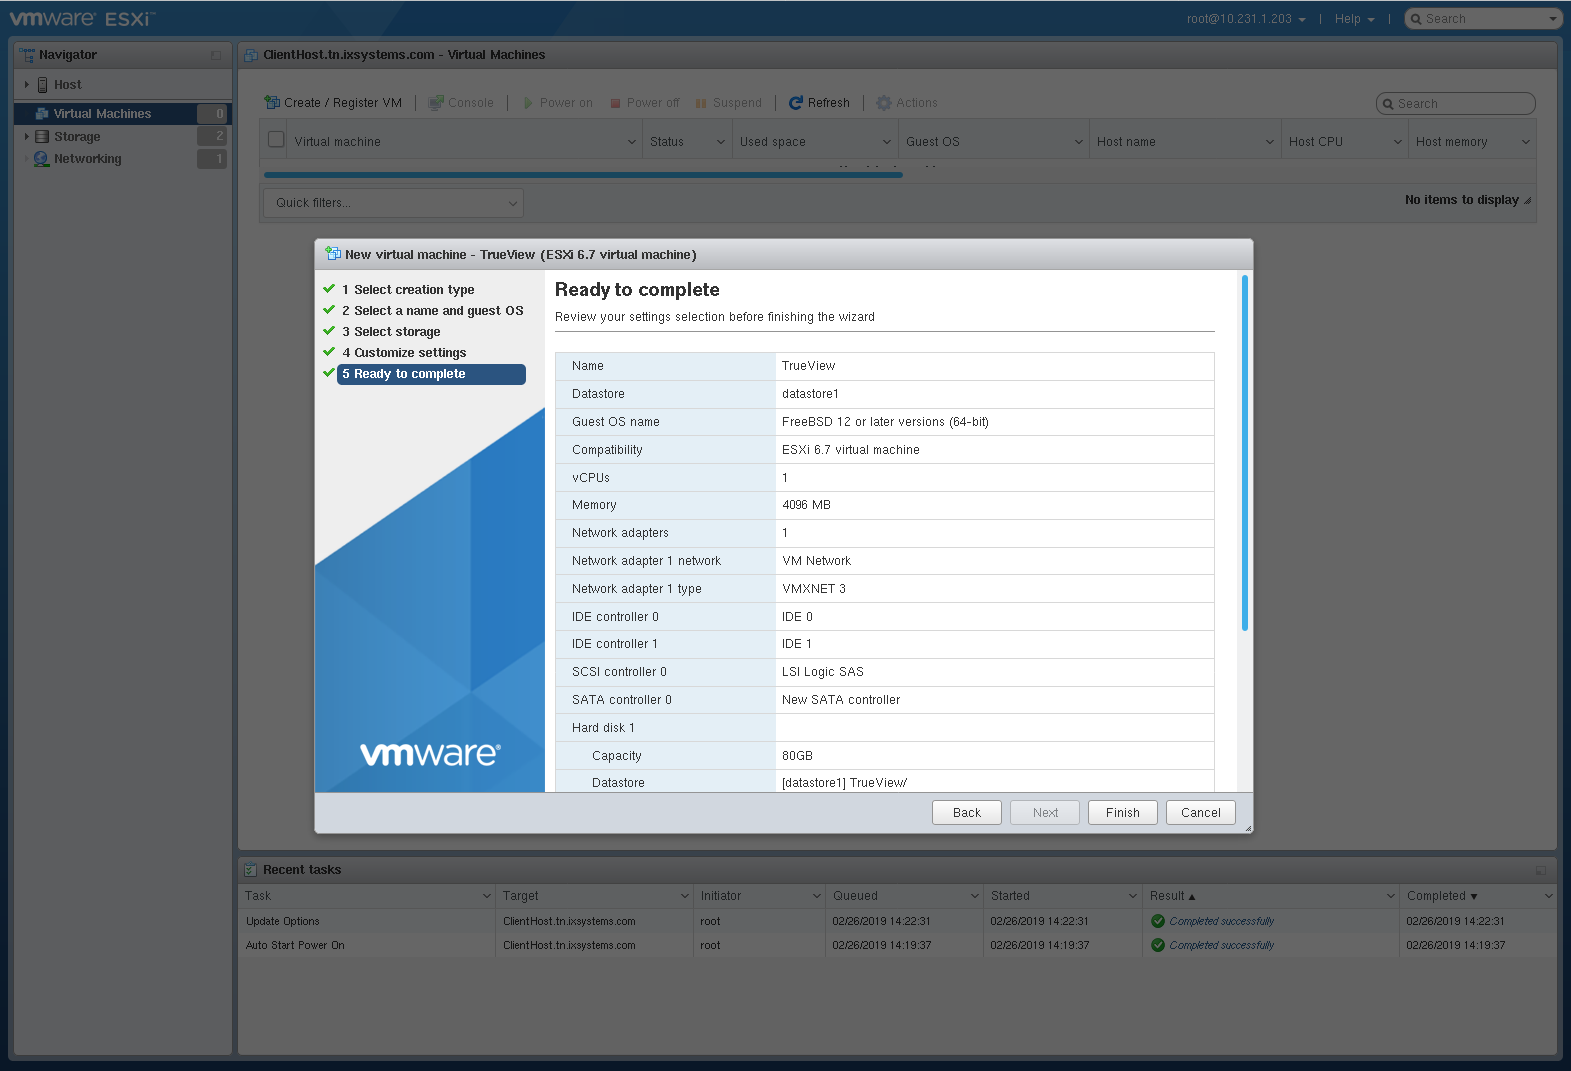
Ready to complete: Review the VM settings. Click Finish to create the new VM.
Click where VM is the TrueCommand VM name. Click Power on to start the VM. Click and install TrueCommand®.
2.3. Installing TrueCommand®
The TrueCommand® installer boot menu appears first. After a short pause, it automatically continues. To boot with one of the options, type the number of the option.
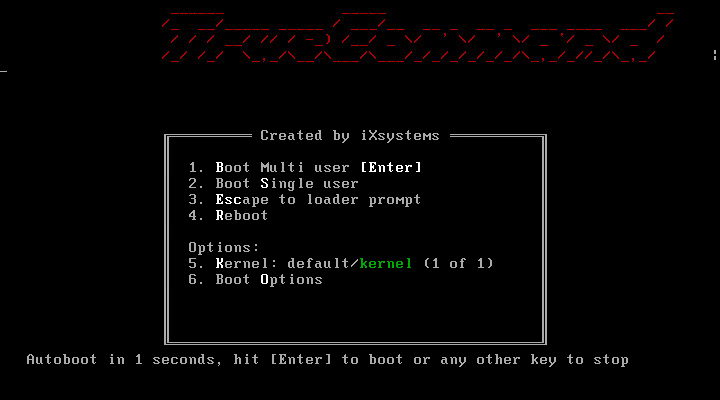
Fig. 2.3.1 Installer Boot Menu
Press Enter to select the default option,
Install.
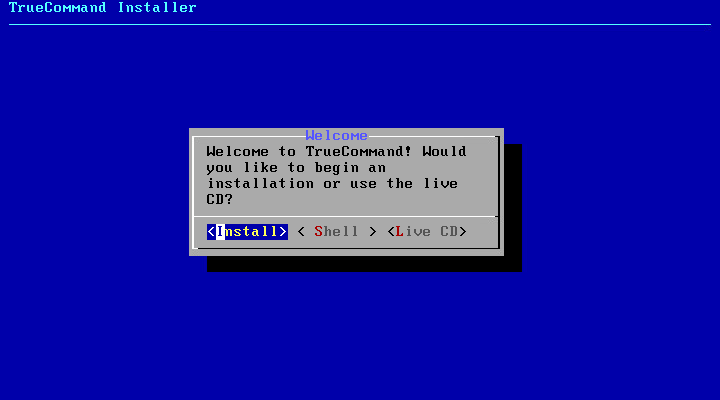
Fig. 2.3.2 Installer Options
Available disks are shown. Use the arrow keys to choose the target
disk. Press Spacebar to select the desired disk. Press
Enter to continue.
Press Enter to use all of the disk.
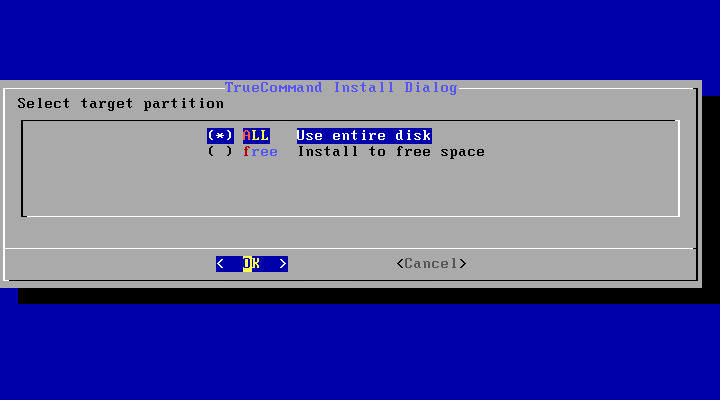
Fig. 2.3.3 Select Target Partition
Use the arrows to select GPT. MBR should only be used on legacy
clients that cannot use GPT. Press Enter.
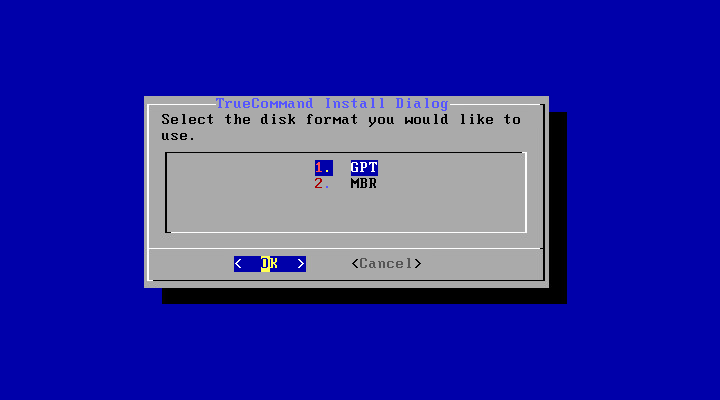
Fig. 2.3.4 Select Disk Format
Set and confirm the root password. The root user
is for system maintenance and is not used to access the TrueCommand® web
interface. Accounts for the TrueCommand® web interface are created with the
web interface after installation.
Press Enter to continue.

Fig. 2.3.5 Set root password
A system user is created for optional SSH access to the TrueCommand®
system. Enter a username and press Enter. Enter a full name for
the user and press Enter.
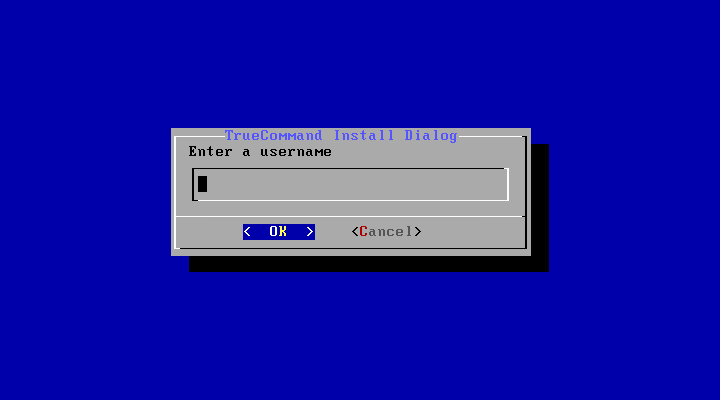
Fig. 2.3.6 Set System User Username
Enter the password, then enter it again to confirm.
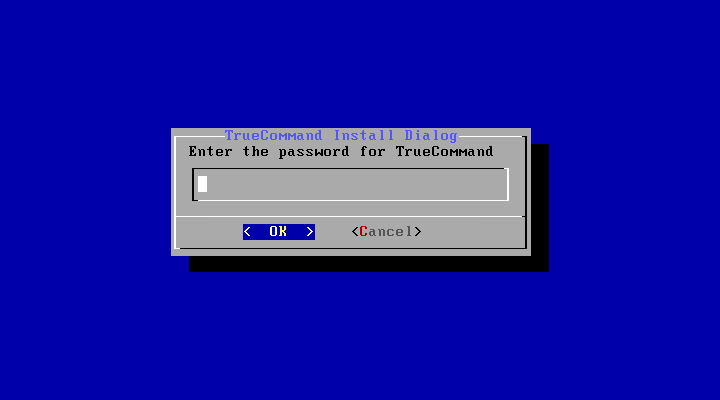
Fig. 2.3.7 Set System User password
Press Enter to select the default, /bin/sh.
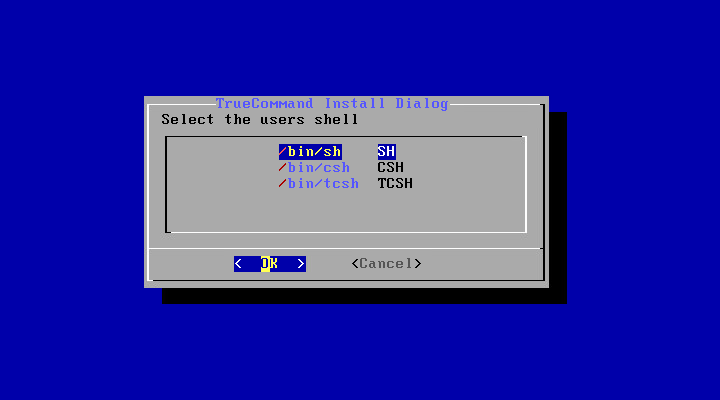
Fig. 2.3.8 Select User Shell
Enter TrueCommand as the system hostname and press
Enter.
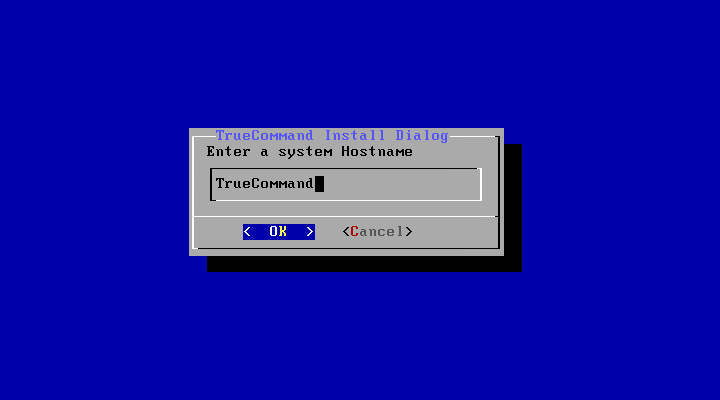
Fig. 2.3.9 Set Hostname
Press Enter to Enable networking.
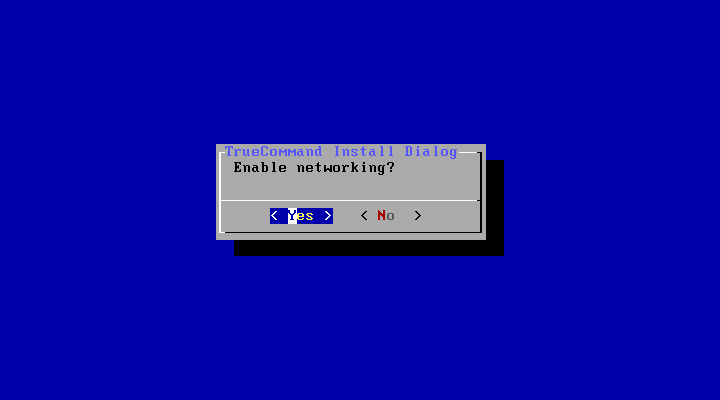
Fig. 2.3.10 Enable Networking
Use the arrow keys to select the network card. A static IP address is strongly recommended. DHCP can be used, but can result in the system unexpectedly moving to new IP address.
When using a static IP address, the IP address, gateway, and netmask are required. DNS is optional, but recommended for name resolution.
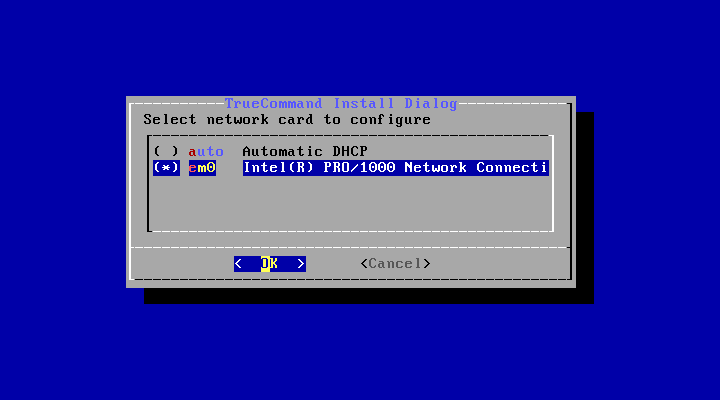
Fig. 2.3.11 Select Network Card
Press Enter to the Enable SSH. Enabling SSH is not required,
but recommended.
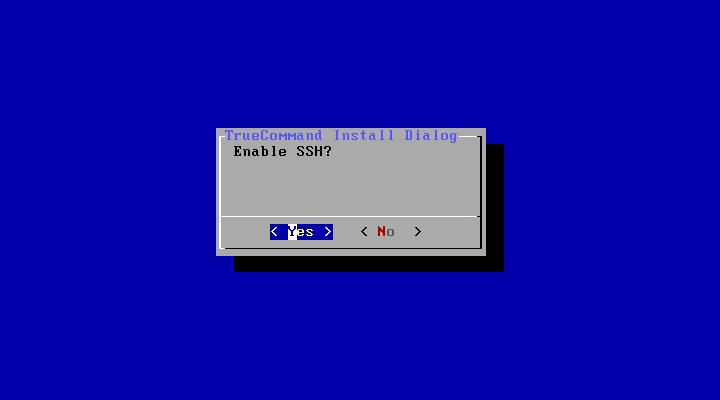
Fig. 2.3.12 Enable SSH
Select install and press Enter.
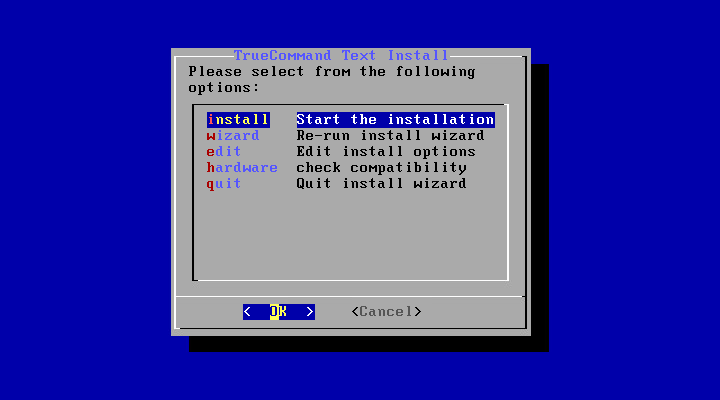
Fig. 2.3.13 Start the Installation
Wait for the Installation Finished! message and press Enter.

Fig. 2.3.14 Finish Installation
Use the down arrow to select quit. Press Enter.
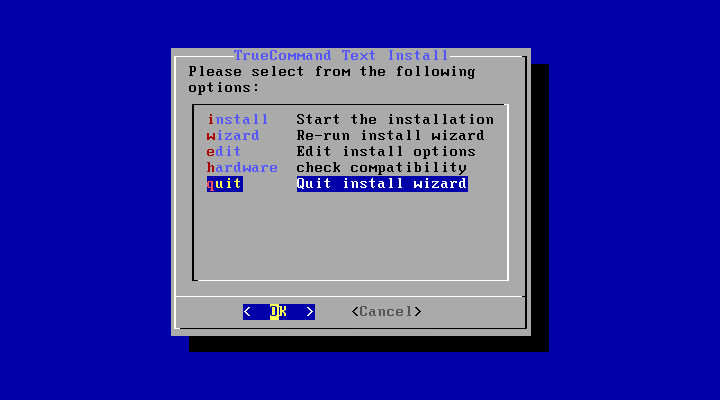
Fig. 2.3.15 Quit Install Wizard
Make sure the installation media has been removed, then restart the TrueCommand® system.
3. Starting
The Appliance Status menu appears when TrueCommand® is running.
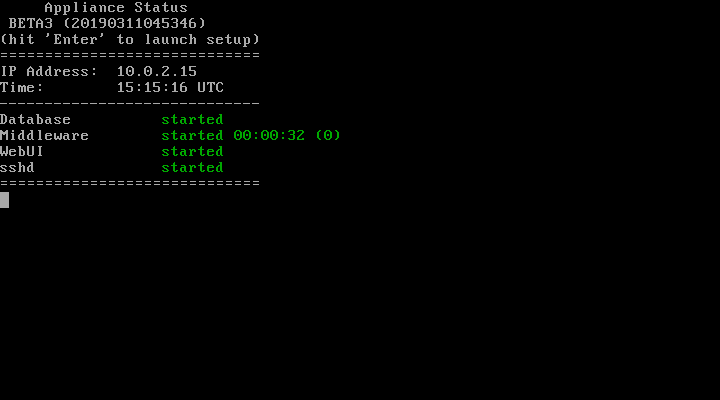
Fig. 3.1 TrueCommand® Appliance Status
3.1. Locating the TrueCommand® IP Address
The IP address of the TrueCommand® system is displayed at the top of the Appliance Status menu.
Enter the DNS hostname or IP address in a browser to access the TrueCommand® system.
3.2. Adding TrueCommand® as an Exception
TrueCommand® uses a self signed certificate for a secure connection. Because of this, most internet browsers consider the IP address or DNS hostname untrustworthy. The IP address or DNS hostname must be added as an exception to connect.
3.2.1. Adding an Exception in Firefox
Click Advanced to view information about the error code.
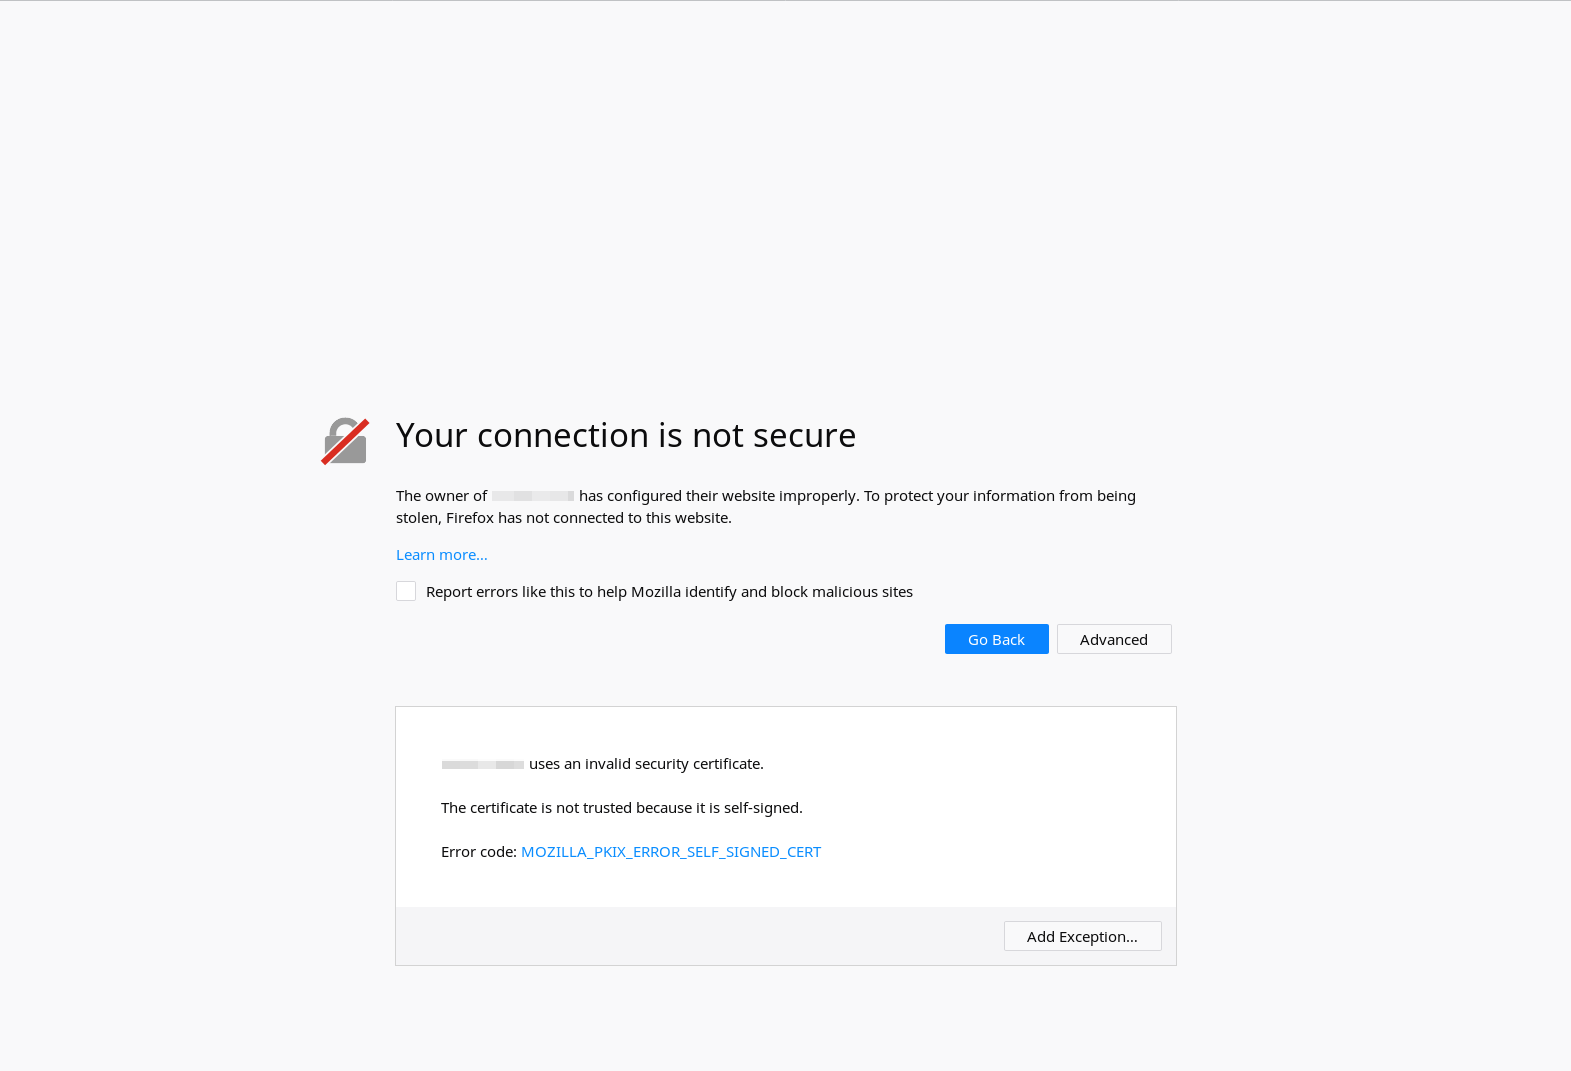
Fig. 3.2.1 Firefox Connection Warning
Click Add Exception…. Set Permanently store this exception to keep the IP address or DNS hostname permanently stored in Firefox.
Click Confirm Security Exception.
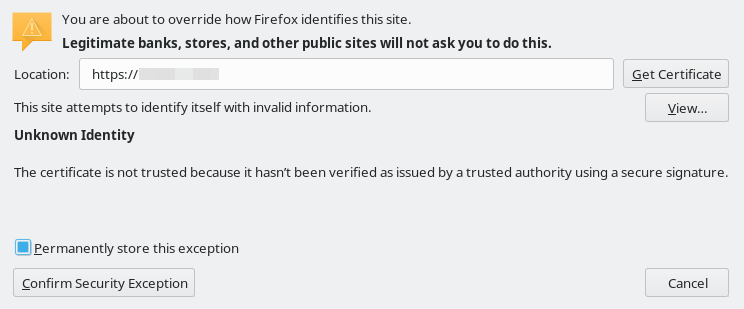
Fig. 3.2.2 Firefox Add Exception
3.2.2. Adding an Exception in Chrome
Click Advanced to view information about the error code.
Click Proceed to {IP address or DNS hostname} (unsafe).
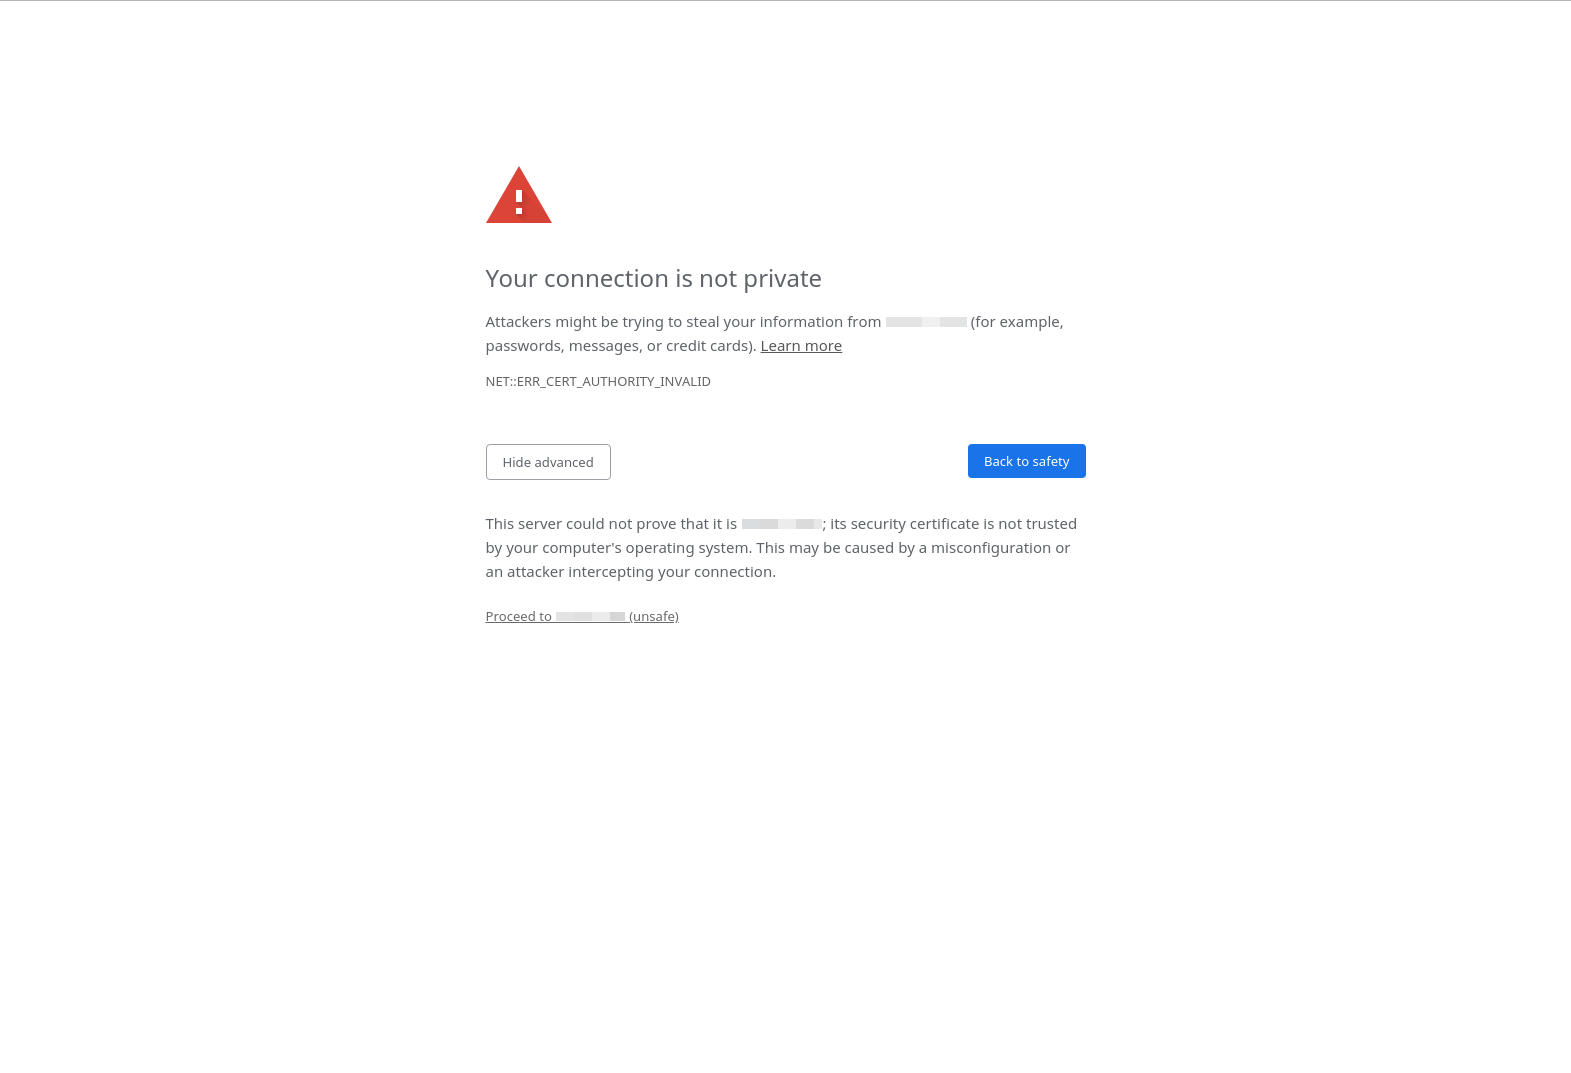
Fig. 3.2.3 Chrome Connection Warning
3.3. Signing Up for TrueCommand®
Follow these steps to create a new admin user:
Log in using the default username (
admin) and password (admin). This username is only present when there are no actual users defined in the database.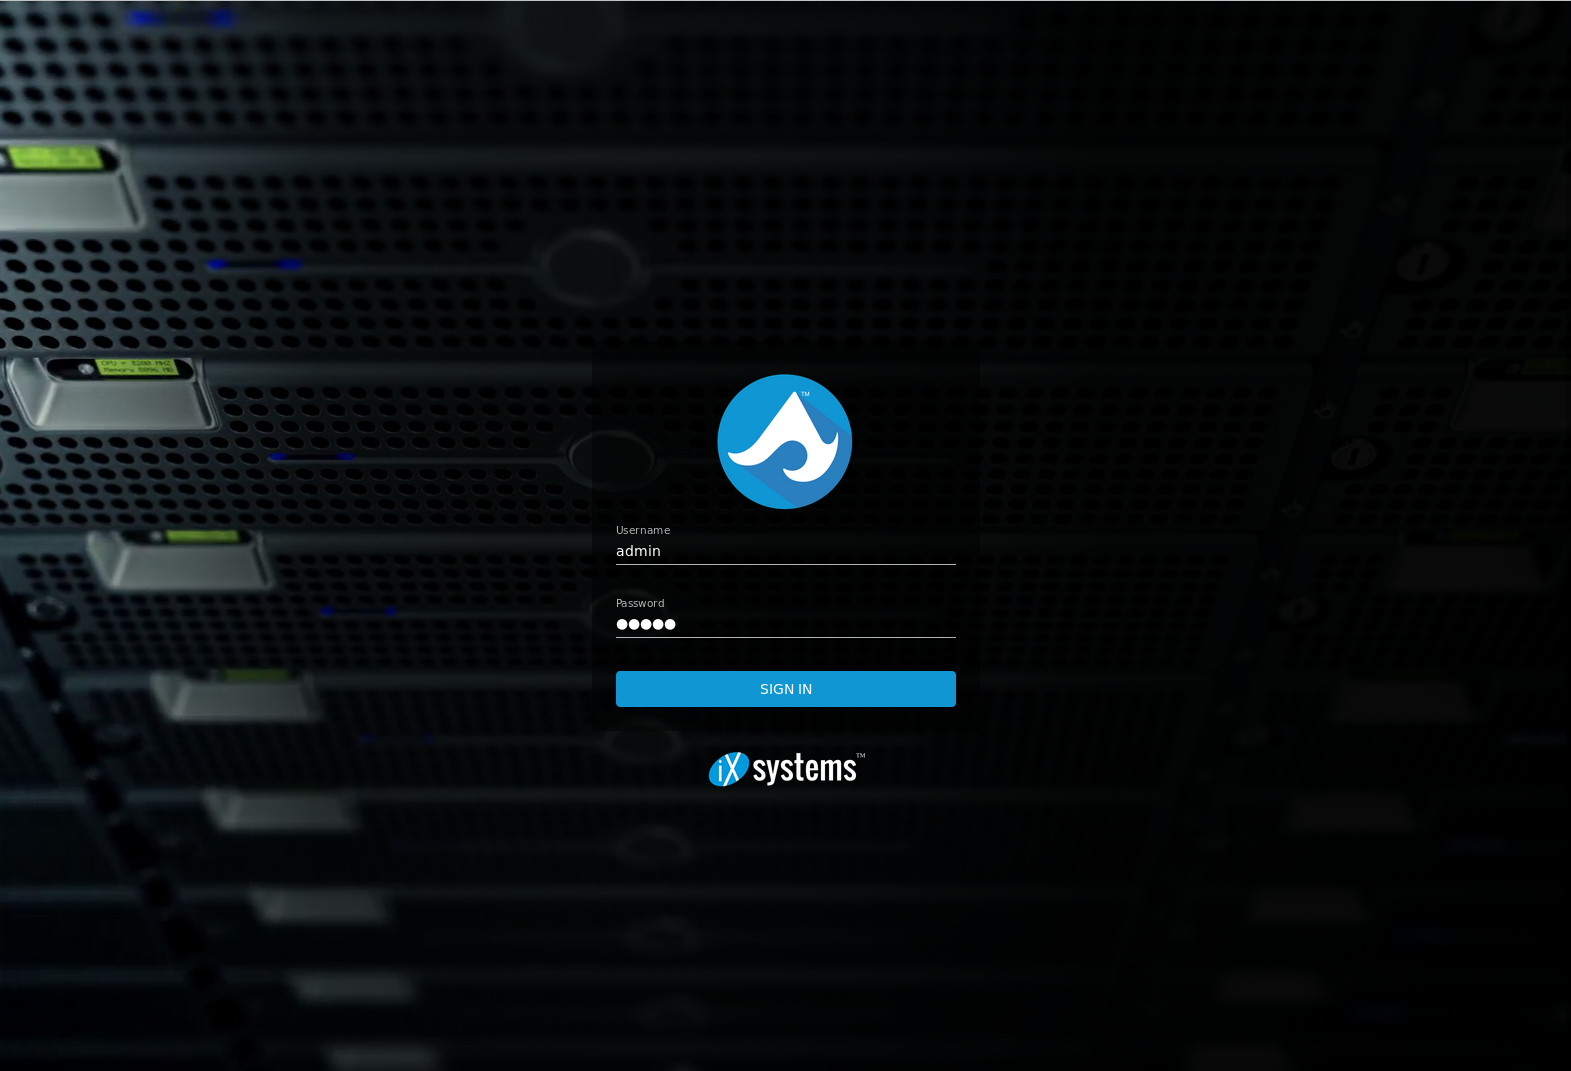
Fig. 3.3.1 Log in to Access Sign Up Page
Enter a username and password. Set I have read and agree to the terms of service and click SIGN UP.

Fig. 3.3.2 Sign Up for TrueCommand®
Log in with the created user. The TrueCommand® web interface loads.
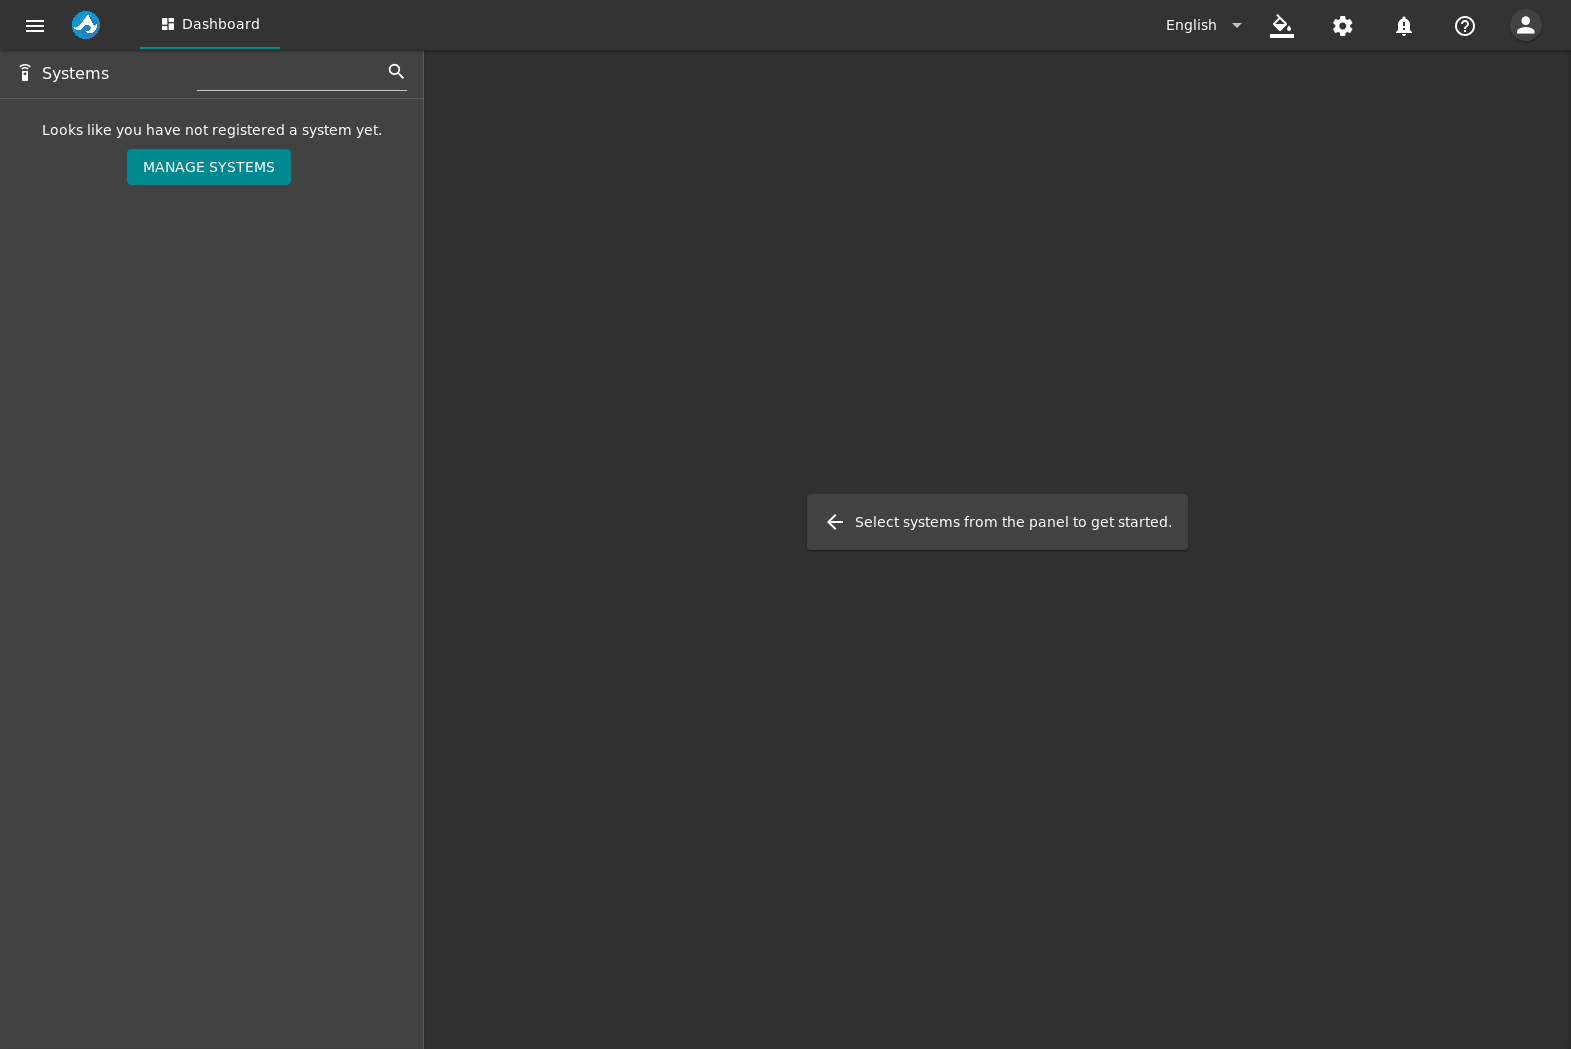
Fig. 3.3.3 Logging in
4. Dashboard
The dashboard is used to manage and monitor FreeNAS® and TrueNAS® systems. It displays system storage capacity, CPU usage, memory usage, network statistics, and other useful information.
The dashboard is empty when first setting up TrueCommand® because no systems have been added to be monitored. Add Systems to view them on the dashboard. All added systems are shown on the dashboard by default. To hide a system on the dashboard, unset the checkbox in the Systems side panel. Access the system by clicking (Settings) in the side panel. This goes to the system interface associated with the DNS hostname or IP address.

Fig. 4.1 Dashboard with Systems
View more information about a specific system by hiding all other systems on the dashboard. When only one system is shown, there are Metrics, Storage, Network, Services, Jails, and Virtual Machines pages that show more information about the FreeNAS® or TrueNAS® system.
5. Systems
A list of FreeNAS® and TrueNAS® systems being monitored is displayed at the top of the systems page. The total number of discovered systems on the network and the number of systems that are actually connected to TrueCommand® are also shown. The SYSTEMS page has three tabs: Systems, System Groups, and Discovered Systems. View the systems page by going to (Settings) .
Click (Settings) to begin monitoring a FreeNAS® or TrueNAS® system. Enter the system IP address or DNS hostname, nickname, and password. If a mistake is made, the contents of the fields can be reset by clicking RESET FORM. To add the new system, click ADD SYSTEM. Adding a system with an incorrect password shows that system as offline in the dashboad and added systems list.
Click Systems to view all added systems.
Systems can be edited by clicking (Edit Item). Change the system information by entering new information in the fields. To go back to the original contents of the fields, click RESET FORM. Systems can be added to a group by clicking ADD GROUP and selecting a group from the drop-down. If a group of systems has not been created, the button says Manage Groups. A system can be removed from a group by clicking (Remove).
A system can be deleted from being monitored in TrueCommand® by clicking (Delete). Confirm the deletion by clicking DELETE SYSTEM.
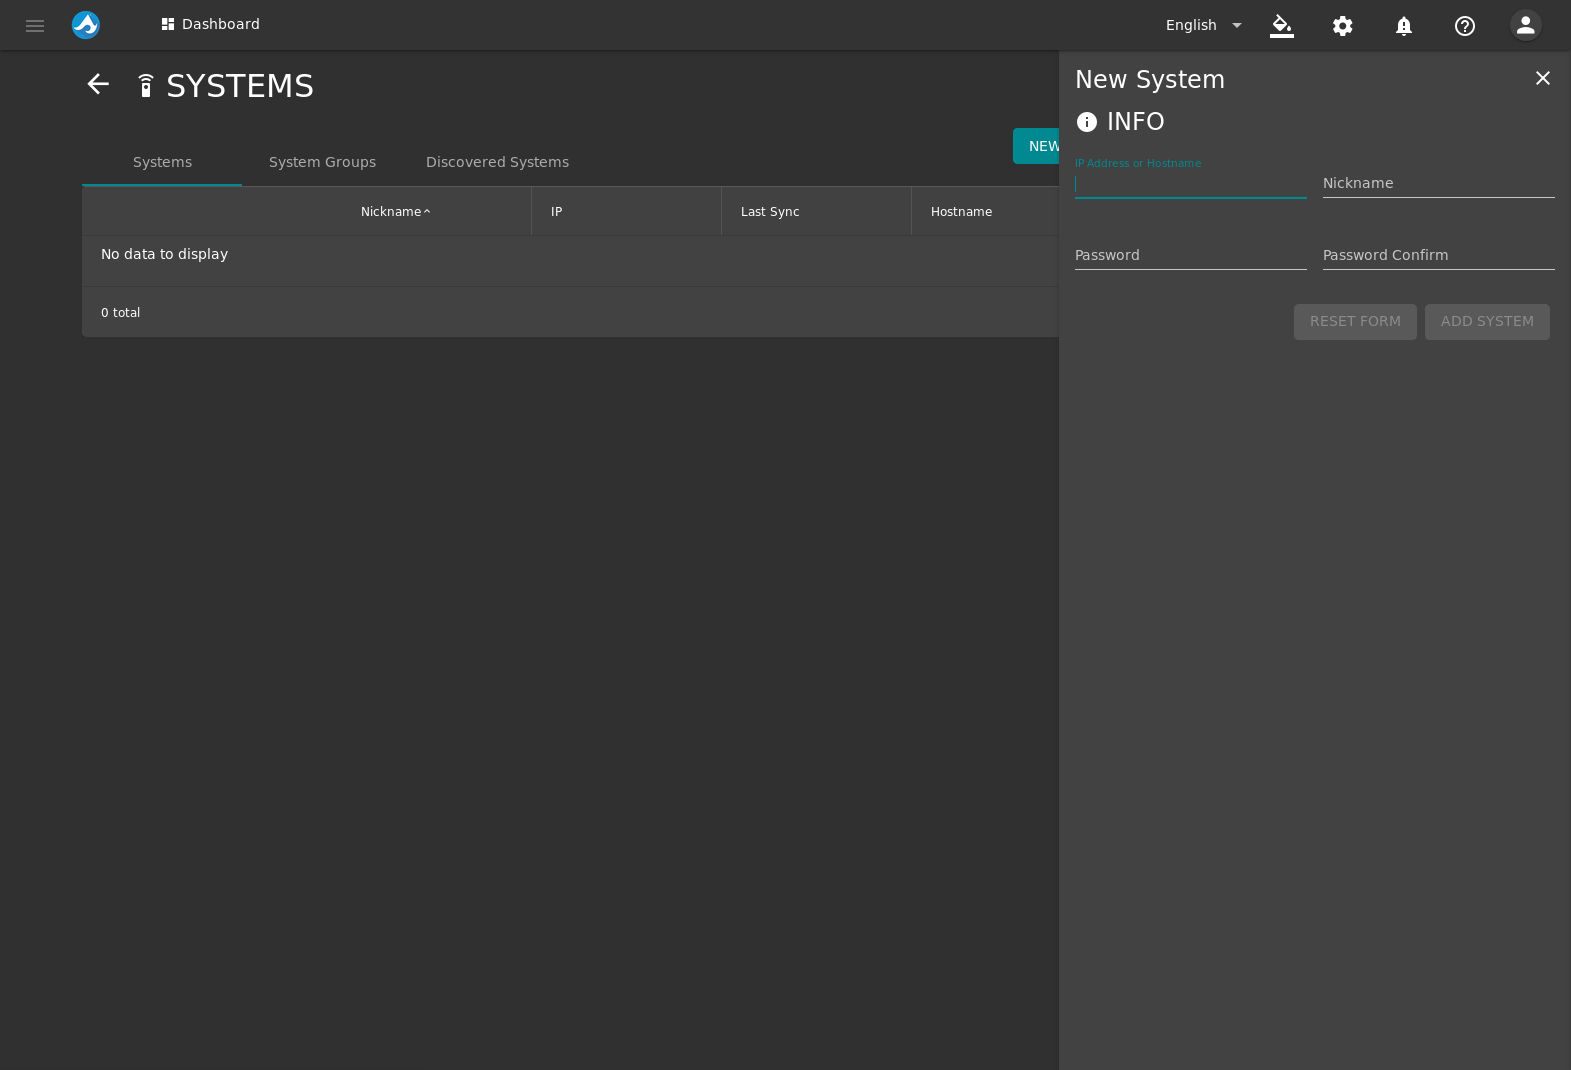
Fig. 5.1 Adding a New System
5.1. Groups
Groups are collections of systems. Systems can be organized into a group to efficiently manage permissions and reports for the group.
Click System Groups to view the list of created groups and the systems they contain. Groups are created by clicking (Settings) . Enter a group name. Click ADD SYSTEM to add systems to the group. Select a system that belongs in the group. Repeat this step to add multiple systems to a group. Click CREATE GROUP when all desired systems are added to the group.
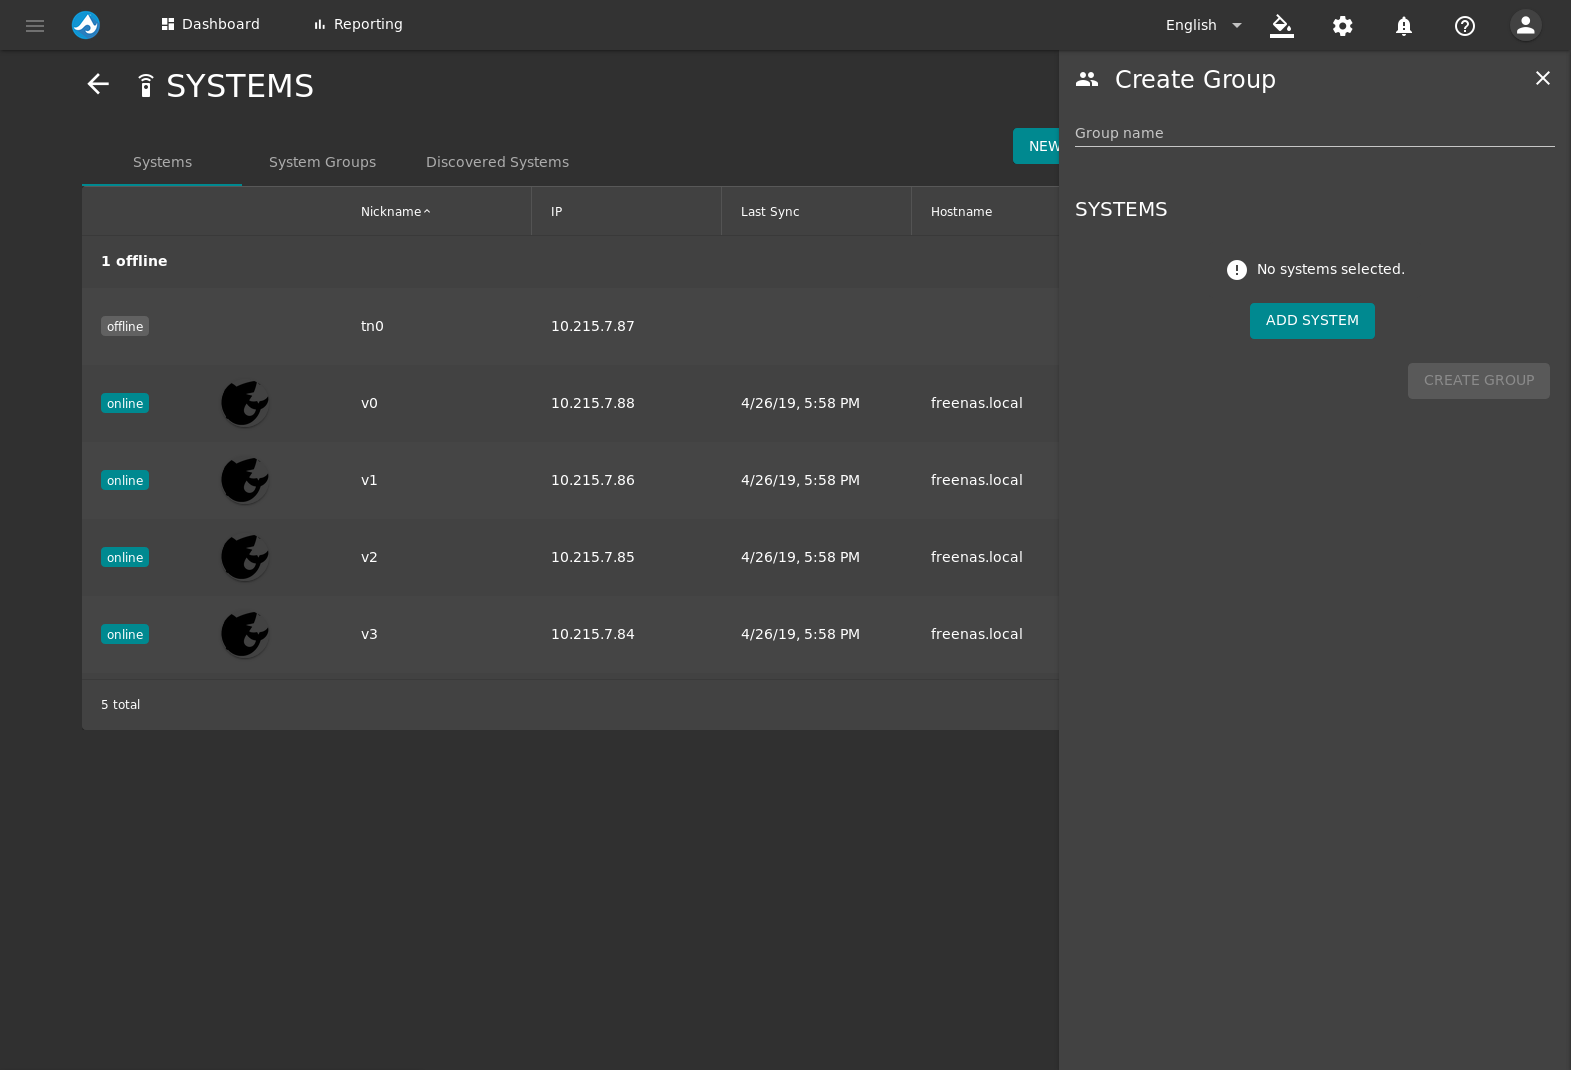
Fig. 5.1.1 Adding a New Group
To delete a system group, click (Delete). Confirm the deletion by clicking YES.
5.2. Discovered Systems
Click Discovered Systems to view a list of systems TrueCommand® has detected on the local network. A system can be added from the list to TrueCommand® by clicking ADD THIS SYSTEM. Enter a nickname and the password for the system. Click ADD SYSTEM.
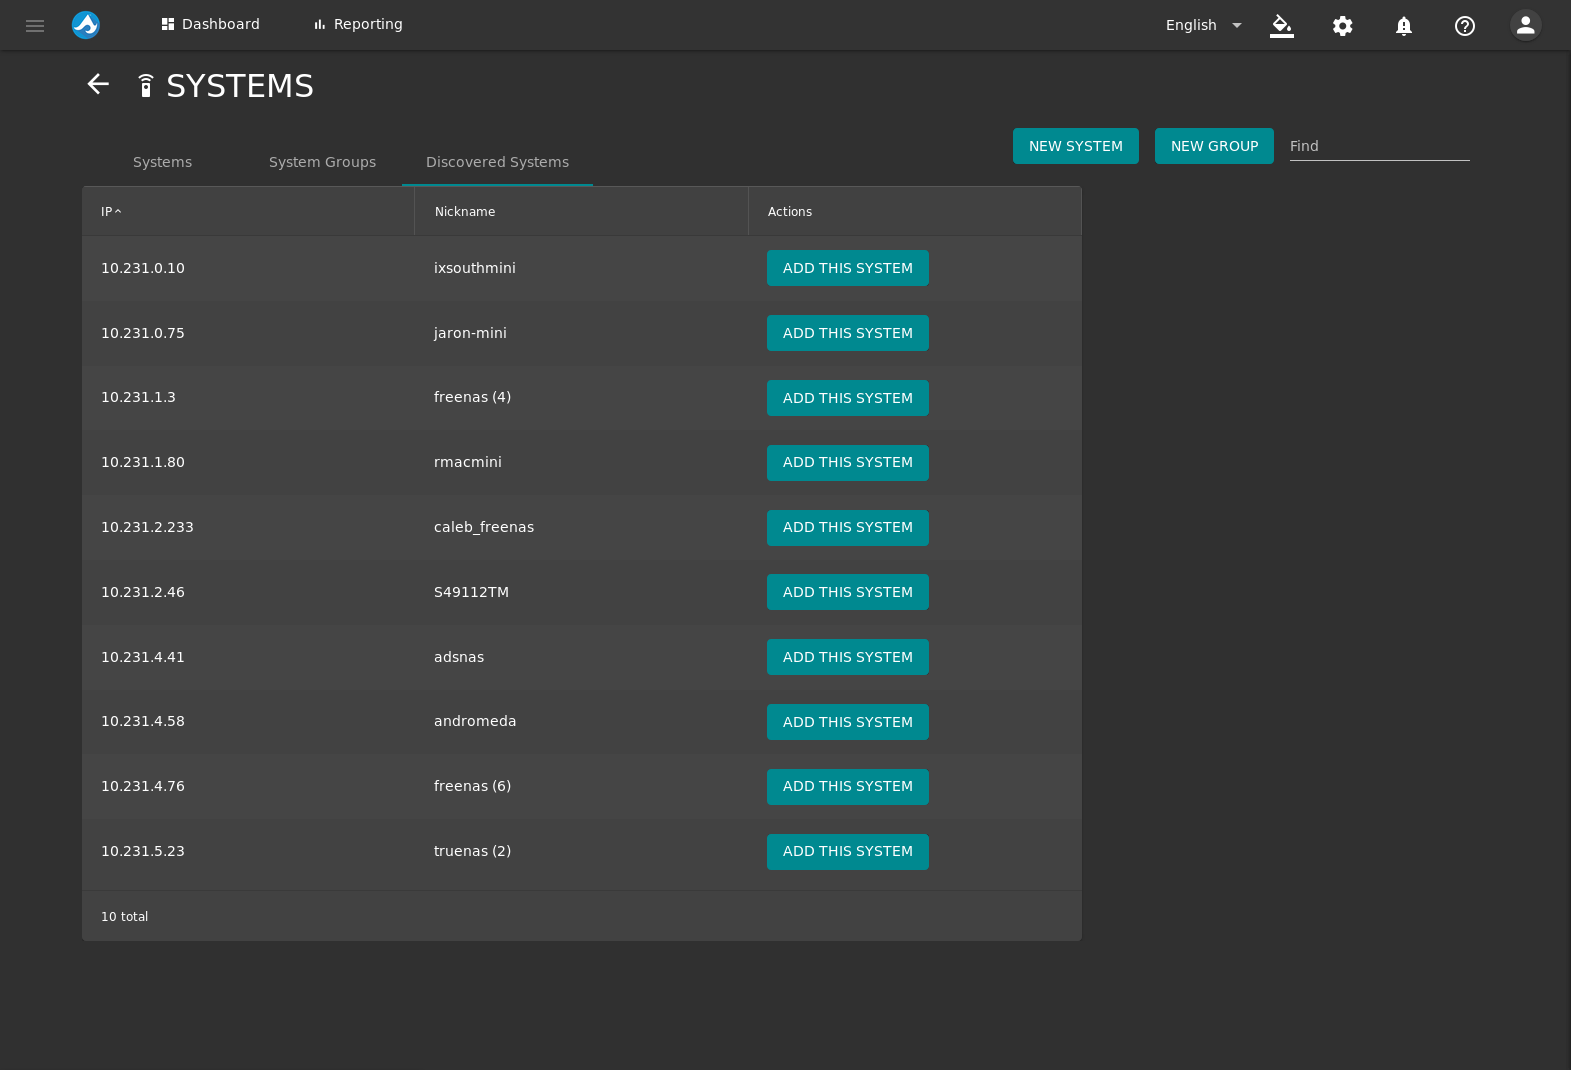
Fig. 5.2.1 Discovered Systems
6. Users
TrueCommand® allows multiple people to connect to the system with personalized settings. Each person has a unique user account.
6.1. Add User
Register a new user by clicking (Settings) . Enter a descriptive username and an authentication method for the user. The DEFAULT auth method is the normal login to TrueCommand®. LDAP/AD allows for a single sign on experience through Lightweight Directory Access Protocol (LDAP) or Active Directory (AD).
After entering the information, click CREATE USER to add the user to TrueCommand®. Repeat this process to add multiple users.
Users can be assigned to Teams. When a team is created, select a team from the drop-down to add the user to that team. Users can be members of multiple teams.
Users can be deleted by clicking (Delete).
Warning
Deleting a user permanently removes the user and cannot be undone.
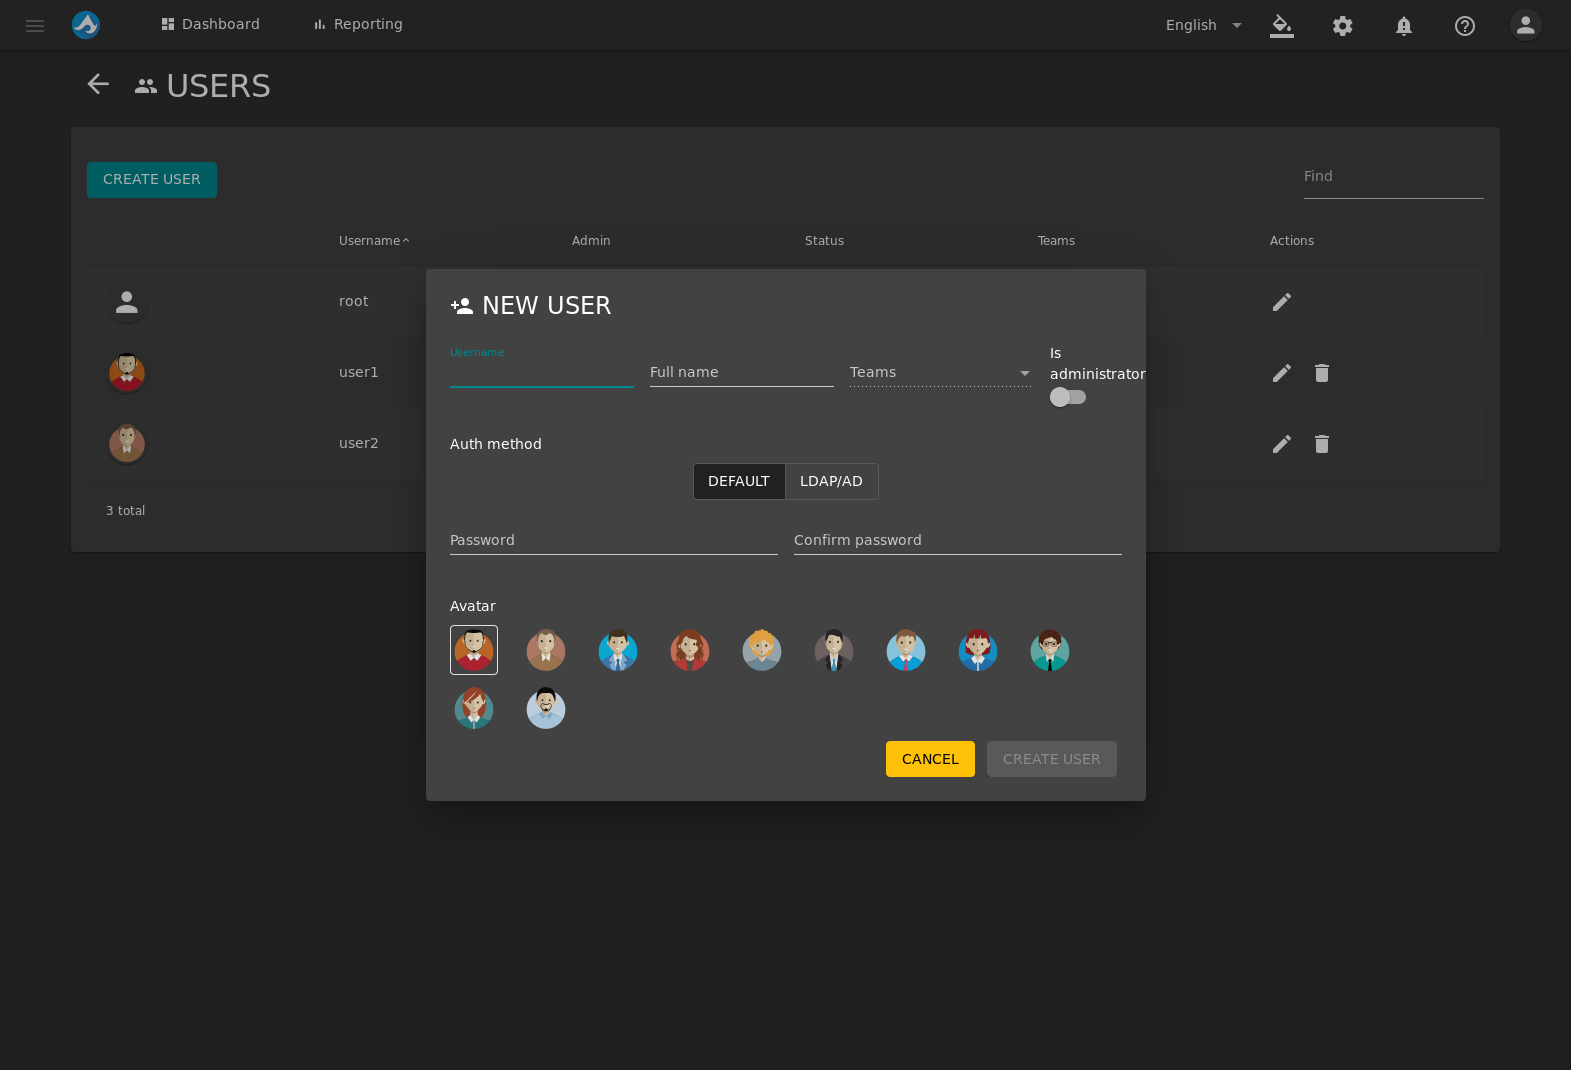
Fig. 6.1.1 Adding a User
6.2. Edit User
Edit users from the (Settings) (Edit Item) menu. These details can be changed for a user:
- AVATAR: Click (Edit Item) and choose an avatar image. An avatar is a picture associated with the user.
- USER DETAILS: A user can be given administrator privileges by clicking the slider. The Username, Full Name, Title, Email, Phone, and Auth method can be changed. To go back to the original contents of the fields, click RESET FORM.
- JOINED TEAMS: The CREATE A NEW TEAM button appears if no teams exist. When teams are present, the JOIN TEAM button appears. Click JOIN TEAM to add the user to a team. Users can be added to multiple teams. Click (Remove) to remove the user from a team.
- SYSTEM ACCESS: The MANAGE SYSTEMS button appears if a system has not been added to TrueCommand®. When a system has been added, the ADD SYSTEM button appears. Click ADD SYSTSEM and select a system from the drop-down to give the user access to that system. To assign the type of access to the system, choose read or read/write from the ACCESS drop-down. To remove a user’s access to a particular system, click (Remove) on the desired system.
- SYSTEM GROUPS: A MANAGE GROUPS button appears if a group has not been created. When a group has been created an ADD GROUP button appears. Click ADD GROUP and select a group from the drop-down to give the user access to all the systems in that group. To assign the type of access to the group, chose read or read/write from the ACCESS drop-down. To remove a user’s access to a particular system, click (Remove) on the desired group.

Fig. 6.2.1 Editing a User
7. Teams
Teams are a collection of users. They provide a more efficient way of managing users. For example, changing the permissions for one team is much faster than changing the permissions for many individual users.
7.1. Add Team
A team is created by clicking (Settings) . Enter a name and select an avatar for the new team. Click CREATE TEAM to create the team.
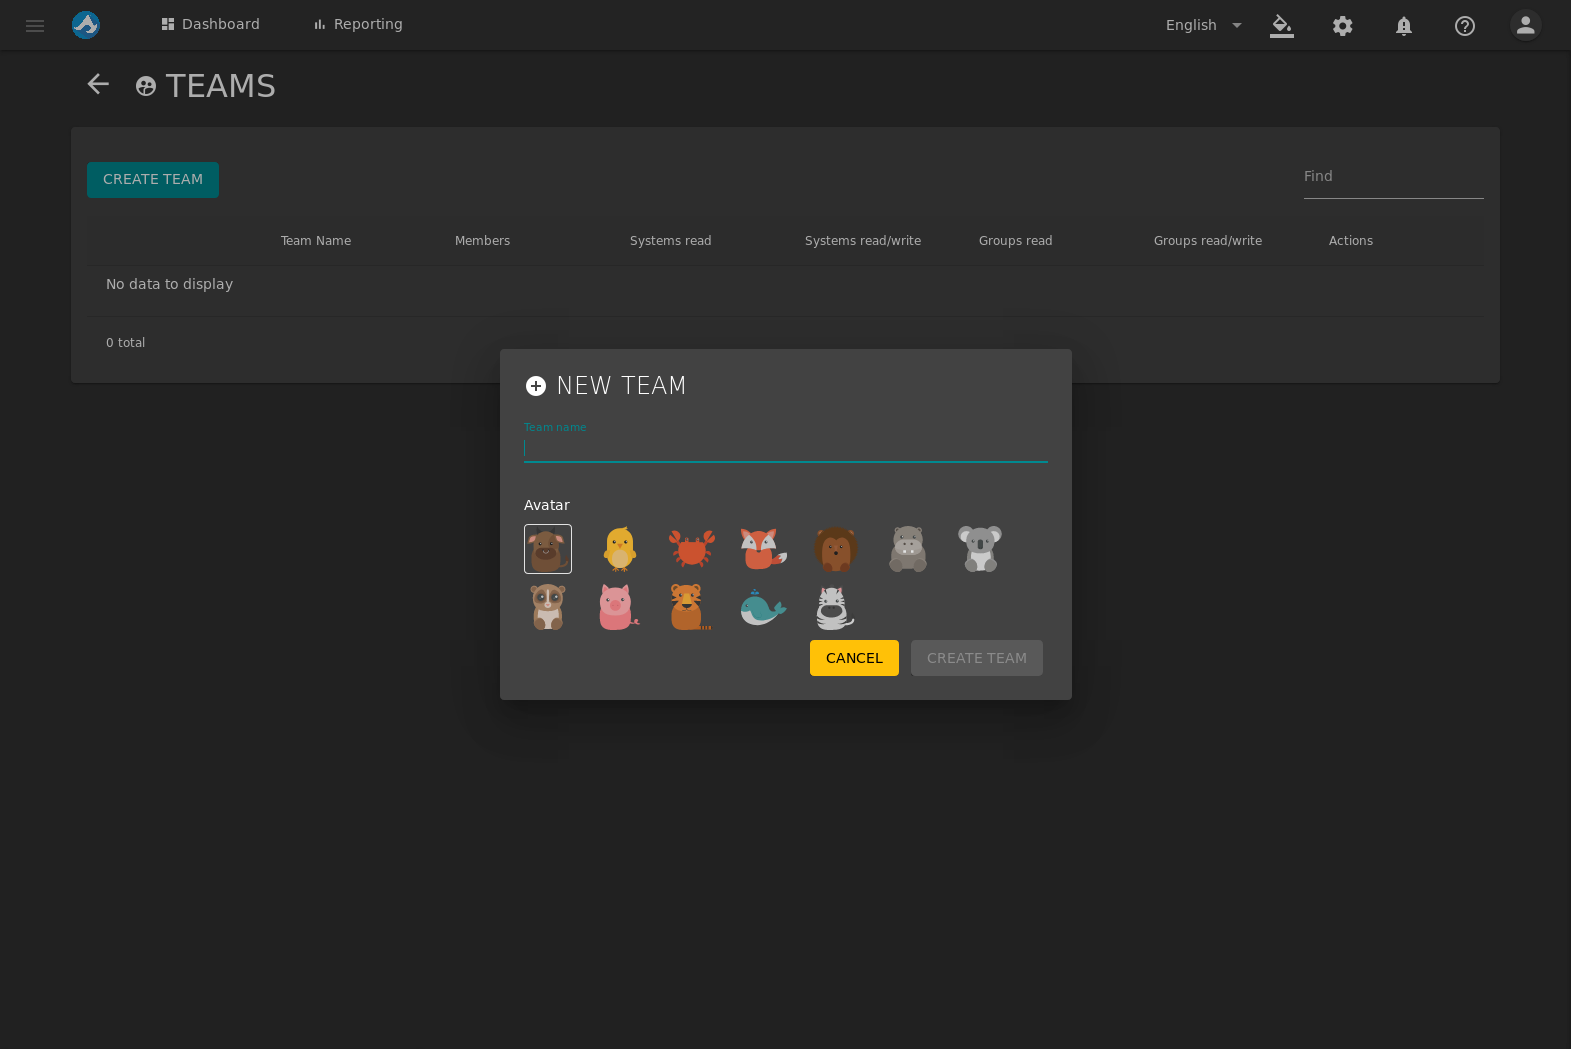
Fig. 7.1.1 Adding a New Team
7.2. Edit Team
Click (Settings) (Edit Item) to edit a team. These options can be changed:
- TEAM AVATAR: Click (Edit Item) to upload an avatar image or use an existing image.
- MEMBERS: To add users to the team, click ADD USER and choose them from the drop-down. To remove users from the team, click (Remove) on the desired user.
- SYSTEM ACCESS: Give the team access to specific systems by clicking ADD SYSTEM and selecting systems from the drop-down. This gives all users that are a part of the team access to the systems selected. To change the type of access, click read or read/write from the ACCESS drop-down. To remove a system from access by the team, click (Remove) on the desired system.
- SYSTEM GROUPS: Give the team access to created groups of systems by clicking ADD GROUP and selecting groups from the drop-down. This gives all members of the team access to the group of systems selected. To change the type of access, click the ACCESS drop-down and select read or read/write. To remove a group from access of the team, click (Remove) on the desired group.
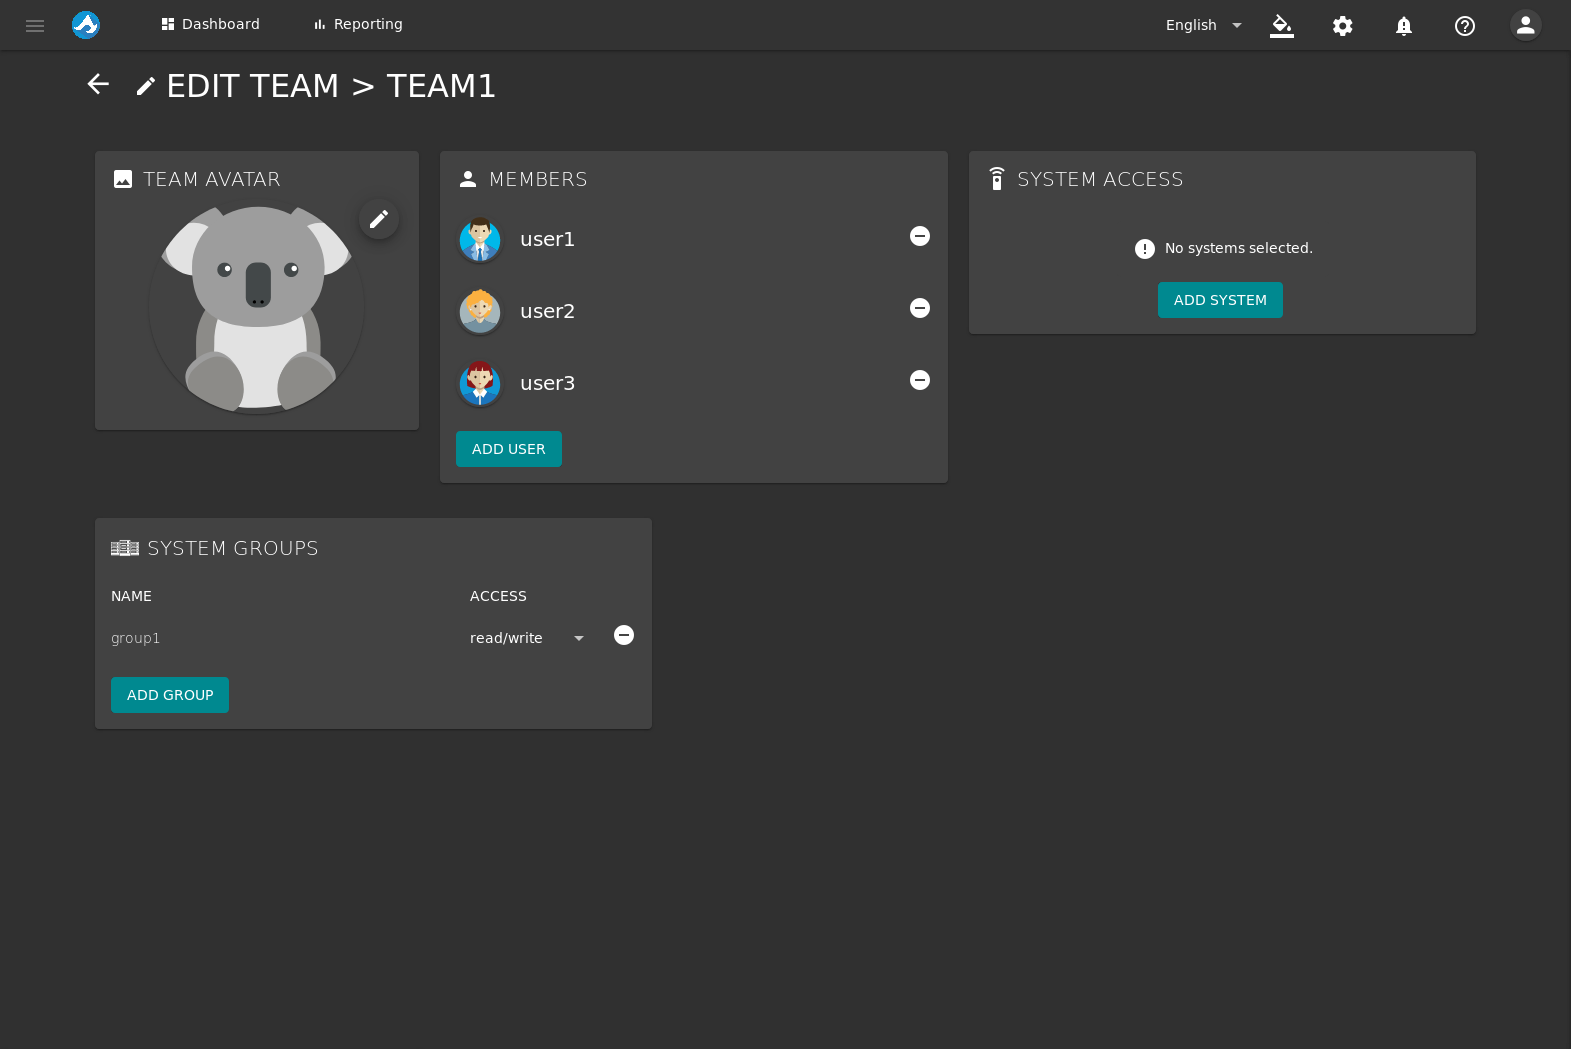
Fig. 7.2.1 Editing a Team
8. Reporting
The Reporting page provides graphs about the systems TrueCommand® is monitoring. The default report shows a memory usage summary for all systems. This includes active memory, unused memory, and cache usage.
View the Reporting page by clicking Reporting. This page shows one day of data by default. Adjust the time shown by clicking 7D for one week, 1D for one day, and 1H for one hour of data.
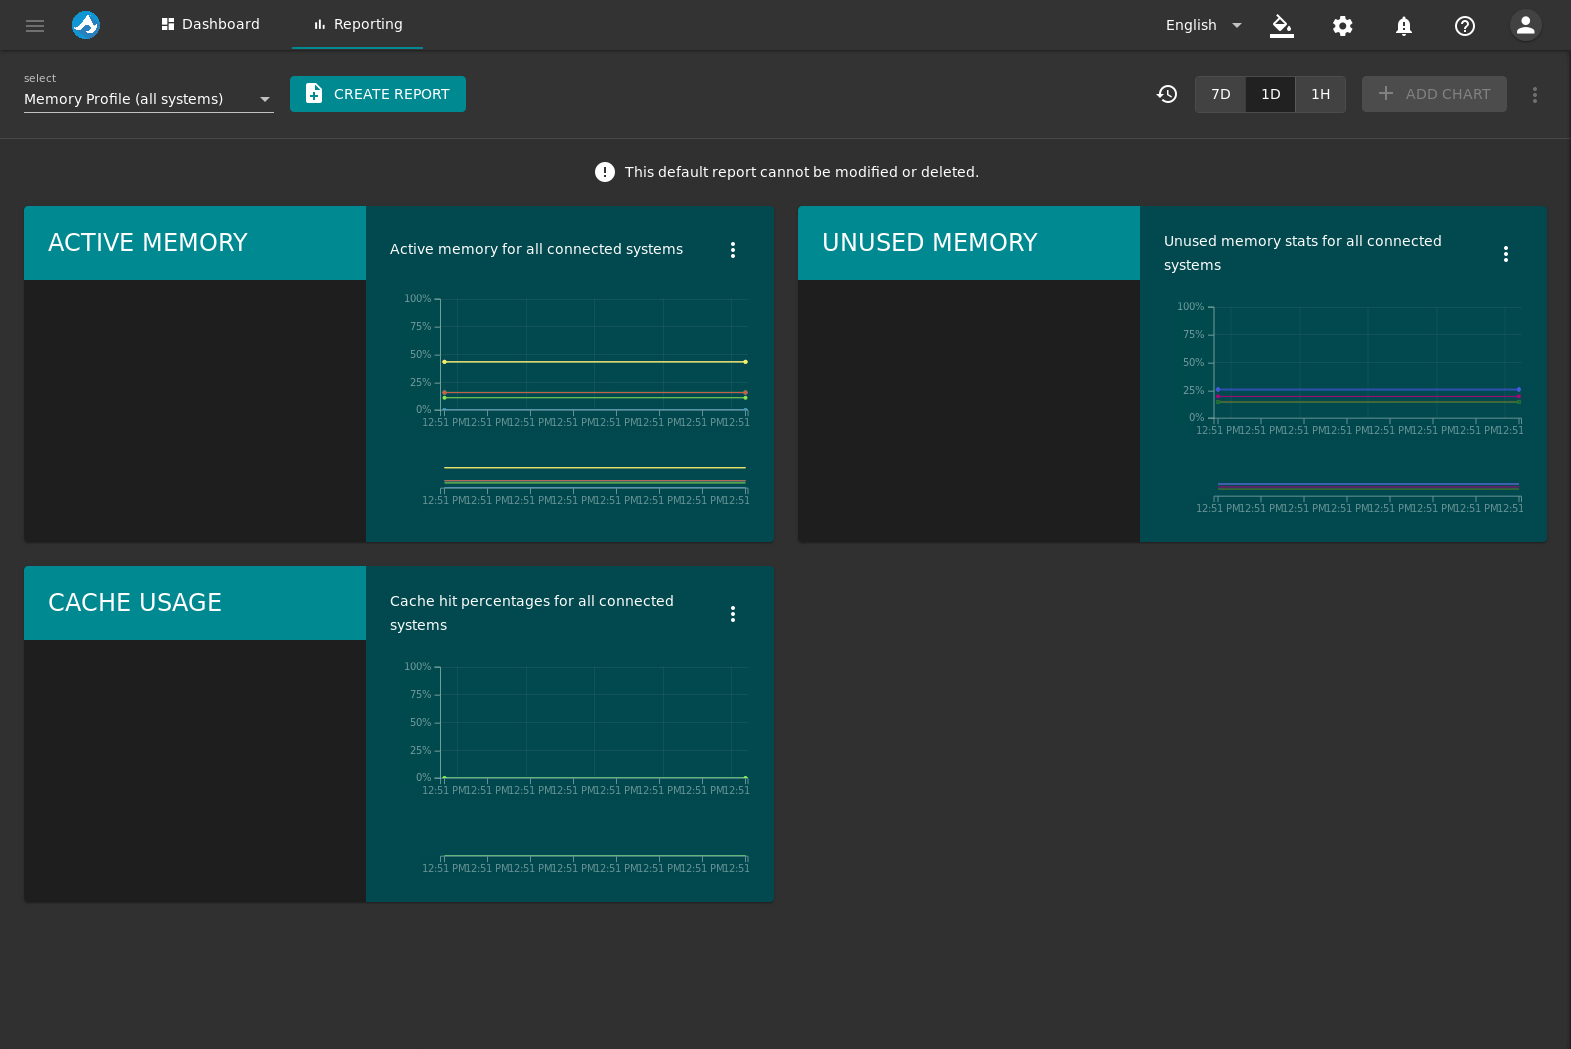
Fig. 8.1 Reporting Page
8.1. Create Report
Click CREATE REPORT to create a customizable report. Enter a title and a description for the report. Click CREATE REPORT under the Description field. Click ADD CHART and follow the wizard to add a customized chart to the report:
- General Info: Enter a chart title and description. Click NEXT.
- Select systems: Add systems to the chart by clicking ADD SYSTEM. Select systems from the drop-down menu. Remove systems by clicking (Remove). Click NEXT.
- Select data sources: Click (Expand) on the desired system. Click (Expand) for the category of data source and select the desired data source. Multiple data sources can be selected.
- Advanced Options: Select the chart type from the Chart Type drop-down. An optional Y Axis label can be defined. Increase or decrease the size of the datapoints by changing the value for Datapoint size (px). Set Y Axis Range Minimum and Y Axis Range Maximum as desired.
- Finished: Click CREATE CHART to create and show the chart. The process can be restarted by clicking RESET.
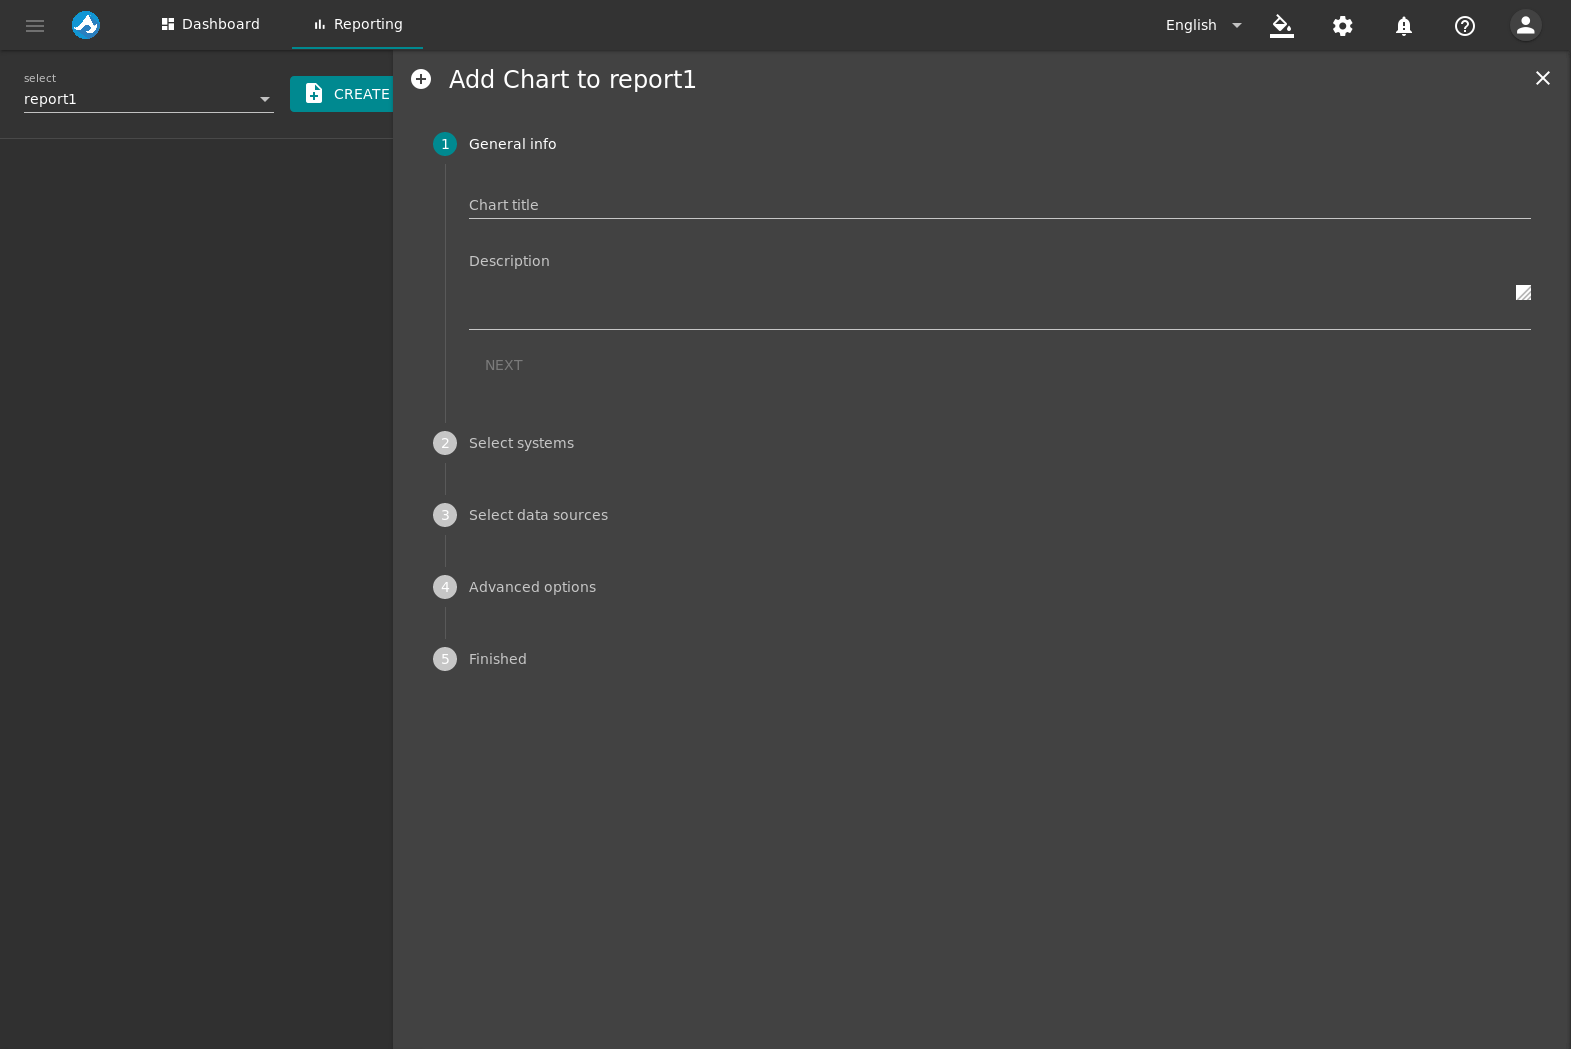
Fig. 8.1.1 Adding a New Chart
A CSV or JSON file of the chart can be downloaded by clicking (Options) or (Options) . Charts can be deleted from the report by clicking (Options) . Charts can be moved by clicking and holding (move).
Reports can be deleted by clicking (Options) .
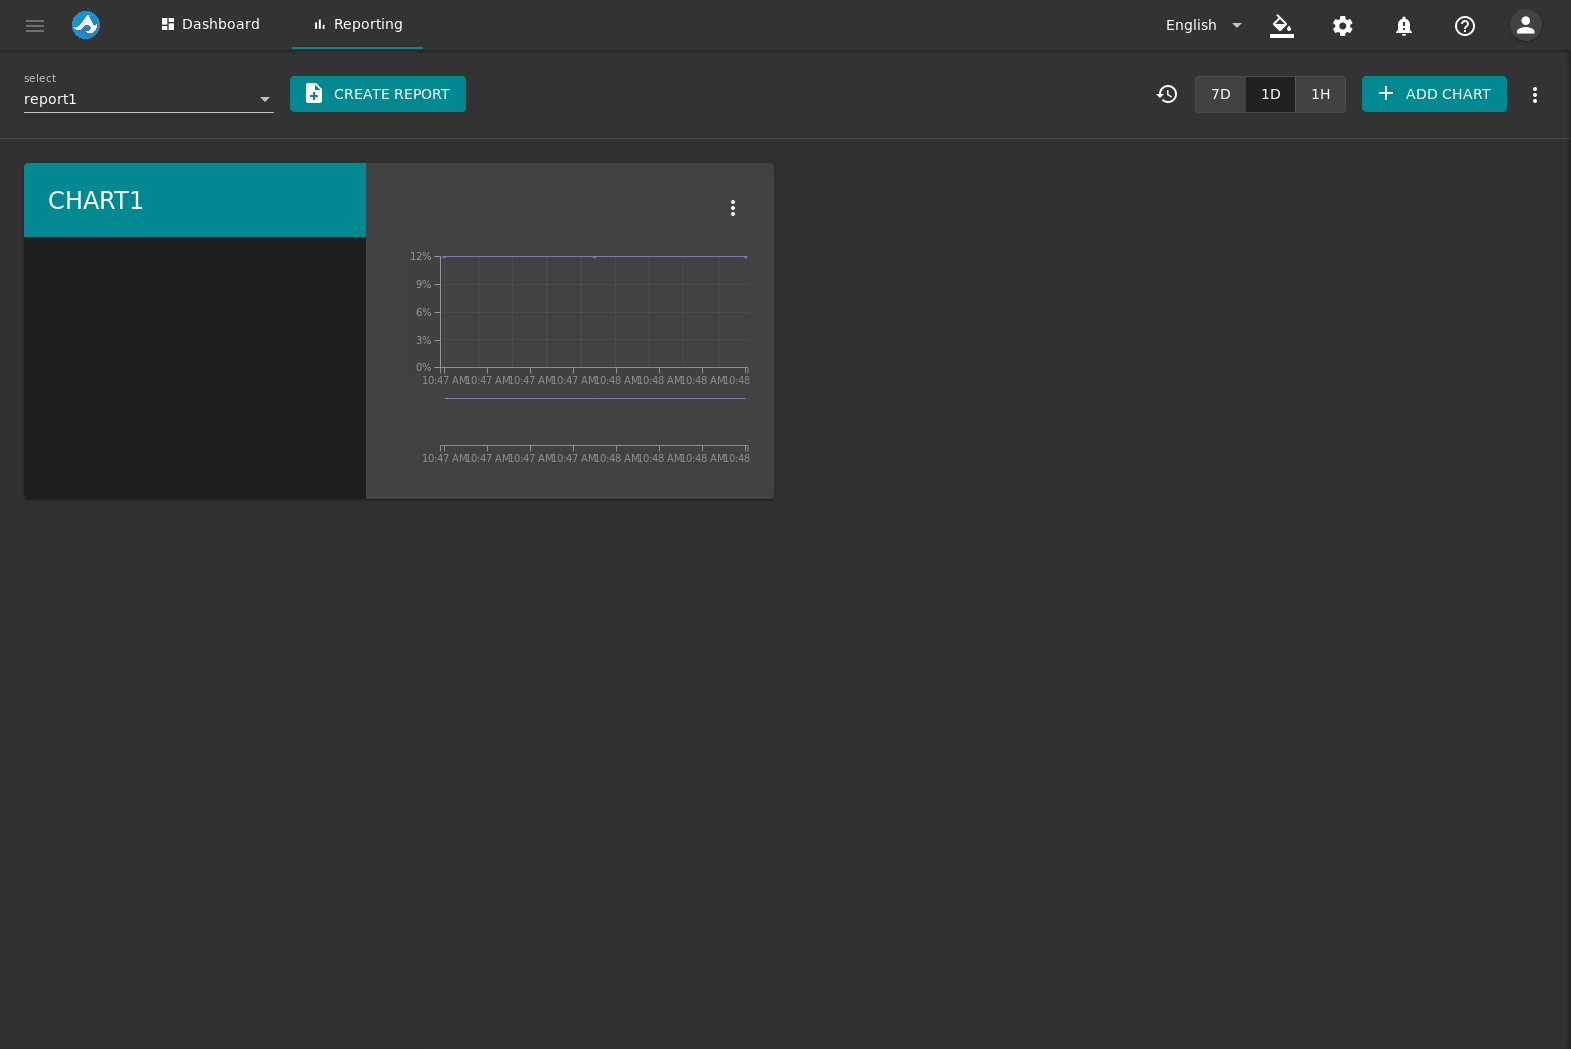
Fig. 8.1.2 Custom Report
9. Logs
Logs track user actions on TrueCommand®. For example, if a user deletes a system from TrueCommand®, the log records which user deleted it along with other information associated with the deleted system. Click an entry in the logs to show more information.
The SYSTEMS panel has options to HIDE ALL or SHOW ALL actions affecting connected systems.
The USERS panel also has HIDE ALL and SHOW ALL options for user related actions..
Logs can be filtered by date. Change the end and start date by manually entering a specified date or click (Calendar) to select a date from the calendar. Click REFRESH to refresh the list to the latest entries.
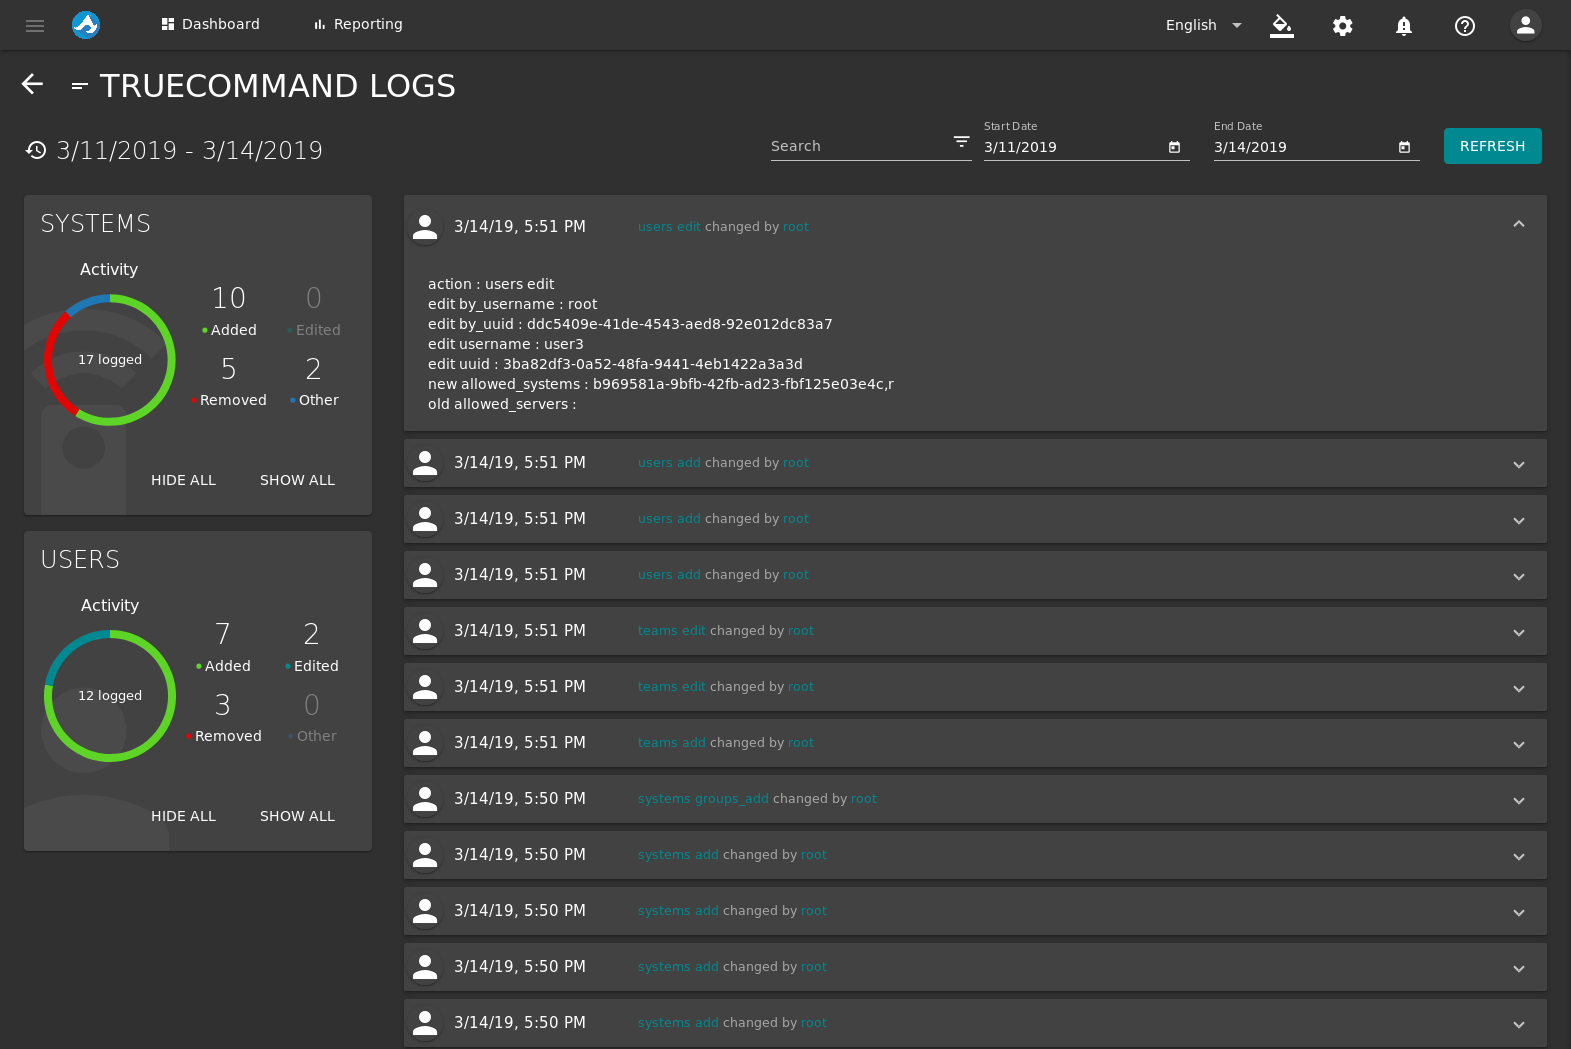
Fig. 9.1 Users Edit Example
10. Alert Rules
The TrueCommand® alert system provides visual warnings for monitored systems that require attention. The current number of alert rules, total notices, and the most recent alert notice are shown at the top of the page. New alert rules can be created to monitor a wide variety of system information. The Alert Rules page is accessed from (Settings) . Click on an alert rule to view more information about it.
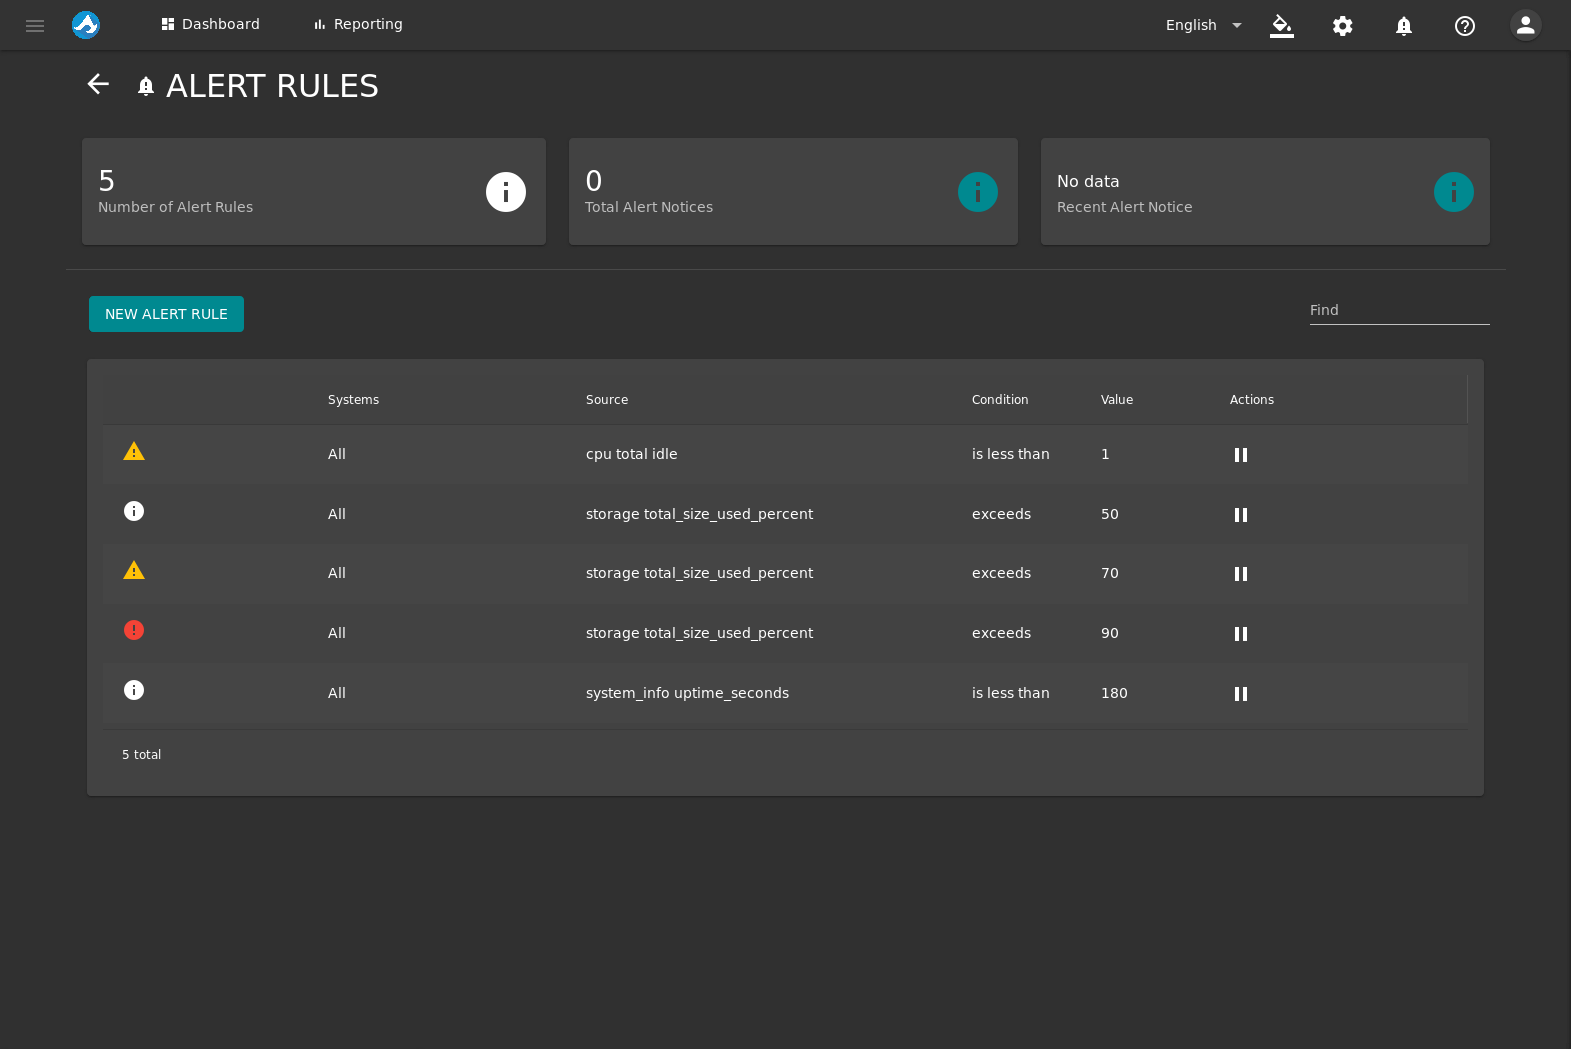
Fig. 10.1 Alert Rules Page
10.1. Add Alert Rule
To create a new alert rule, click NEW ALERT RULE and follow the creation wizard:
- Select a System: Choose a system to create an alert for and click NEXT.
- Select a Data Source: Choose a data source for the alert. For example, choosing cpu_temp makes the alert about the cpu temperature for the chosen system. Click NEXT.
- Type and Threshold:
- Field to Scan: This is the system data TrueCommand® will monitor. The options change depending on theData Source.
- Importance of Rule: Choose Information, Warning, or Critical. This determines the severity of the alert.
- Comparison Type: A conditional statement that applies to the Field to Scan and the Comparison Value.
- Comparison Value: Enter a value appropriate to the options scenario and options selected.
- Finished: To create the new alert, click CREATE ALERT. To start over, click RESET.
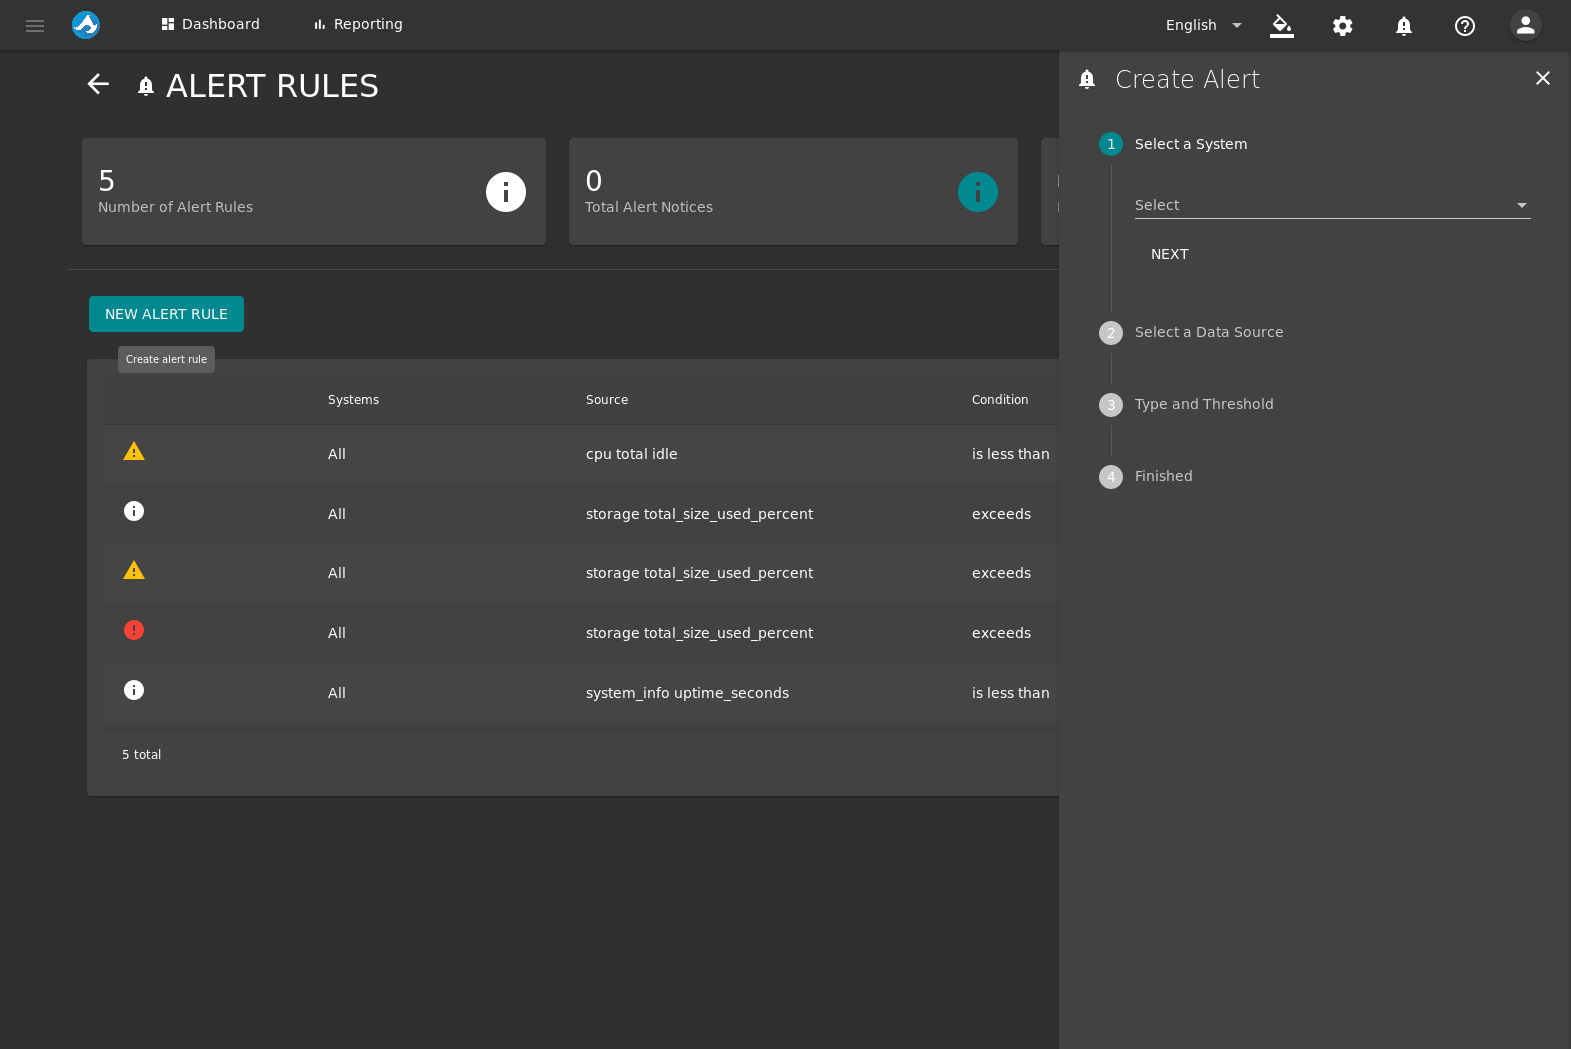
Fig. 10.1.1 Adding a New Alert Rule
Alert rules can be deleted by clicking (Delete). Alert rules can be disabled temporarily by clicking (Pause).
11. Administration
The ADMINISTRATION page has three tabs: About, Updates, and Email Setup. The ADMINISTRATION page is accessed from (Settings) .
Note
The Administration option is only available to users with admin permissions.
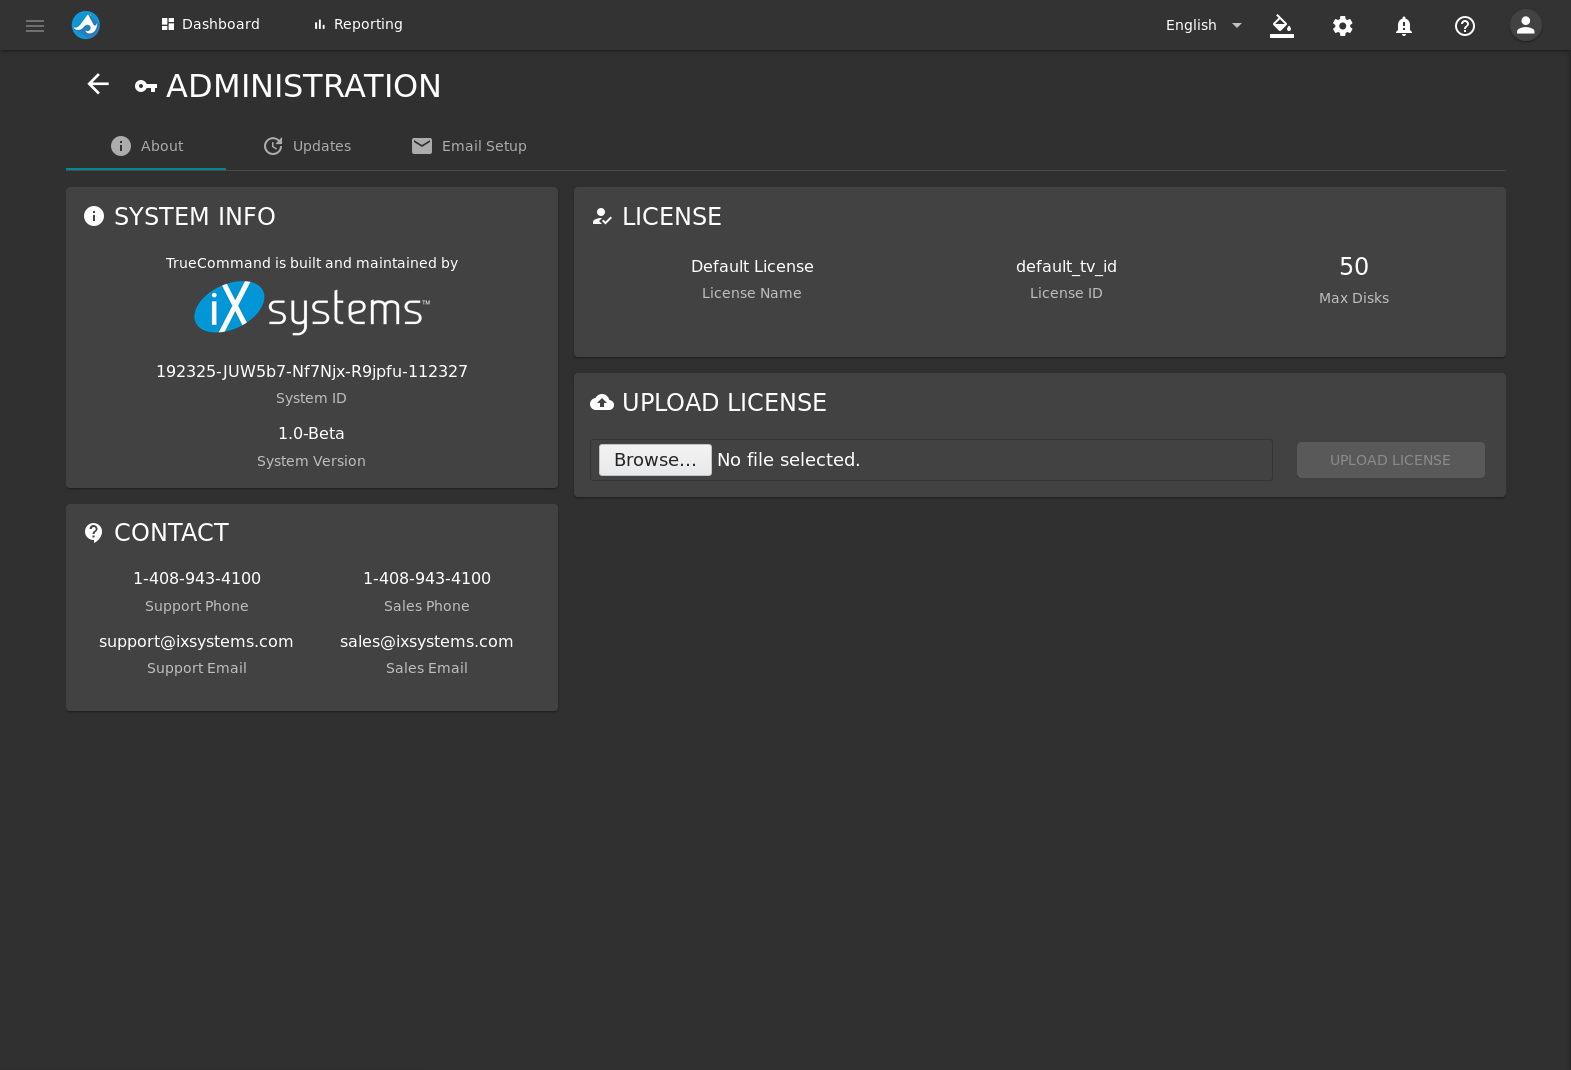
Fig. 11.1 Administration Information
The About tab contains:
- SYSTEM INFO: Includes system ID and the system version of TrueCommand® installed.
- LICENSE: Displays the current license and the maximum number of disks the license allows.
- CONTACT: Includes the iXsystems™ support phone number and email as well as the sales phone number and email.
- UPLOAD LICENSE: Click Browse… to open the file browser. Select the new license file to upload. Click UPLOAD LICENSE to apply the new license to TrueCommand®.
Note
Contact iXsystems™ support to upgrade the TrueCommand® license.
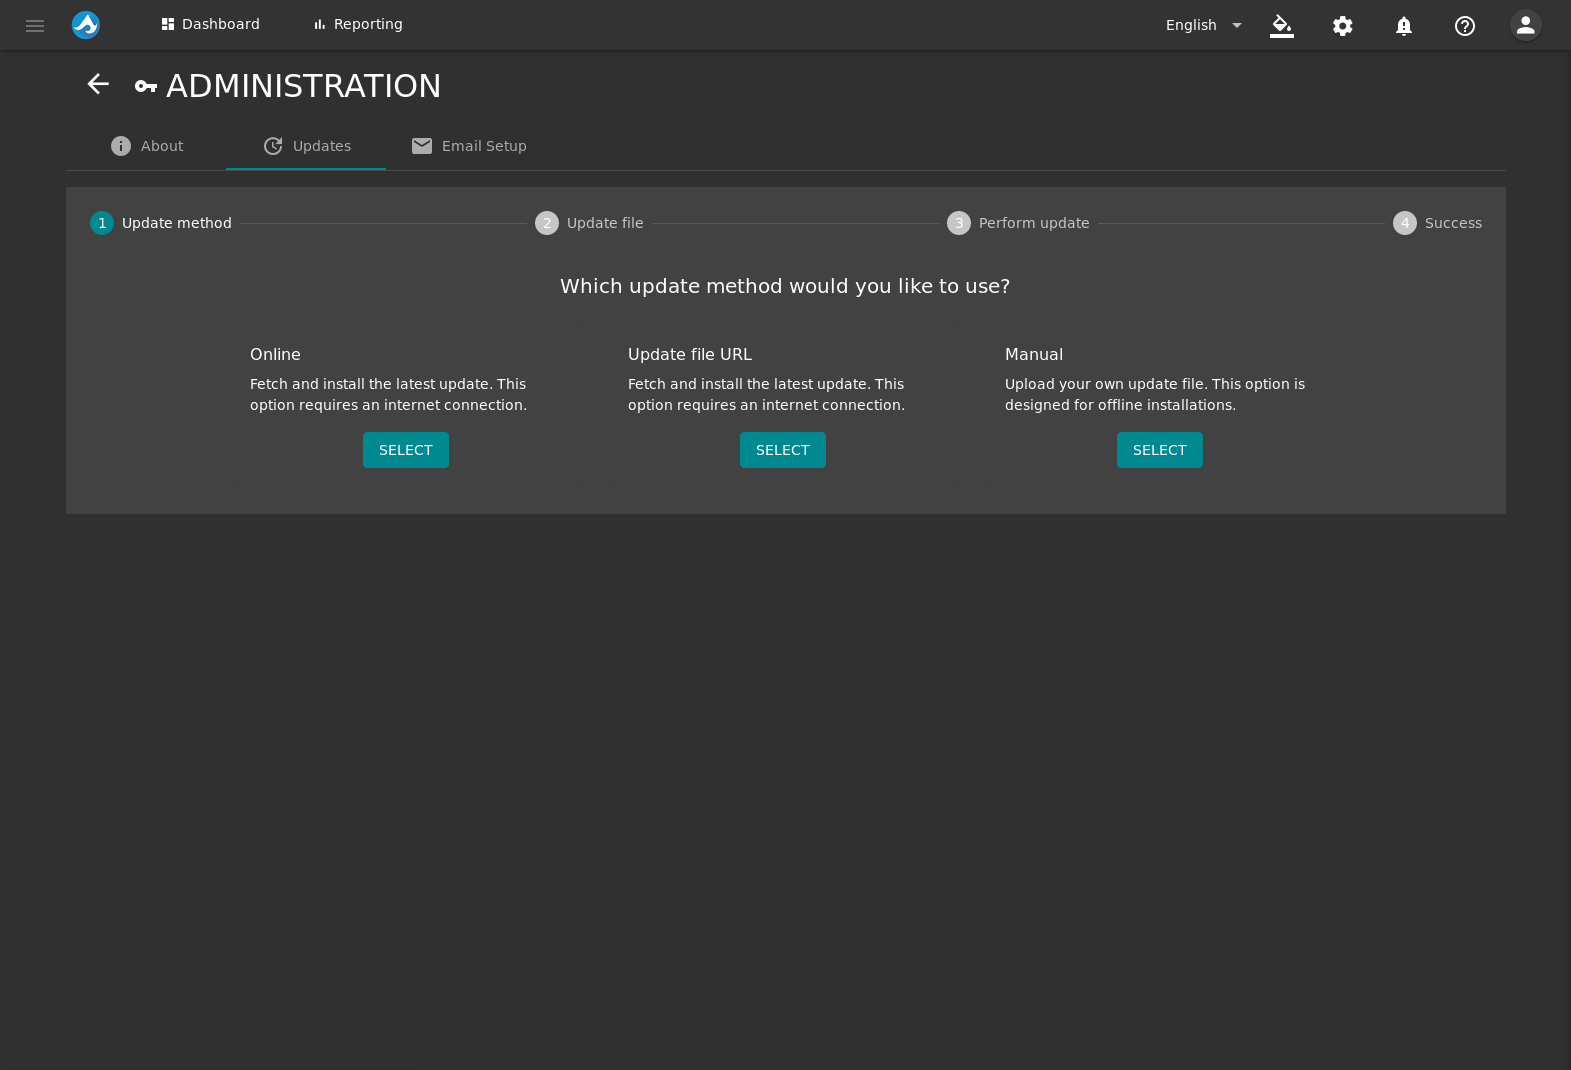
Fig. 11.2 Administration Updates
The Updates tab contains an update wizard:
- Update method: Choose the desired update method by clicking SELECT. Online fetches and installs an available update immediately. The system is automatically rebooted to apply the update. Update file URL updates TrueCommand® from the URL provided. Manual updates TrueCommand® from an uploaded file.
- Update file: If Update file URL was chosen, enter the URL of an update file. If Manual was chosen, upload an update file.
- Perform update: Shows the status of the update.
- Success: Shows if the update succeeded or not.
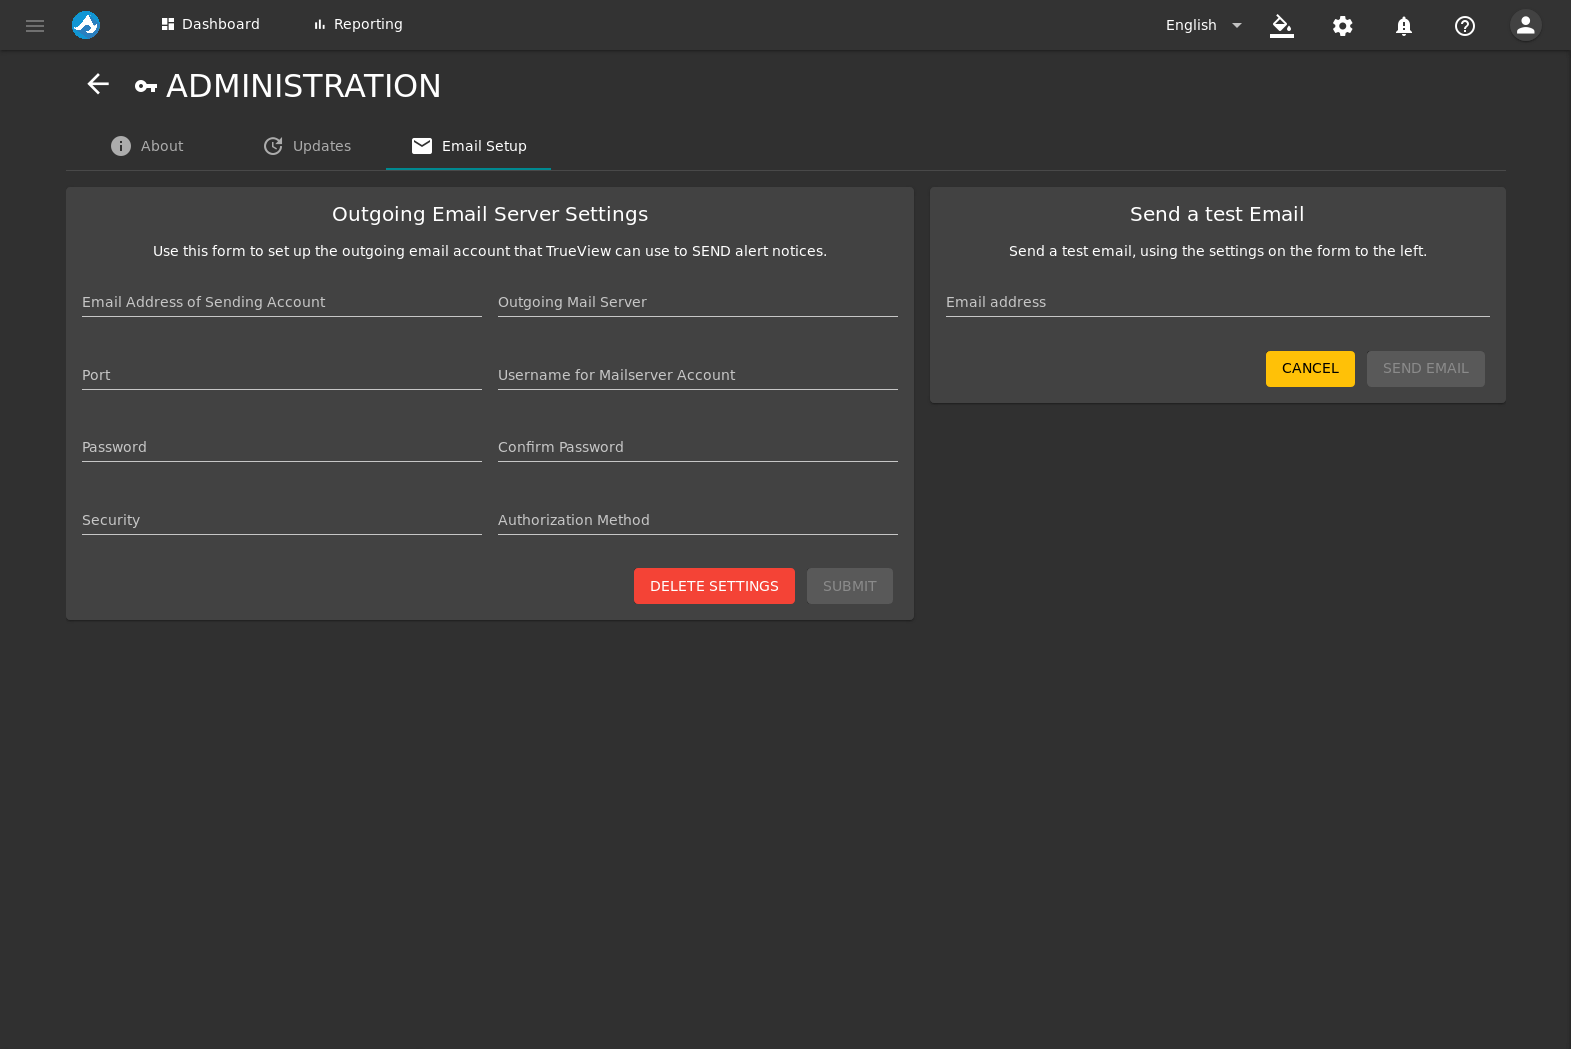
Fig. 11.3 Administration Email Setup
The Email Setup tab contains:
Outgoing Email Server Settings:
Field Description Email Address of Sending Account The name that appears in the From field of the email. Outgoing Mail Server The mail server DNS name for email submissions. For example, mail.example.com. Port Port number to use when contacting the email server. For example, 587. Username for Mailserver Account The username on the mail server. Password Password for the mailserver. Security Email encryption type. Enter TLS, STARTTLS, or TLS+STARTTLS. Authorization Method Mailserver authentication type. LOGIN, using a username and password, is standard. Click SUBMIT to confirm the outgoing email server settings. Click DELETE SETTINGS to remove the contents of the fields and delete the outgoing email credentials.
Send a Test Email: Enter an email address and click SEND EMAIL to send a test email using the current outgoing email server settings.
12. Help Text
TrueCommand® includes a help text feature that shows additional information when the mouse pointer is held over an element in the web interface.
Click (Help) to enable the help text dialog. When the dialog is enabled it is displayed in the bottom left corner of the web interface. When help text is enabled and the mouse pointer is held over an element, additional text about the element is displayed in the dialog. If help text is disabled and the mouse pointer is held over an element, a small tool tip is displayed.
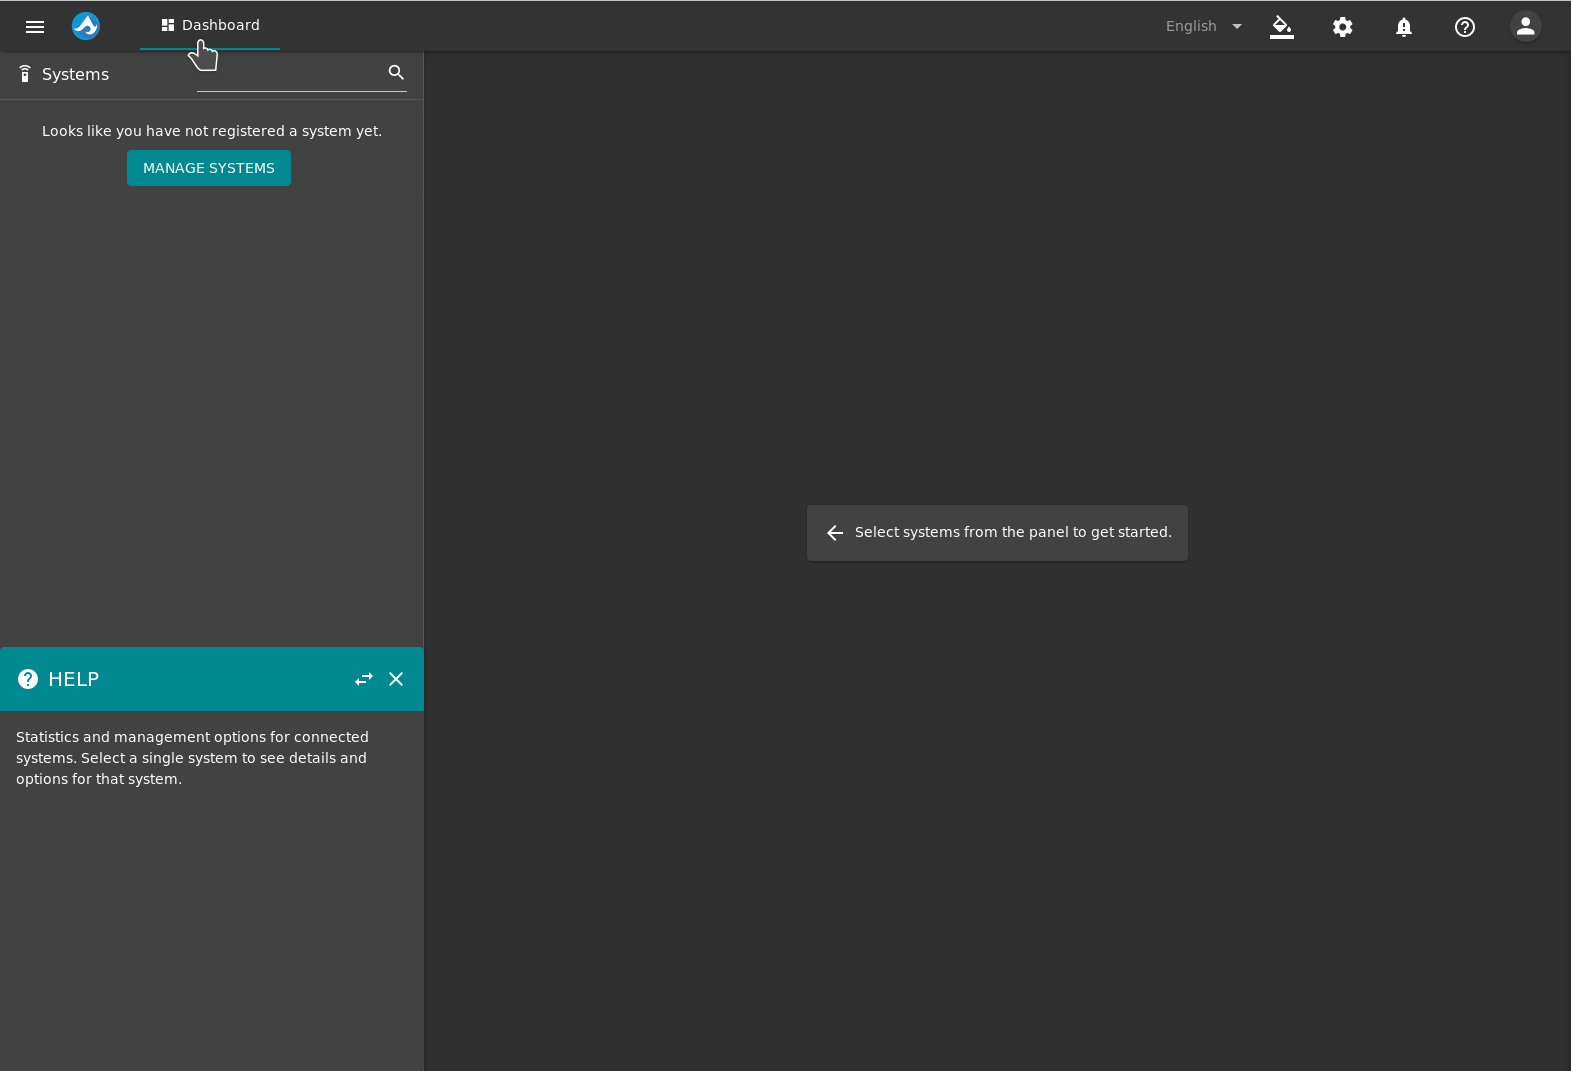
Fig. 12.1 Help Text for NEW SYSTEM button
13. API Tester
TrueCommand® has an API tester for advanced users and developers to test calls to the middleware. This is for users to use the middleware to program their own monitoring applications. API calls generate a response which is displayed on the page. The API tester can be used to interact with the middleware without using the web interface.
Click LOG to access the middleware log. Access the
TrueCommand® API documentation by entering /docs at the end of
the URL in the browser address bar.
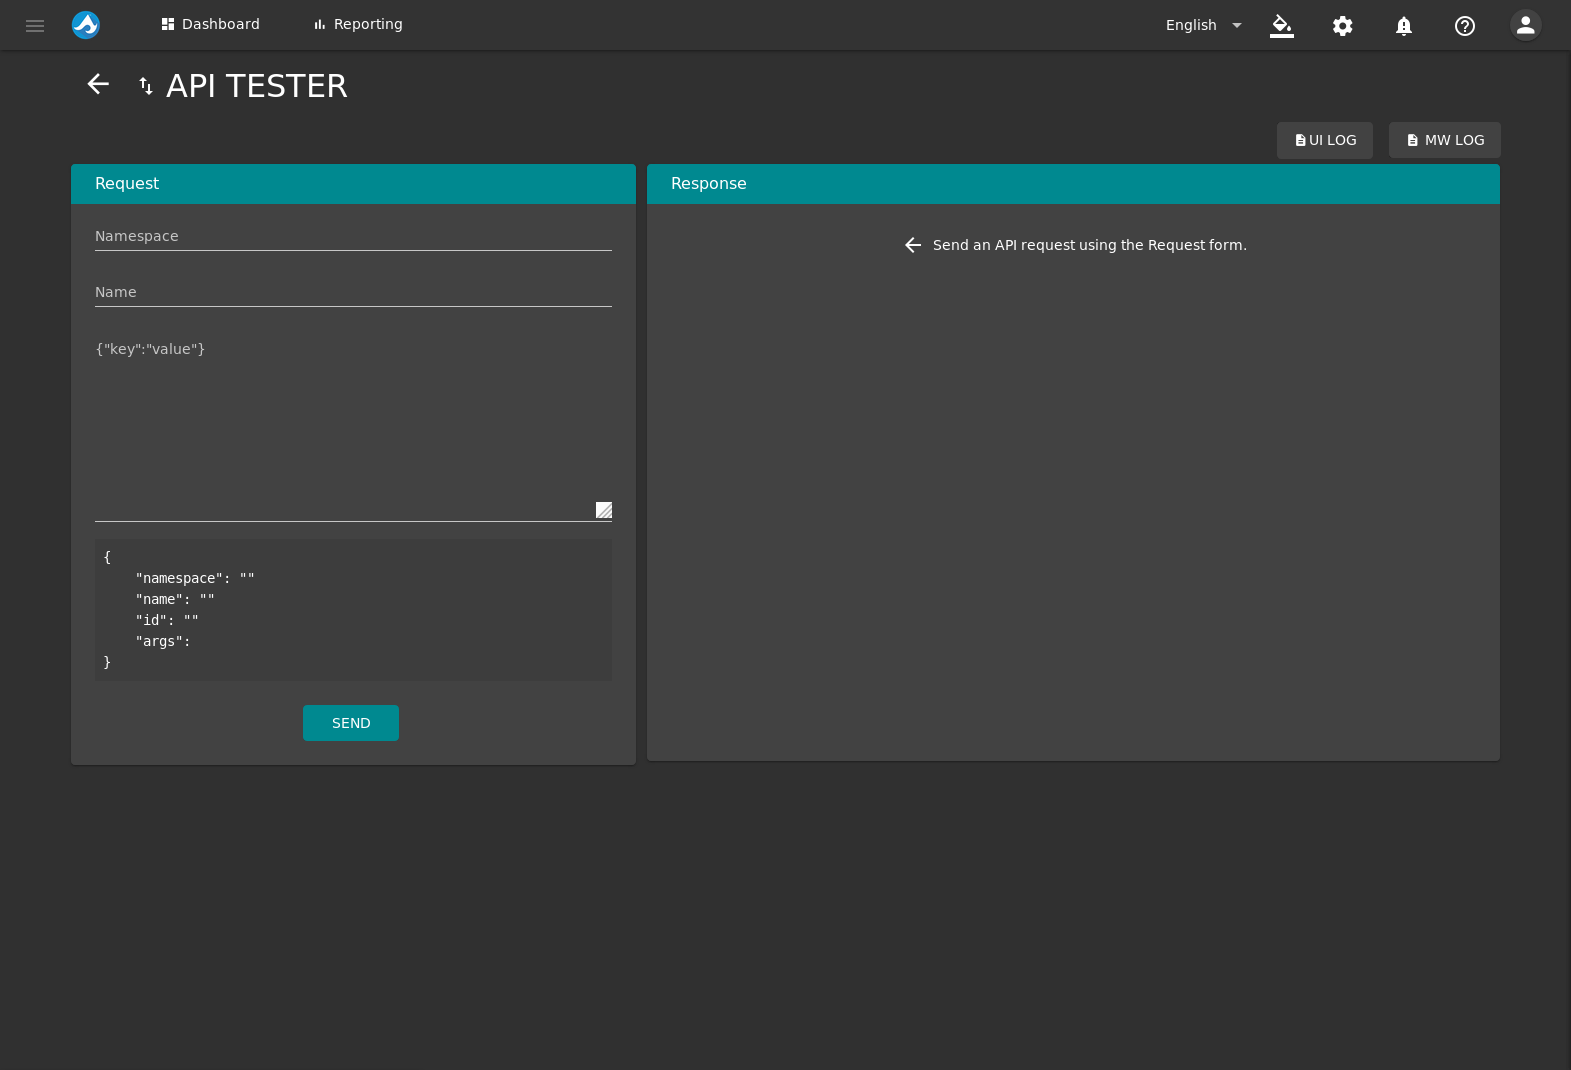
Fig. 13.1 API Tester
14. Alert Notices
The ALERT NOTICES page is a list of all alerts that TrueCommand® has issued. Alerts are notifications about the systems being monitored by TrueCommand®. The page shows the number of alert rules, the total number of alert notices, and the most recent alert notice. Click the avatar in the top right, then click Alerts.
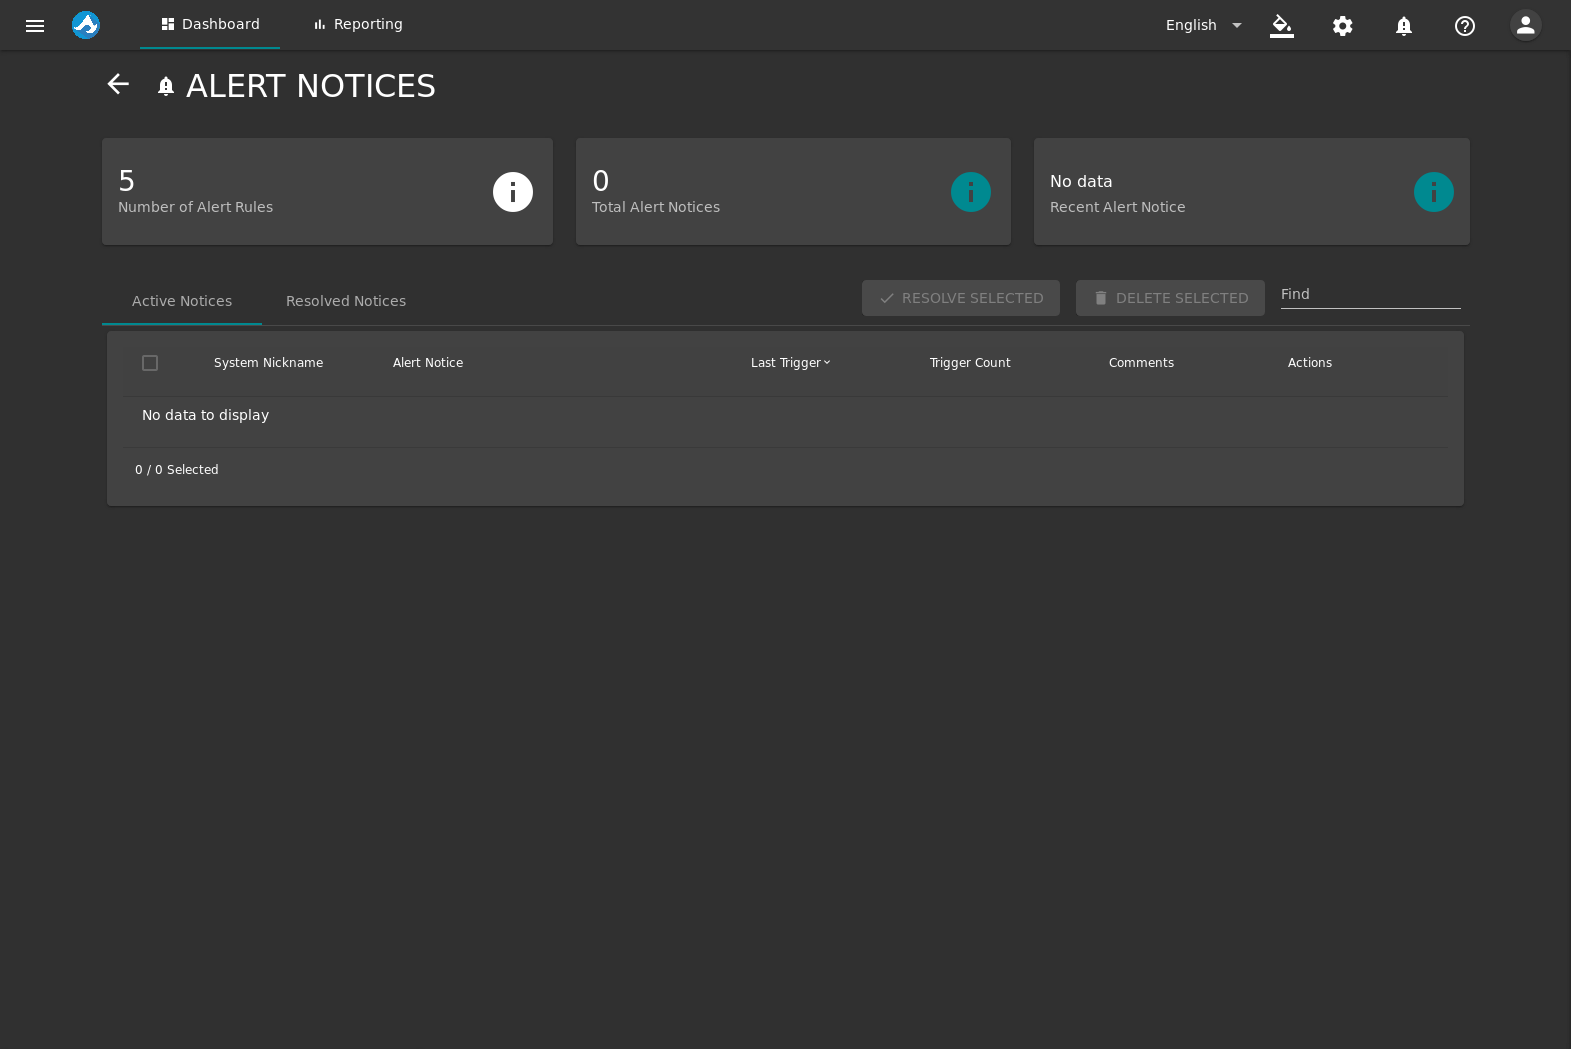
Fig. 14.1 Alert Notices
The Active Notices tab shows the list of alerts that have not been resolved or deleted. Resolve individual alerts by clicking (Resolve). To resolve multiple alerts, select the desired alerts and click RESOLVE SELECTED.
Click to view additional comments about an alert notice. Comments can be added to an alert notice by entering information in the Leave a comment field and clicking ADD COMMENT.
Alerts can also be deleted. Deleting an alert cannot be undone. Delete an alert by clicking (Delete). To delete multiple alerts, select the desired alerts and click DELETE SELECTED.
The Resolved Notices tab shows a list of all alerts that have been marked as resolved. Delete resolved alerts by clicking (Delete). To delete multiple resolved alerts simultaneously, set the desired resolved alerts and click DELETE SELECTED.