4. Settings
The (Settings) menu has shortcuts to edit the root account
settings and password, set interface preferences, view system
information, and switch to the Legacy Web Interface.
4.1. Edit root Account
Click (Settings) and Account to begin editing the
root account settings. This is the primary account used to
log in and interact with the FreeNAS® system. See the
User Account Configuration table for
details about each account option.
4.2. Change Password
Click (Settings) and Change Password to see a
simplified Change Password form. This is used to quickly
change the account password for the root and any other user
account that is not built-in to FreeNAS®.
Enter the Username and Current Password for the user account, then create and confirm a New Password. Click SAVE to update the account password.
4.3. Preferences
The FreeNAS® User Interface can be adjusted to match the user preferences. Go to the Web Interface Preferences page by clicking the (Settings) menu in the upper-right and clicking Preferences.
4.3.1. Web Interface Preferences
This page has options to adjust global settings in the web interface, manage custom themes, and create new themes. Figure 4.3.1 shows the different options:
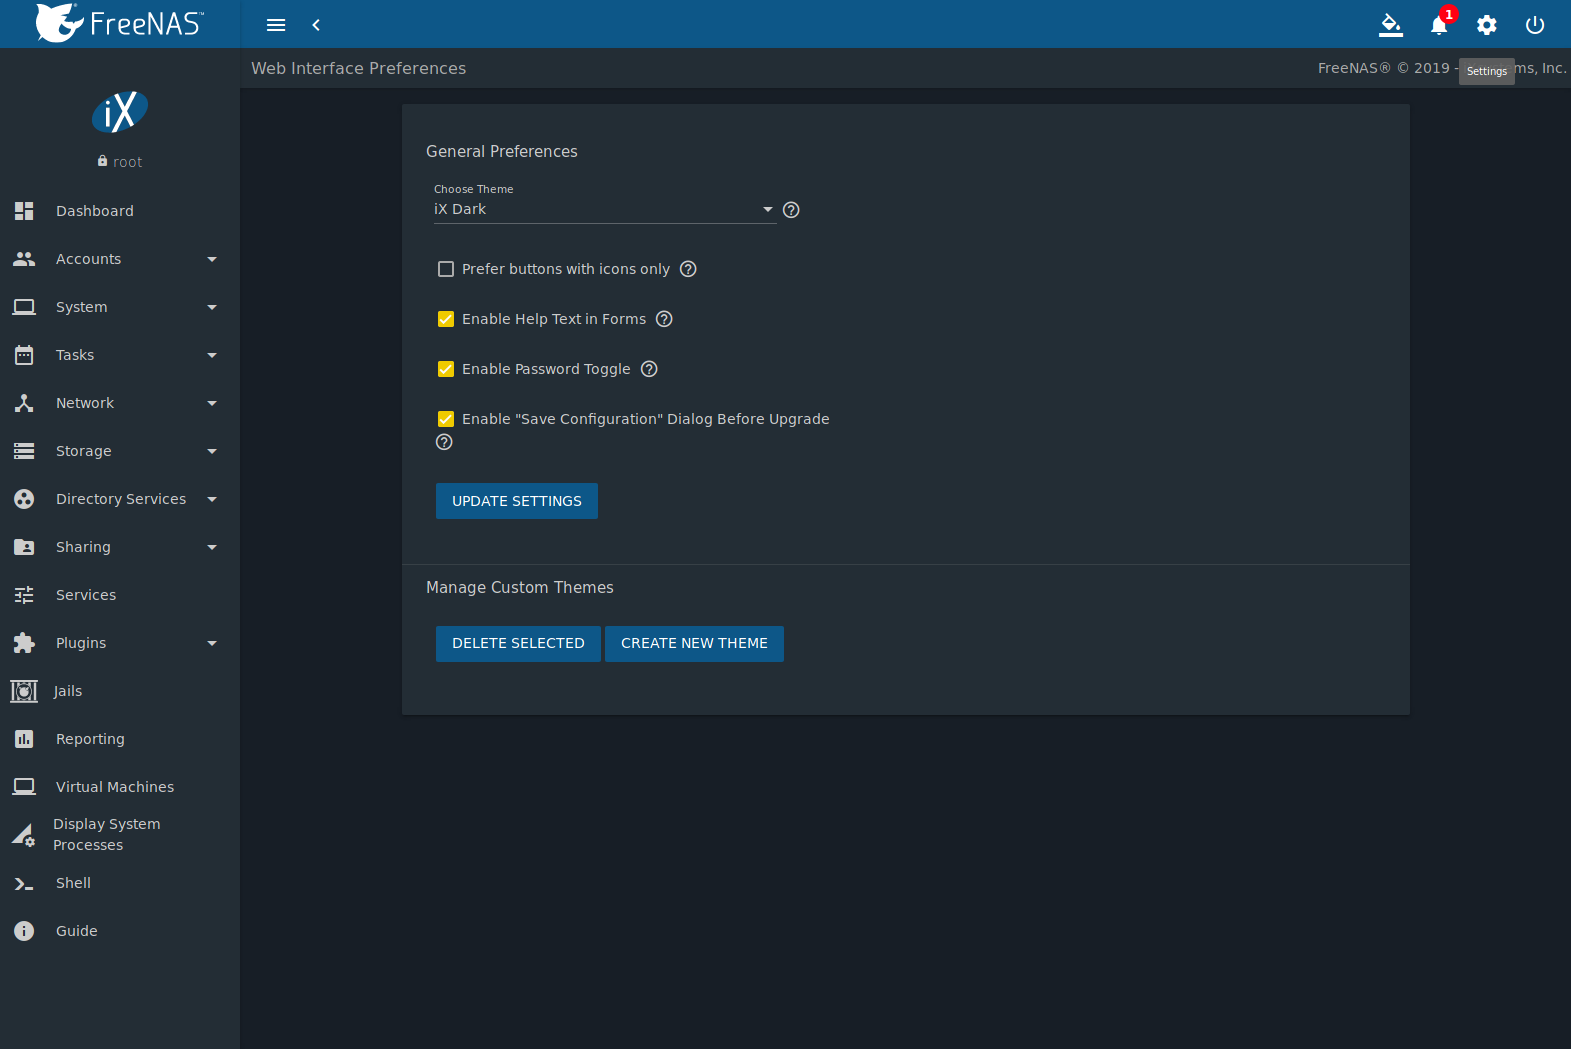
Fig. 4.3.1 Web Interface Preferences
These options are applied to the entire web interface:
- Choose Theme: Change the active theme. Custom themes are added to this list.
- Enable Help Text in Forms: Set to add pinnable help boxes to each form in the web interface. Unset to hide all help icons.
- Enable Password Toggle: Set to add the option to toggle between hidden or visible text for passwords in forms.
- Enable “Save Configuration” Dialog Before Upgrade: Shows a popup window to save the system configuration file on system upgrade.
Make any changes and click UPDATE SETTINGS to save the new selections.
4.3.2. Themes
The FreeNAS® web interface supports dynamically changing the active theme and creating new, fully customizable themes.
4.3.2.1. Theme Selector
Quickly change the active theme by using the theme selector. Look for the paint bucket icon in the upper-right corner of the web interface. Click the icon to see a list of different default and favorite themes. Figure 4.3.2 shows an example:
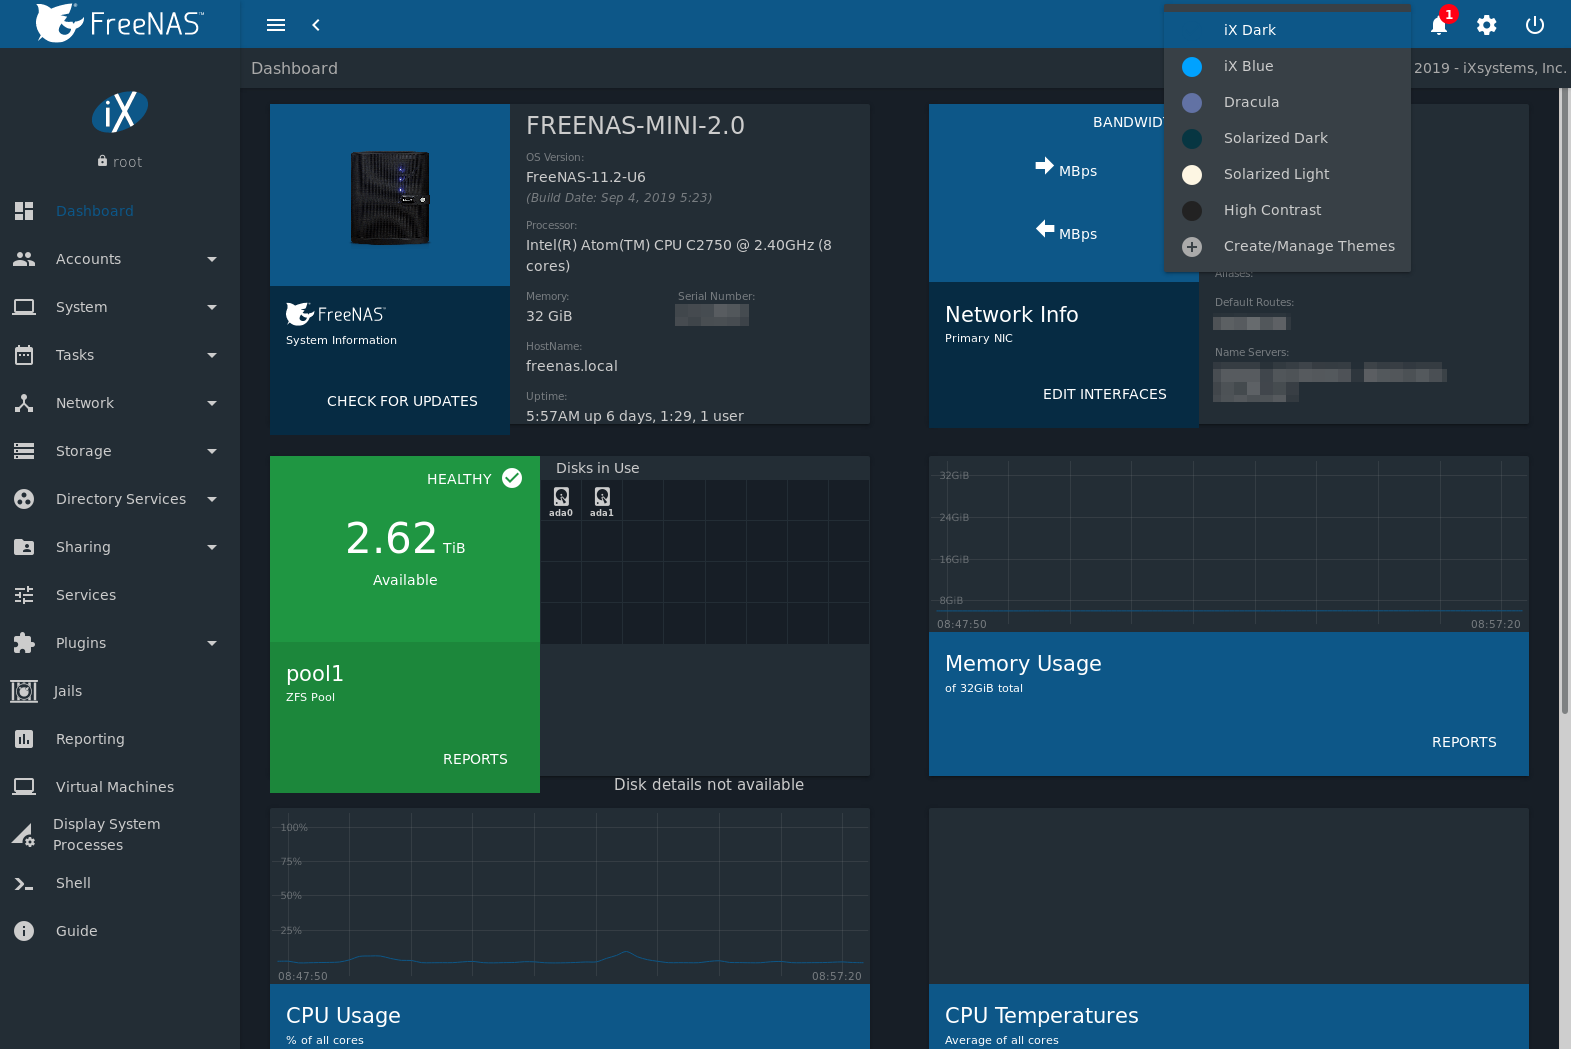
Fig. 4.3.2 Changing the FreeNAS® web interface theme
Click a theme to activate it.
Select Manage Themes to open the Web Interface Preferences page. The Manage Custom Themes column displays any created custom themes. Delete these themes by setting the options and clicking DELETE SELECTED.
Click CREATE NEW THEME to go to the Create Custom Theme page.
4.3.2.2. Create New Themes
This page is used to create and preview custom FreeNAS® themes. Figure 4.3.3 shows many of the theming and preview options:

Fig. 4.3.3 Create and Preview a Custom Theme
Select an existing theme from the Load Colors from Theme drop-down menu in the upper-right to use the colors from that theme as the starting values for the new custom theme. Table 4.3.1 describes each option:
| Setting | Value | Description |
|---|---|---|
| Custom Theme Name | string | Enter a name to identify the new theme. |
| Menu Label | string | Enter a short name to use for the FreeNAS® menus. |
| Menu Swatch | drop-down menu | Choose a color from the theme to display next to the menu entry of the custom theme. |
| Description | string | Enter a short description of the new theme. |
| Add to Favorites | checkbox | Set to add this theme to the Theme Selector. |
| Enable Dark Logo | checkbox | Set this to give the FreeNAS Logo a dark fill color. |
| Choose Primary | drop-down menu | Choose from either a generic color or import a specific color setting to use as the primary theme color. The primary color changes the top bar of the web interface and the color of many of the buttons. |
| Choose Accent | drop-down menu | Choose from either a generic color or import a specific color setting to use as the accent color for the theme. This color is used for many of the buttons and smaller elements in the web interface. |
Choose the different Colors for this new theme after setting these general options. Click the color swatch to open a small popup with sliders to adjust the color. Color values can also be entered as a hexadecimal value.
Changing any color value automatically updates the Theme Preview column. This section is completely interactive and shows how the custom theme is applied to all the different elements in the web interface.
Click SAVE CUSTOM THEME when finished with all the General and Colors options. The new theme will be immediately added to the list of available themes in Web Interface Preferences.
Click Global Preview to apply the unsaved custom theme to the current session of the FreeNAS® web interface. Activating Global Preview allows going to other pages in the web interface and live testing the new custom theme.
Note
Setting a custom theme as a Global Preview does not save that theme! Be sure to go back to , complete any remaining options, and click SAVE CUSTOM THEME to save the current settings as a new theme.
4.4. About
Click (Settings) and About to view a popup window with basic system information. This includes system Version, Hostname, Uptime, IP address, Physical Memory, CPU Model, and Average Load.
4.5. Legacy Web Interface
Click (Settings) and Legacy Web Interface to switch to the previous FreeNAS® web interface. A popup window asks to confirm the choice. Click CONTINUE to log out and go to the log in screen for the Legacy web interface.